
The Vanquishers carve their way through some hapless Gondorians
It’s my last tournament of the year, and also my last Queensland tournament before I move down south. As such, I decided to bring a bit of a throwback list: the Vanquishers of the Necromancer. These guys have fallen a long way since I took them to a tournament shortly after they came out, and they’re certainly far from the top of the meta. But I’ve always had a soft spot in my heart for their crazy shenanigans, and it would be interesting to see how they fared in this brave new meta. So, can the Vanquishers of the Necromancer live up to their past glories, or will I crash and burn at my last Queensland tournament? Read on and find out!
Tournament Format
This
tournament was 700 points, with pre-randomised pools for scenario veto that
were released a little before the tournament. The particular missions rolled happened
to skew towards killing power a lot, which really reinforced my desire to bring
the Vanquishers: if there was ever going to be a tournament to bring them to,
this seemed to be it. 700 points is obviously not ideal for them (50-point
handicaps are an amusing flex) but the scenario pools were definitely an
advantage for hero-hammer like this.
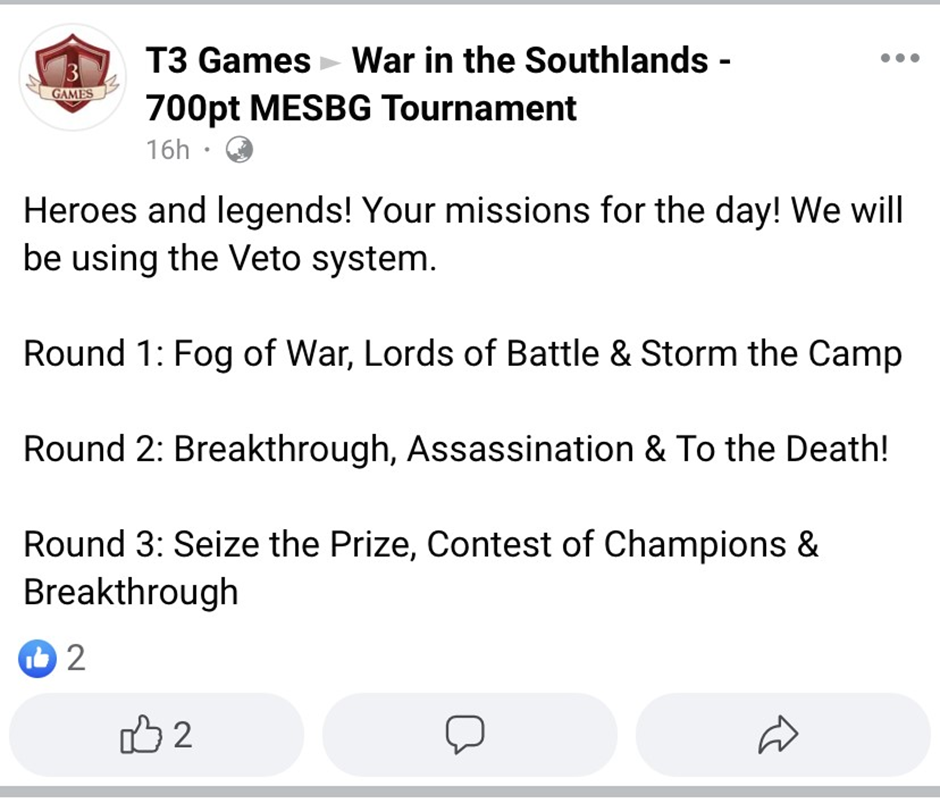
Don’t get much better scenarios for all-hero lists than those!
Listbuilding
I’d
contemplated a few other builds for this tournament, including two different
variants of my Watcher in the Water build, the 700-point version of my
Mordor/Harad alliance, and even Assault on Lothlorien Spider-spam again. But I
wanted to take the Vanquishers at some point, and this tournament would clearly
be the best opportunity I’d get for a long time. With that in mind, the list
largely wrote itself:

It's only 4 models, but they’re very good models!
Warband
1
Saruman
the White (Army Leader)
Galadriel,
Lady of Light
Gandalf
the Grey
Elrond,
Master of Rivendell in heavy armour
650/700
points, 4 models, 0 bows, 12 Might, no fast models
The
only real choice for me to make at 700-points was whether to take Radagast or
Elrond. Radagast brings a lot more healing, a bit more mobility, more ranged
magic and more Nature’s Wraths when he’s not tagged in combat. Elrond, on the
other hand, is a much better fighter, bringing a banner reroll and a free
Heroic Strike. I do think both are probably quite viable, but in the end I
decided that Elrond was the simpler option. Radagast relies on me being able to
‘unlock’ him by Banishing whatever model he’s fighting so he can cast Nature’s
Wrath, while Elrond is more capable of operating independently of that magical
support. Plus I don’t actually own Radagast’s sleigh, so Elrond was the much
simpler option from a hobby perspective.
Magic is absolutely at the core of how this list plays. Even post-nerf, the barrage of magic moving first or second can cripple opponents’ offensive threats and target out their key models, allowing your powerful heroes to rampage as your opponent runs out of resources. It’s a list with surprising damage output and durability (even if both have been rightfully reduced from their bonkers heights), and I’m hopeful that people will underestimate the tricks it can pull. In saying that, I got tabled in one practice game and nearly-tabled in another, so I was a bit nervous about a potential day of wipeouts. Beornings in particular were a bit of a concerning proposition that I was just praying not to face.
Game 1: Gondor in Fog of War, 12:3
Ethan
had brought along a cool Gondorian list, with Faramir (mounted with all the
toys) backed up by Hurin, Cirion, Anborn and Mablung plus around 40 Gondorians
of various kinds. I immediately vetoed Storm the Camp for about 10 different
reasons (not least that it’s a pretty bad scenario), while he vetoed Lords of
Battle to leave us with Fog of War. I opted to protect Elrond (my toughest
model), claim a pillar on the far side of the bridge, and kill Cirion (as Ethan
had deployed him directly opposite me).

My 4 little heroes look very outnumbered, but this chokepoint will help
a lot
The
map had a cool Khazad-dûm theme, and was dominated by a central river of lava with
one ford and a central bridge. Ethan and I agreed to play it as lava because
that’s awesome, and I promptly spent the whole game trying to Sorcerous Blast someone
into it. My various (failed) attempts produced a great deal of laughter, and when
I finally knocked a Warrior of Minas Tirith in on the last turn we celebrated
together.
Battle
was joined quite early on as my Vanquishers surged forwards along the bridge, getting
peppered with arrows and needing to spend 5 Fate across Gandalf and Galadriel
to escape unharmed. Not the start I wanted! My magic failed to really
accomplish much initially, as an attempt to Blast Cirion off the bridge was Resisted,
while the Gondorian banner survived two more Blasts and a Banishment (Resisted
on a 6!). It was quite amusing watching the banner get smashed backwards 5”,
pick itself up and run forwards, then get Blasted and repeat the same process.

Combat
sufficed where magic had failed, however, and I was able to rapidly cut my way
through Cirion’s warband and take him out with Elrond and Gandalf. One more
Sorcerous Blast also took out Anborn after he opted not to Resist and bungled
his Fate, which was a nice surprise.

Cirion and Anborn both fall this turn, with a lot of prone Gondorians
from a Wrath of Bruinen
By
this point the game had basically turned into a survival game for my
Vanquishers, with wave after wave of Gondorians coming in from both sides and
being dispatched. Hurin had led his warband across the ford and around the back
of the bridge, but failed his Terror check to charge Elrond (although my return
volley of spells only managed to strip a Wound and his Will point).

Hurin’s troops flood around to provide another wave of threats
On
the next turn I was then able to Command him forward and get in with both
Elrond and Saruman, smashing him down to reduce the Gondorians to two heroes. I
then ping-ponged back to the centre of the bridge and won a Move-off to charge
Faramir, cutting him down in a single turn with the same Elrond/Saruman combo. These
guys are lethal!

Faramir falls and the Gondorians are Broken
By
this point Ethan was Broken, and I was now trying to push my way through to the
terrain piece I was trying to hold. Mablung narrowly passed his Break test to
hold the Gondorians together, and Ethan’s models generally showed remarkable
bravery in the face of the slaughter. An amusing gambit took place on the turn
after the Gondorians broke, in which I was attempting to Heroic Combat off a
Warrior of Minas Tirith to get Elrond to the pillar I’d chosen as my terrain piece.
The warrior was too far away from the pillar, so I wanted to move him to within
6” of it to make the Heroic Combat work. But because he was prone from a
previous Wrath of Bruinen I couldn’t Command him any distance, so my only
option was Sorcerous Blast and hoping he didn’t die. The spell went off and he
survived the S5 hit, only for the Blast to shoot him the full 6” backwards and
outside Elrond’s charge range! Ethan was very amused.
Elsewhere
Gandalf hacked his way through the Gondorians and cut down Mablung, and the
game didn’t end on the first turn. As a result I was able to claim my terrain
piece with Elrond, and– finally– Sorcerous Blast a warrior into the lava. Much
rejoicing was heard by all, except presumably the warrior.

This Sorcerous Blast was my highlight of the tournament
When
the game finally came to a close the last Gondorians were standing tall on
Ethan’s terrain piece, but the Vanquishers had taken a comfortable 12:3 win.
This
game was an absolute blast, and was my favourite of the tournament. Ethan was
delightful to play, and got a well-deserved Best Sportsman award at the end of
the tournament.
Game 2: The Rangers in To the Death, 10:0
Up next was Sean Rossato, the current Queensland champion, who I’ve faced five times before. In fact, my first ever tournament saw me
matched up against Sean’s Rangers (and my second saw him facing my
Vanquishers!), so it’d be a real nostalgia trip (and probably a very hard game!).
I vetoed Breakthrough, and Sean correctly identified
that To the Death was a better option than Assassination. After all, ‘stop the
Vanquishers killing one specific Dúnedain’ was always going to be a hard ask.
Sean had brought along Halbarad, Arathorn and 20 Dúnedain, and they promptly
formed up on a building and shot at me for two turns as I advanced. This was a
bit nerve-wracking, but Galadriel’s Phial and some good use of cover meant I only copped a Wound on
Gandalf. Elrond promptly healed that with Renew, then Gandalf restored Elrond’s
Will with Strengthen Will. Sean saw all this and decided he needed to get into
combat.

The Ranger castle, shortly before they swarm down and swamp me
As the lines clashed, I soon found myself surrounded by the Rangers. This was actually really scary, as Sean was rolling 6-9 dice in
every fight with heaps of Might behind them. I needed to win every single fight
to stay alive, and thus had to burn Might whenever I failed to get the 6 I needed.
That was quite costly, and after two turns of combat I was down to 3 Might
across the whole force! This had come at the cost of about 8 Rangers though,
and my magical barrage had also reduced Halbarad to one Wound and forced him
into combat with Galadriel. She promptly punched him in the face, and Sean lost
his immunity to Courage.
The third turn of combat was thus critical: with
Saruman and Elrond out of Might and Gandalf down to one, all it would take
would be a couple of botches from my heroes for things to rapidly snowball and
for Sean to cleanup. Instead the Rangers struggled with their Terror checks,
allowing Saruman and Galadriel to share a Heroic Combat and take out several
Rangers, while both Gandalf and Elrond got the sixes they needed. After the slaughter
Sean was well and truly Broken, and from there it was largely just cleanup as
the Vanquishers tabled him.

A closer view of Sean’s awesome Rangers
The game ended with a 10:0 my way, but that
scoreline in no way reflects how close it was. Sean had done a great job of
identifying his win condition– putting me under overwhelming pressure and
taking out 1-2 Vanquishers early– and the dice very nearly complied. If Turn 3
of combat had gone even slightly different then we’d probably have been looking
at a 10:0 the other way.
In any case, Sean was a delightful opponent as
ever, and did his best to overcome the residual trauma from the last time I
faced him with the Vanquishers. I imagine he’ll probably do an event recap over
on his channel (The Last Alliance of Noobs and Men), so definitely check that
out when it releases.
Game 3: Azog’s Legion/Hunters in Contest of
Champions, 9:0
My
final game saw me facing David Thompson, whose Azog’s Legion I’ve faced once
before in this tournament. He’s won a few events with it too, so it was unlikely
to be an easy fight. David had brought along Bolg, Fimbul, a Troll Brute, an Ogre,
lots of Berserkers and some Goblin Mercenaries, which was quite the array of
threats for me to face.
This
game ultimately came down to one unfortunate strategic error on David’s part: out of a
scenario pool of Breakthrough, Seize the Prize and Contest of Champions, he
chose to veto Breakthrough. I naturally picked Contest of Champions, and David seemed fairly
confident that I’d made the wrong choice. I gather that he wanted to get stuck
in on Turn 1 to stop me picking away with magic from a distance, but the scenario
objectives in Contest were so skewed in my favour that a close deployment was
totally fine.
That
immediately turned the game into nearly an auto-win, especially as the central
terrain was dominated by a pair of buildings creating a tight chokepoint. Much
of David’s army spent several turns running around those buildings, allowing me
to leverage all my list against a portion of his.
The
battle started with Bolg charging straight into Elrond alongside a Berserker, burning
all his Will to Resist an Immobilise from Gandalf and a Banish from Galadriel. Galadriel
also copped a Wound from a charging Troll Brute, having to burn two Might to
win the fight and Wound it back.

Bolg storms in, but the Vanquishers are about to hit back
I
responded by Blasting the Berserker in combat with Elrond, killing it and
dismounting Bolg to prevent him doing any damage. Saruman also dragged a mounted
Hunter Orc forward and smashed it from the saddle, getting an early lead in
kills.
On
the next turn I won a Move-off (the only one of the 4 total in this game) and was able to Command the Brute, sending it
smashing through several of David’s Wargs. Bolg was Immobilised and out for the
turn, while the rest of the team hacked their way through some Berserkers and
Saruman got up to 3 kills. Elrond botched a Strike-off against Fimbul and was Wounded
once, but I still had all his Fate to keep him safe.

There are two Bolgs on the field here, because Bolg’s Warg had stuck
around when he was dismounted and it still needs the silly limo base
Turn 3 saw David call a Move and got Bolg into Gandalf, although I Immobilised him again in response. The Brute went into Galadriel again, wounding her once more before she wounded it back in combat. Two Hunter Orcs trapped Saruman, but he managed to win the fight and hack his way through them to put me up to 5 leader kills.
Gandalf then managed to win his fight against (an Immobilised) Bolg, and the Orc could only back away a half-inch at most. I pointed out that he was trapped, but David pushed back hard, saying that we hadn’t been exactly measuring an inch on all the previous back-away moves in the game. That was certainly true, but was because in every other fight it was clear that the model backing away wasn’t trapped. It seemed normal to me to have only measured things exactly when the exact distance was going to matter, but David was determined not to let his leader be trapped here.
In
the end I decided I couldn’t be bothered calling the TO over and I let it go, basically
because Bolg’s lack of Will meant he was never going to be able to kill any of
my models (i.e. the game was already over in every practical sense). In hindsight
I probably should have stood my ground there, but it just didn’t feel
worth it in the moment. There were quite a few other ‘challenging’ rules interactions
throughout the game, and it ended up being a bit of an unpleasant experience overall.
In
any case, within two turns Bolg had been Banished by Galadriel’s chip damage, Elrond
had taken out Fimbul, Saruman had killed an Ogre and gotten to 6 kills and
Galadriel had killed the Brute at last. With no real threats left on the table and
his leader dead, David called it there for a 9:0 win to the Vanquishers!

An after-action shot of the gang celebrating their victories
After
three big wins, I took out first place for my final Queensland tournament! Much
banter was had about the filthiness of the Vanquishers, which is always good
for a few laughs. I picked up a nice store voucher, which I immediately cashed
in for a bunch of new Contrast paints. They’ll be very handy for the Pits of
Dol Guldur army I’m planning to work on next year, which I find a little
ironic: in the end the Vanquishers of the Necromancer are helping me get Azog’s
forces together. Ha.
Tournament Review
Scott
did a great job of hosting, with great terrain, everything running on time and
pizza at the halfway mark. I do think the scenario pools were perhaps a little
too favoured towards elite armies, which did skew the results towards armies
like mine. One player went into the third round undefeated with Smaug, despite
only having played a handful of games beforehand! Still, it was a great event,
and a good one to close out my Queensland MESBG ‘career’.

List review
Well,
the Vanquishers definitely can still pull out the wins! The scenario pools
obviously made a huge difference here, and I’m sure I would have found
my games way harder if they were objective-based. But at least in terms of raw
killing power and durability, the list still felt insane. The ability to reach
out and whittle down enemy heroes was amazing, while the A3 heroes sliced their
way through the enemy lines. The contrast with the Breaking of the Fellowship (which
I ran at this tournament recently) was quite noticeable; this time around I
felt like I had tools to actually impact the game and put my opponent under
pressure, rather than just slogging forwards and hoping to roll enough sixes to
win. Unlike the Fellowship, the Vanquishers felt genuinely strong, at least when
they didn’t have to do anything more complicated that move forward and kill
stuff.

Getting to harass enemy backline heroes while chopping through troops is
a huge win over the Fellowship
In
saying all that, I really felt the Vanquisher nerfs in all my games, and
the list felt way less oppressive than it used to. With Radagast swapped
out for Gandalf and my strongest spells not castable in combat, the list had
vastly less staying power than in the past. That is, to be clear, a good thing;
the combination of all the healing it used to be able to do and the constant
Nature’s Wrath spam was definitely A Bit Much. In contrast, in these games (particularly
the second one) I often felt under pressure of actually being taken out. In
practice games I did get tabled or nearly-tabled several times, and that was a
real possibility against Sean. The list now felt like I had to play well to use
it, and I was grateful to all the practice games I played with the Vanquishers
back in the day. It turns out the muscle memory of sequencing my casting had
stuck around over several years of not touching the army!
I
do recommend trying out the Vanquishers at least once: they’re challenging to
play, but the deep list of options available to them means you always
feel like you’ve got a chance in any situation. Well, any non-Reconnoitre
situation, of course.
Tournament Wrap-up
One
last great event before the big move south, only slightly marred by the final
game. It was a somewhat bittersweet experience, as I’ll definitely miss being a
part of the Queensland scene. Hopefully I’ll be able to make it back for at
least some tournaments next year, but with a heap of leave being locked in for little
things like ‘getting married’ I don’t know how easily I’ll be able to fit in trips up for things
like the Queensland GT.

Gûlavhar does need to protect his crown though, so I’ll see if I can
make it to at least the GT
Thanks
to Scott for organising, and thanks to everyone who’s made the Queensland
league so welcoming over the last couple years.
Until
next time, may the scenario pools always favour the army you wanted to play!
Good read, as always. Did you send in a army list to an unexpected podcast recently by the way? They reviewed a watcher list by someone called sharbie (or something similar). If so, i'd love to see a blog post on that list with your comments on their comments. I do believe you have a very different opinion, could be an interesting read!
ReplyDeleteGlad you enjoyed! I definitely did, it was great to hear the group review the lists. I definitely do have a few different opinions from them (mostly about whether the extra numbers the list could access by staying pure are worth giving up either the Spider Queen or the Black Numenoreans), so I may get around to a 'rebuttal' at some point.
DeleteI do think that they were right that the Moria/Dark Denizens build would benefit from more numbers though, and I've realised that by ditching the second Bat and replacing the Shaman with a Captain I can hit 45 models. That's probably worthwhile, and I might try and take that list to a tournament sometime soon