This model may be a little gamebreaking, but it's also super cool
Having now taken the Watcher in the Water to two tournaments (which you can read about here and here) and gone undefeated, I thought I’d share my thoughts on how to use this rarest
of beasts. Perhaps more importantly, I thought it worthwhile to spread the word
on its weaknesses —just don’t use them against me! This article is going to
assume you understand the basics of this profile, but feel free to give this article I wrote for TMAT a read if you’re uncertain. It covers a lot of the core Watcher tricks, including the classic move of grabbing enemy heroes and pulling them into contact with the Watcher and a Bat Swarm to guarantee their demise. Also have a read of their site more generally if you haven't, it's easily the most well-rounded MESBG blog around.
Read that article and wrapped your head around the basics?
In that case, let’s dive right on into the murky waters of the West Pool…
Using the Watcher
In general, the Watcher functions by popping up behind a
wall of Goblins and grabbing enemy models to tear apart using its Tentacles
special rule. There are 4 main ways of using this ability, each of which can be useful in different situations.
The way you’ll generally use the Watcher for the first few
turns of combat involves grabbing key enemy heroes and ripping them to shreds.
As discussed in the article I linked above, this requires setting up a ‘killbox’
for the enemy hero to be yanked into. By positioning models correctly (and
getting your opponent’s agreement that everything is in the right spot!) you
can guarantee that any hero you hit with your Tentacles will end up trapped by
the Watcher, a Bat Swarm and a few Goblins. At that point you’re certain to
have the higher Fight value and will have 10+ dice to win the combat. Most
heroes will immediately evaporate from 12 S6 attacks, let alone the extra hits
from the Goblins and Bats. If you’re up against something really tough then you
can bring in other monsters to help guarantee the kill, but it generally isn’t
necessary at all.

If you look carefully, you can see that the closest point on the Watcher to the Goblin King will leave the King facing Durburz, a Captain, a Bat Swarm, the Watcher and a Giant Spider. Ouch
Of course, smart enemies will recognise that their heroes are in trouble if they get within 6" of your Watcher and will keep them back from the fray. If they do, then your best bet is to clear the area around your Watcher and start grabbing as many warrior models as you can get your tentacles on. The Watcher can easily kill 2-4 models a turn if it can grab enough, so hope you roll high for your shots and get rampaging. Prioritise enemy banner bearers and elites, then go for whichever enemies are in the most inconvenient positions for you. That will often be models that are positioned to hurt your leader or kill some Goblins, but there's no limit to the shenanigans you can pull with this. I'm particularly fond of pulling the front models from a pike-block to leave the two supporting models out of combat twiddling their thumbs. Another great trick is to pull out models that are trapping your Goblins, or that are in position to threaten your objectives. In general, you're almost always looking to prioritise enemy models that are in combat with your Goblins, because the less Goblins are fighting the slower they're dying. This kind of thinking can really increase the durability of your force, and increase the turns that your Goblins can hold the line before Breaking.

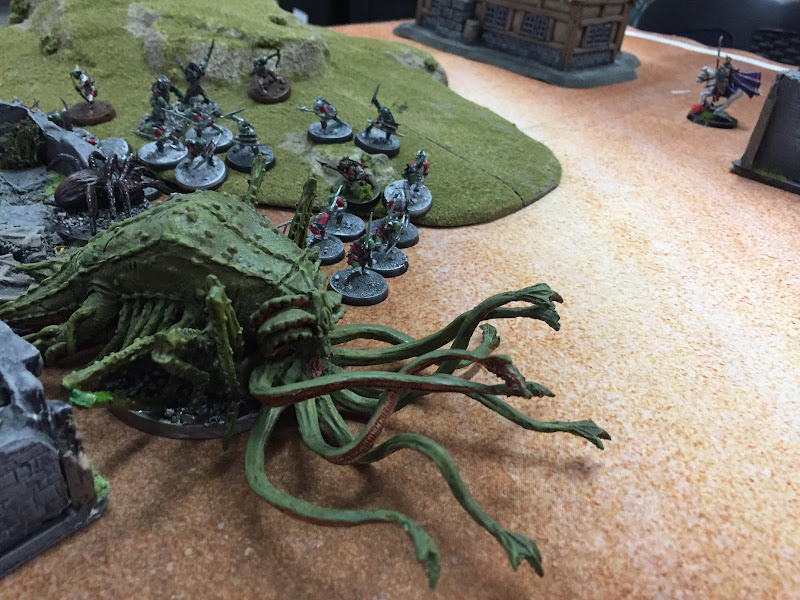
The Watcher grabs one Uruk at a time to protect its little Goblin buddies
As an extension of this, you'll often find that you kill the enemy's big threats in the first couple turns of combat with the 'yank and gank' combo of Bat Swarm and Watcher. Some enemies (like Assault on Helm's Deep without Bomb Teams, for example) even start the game without any way to threaten your Watcher in combat. At that point, you can Unleash the Kraken in full, by moving your Goblins out of the way and letting it charge the enemy. The Tentacles then function as a way of getting extra models into your fight, so as to increase the kills you can get each turn. This is where you can start really racking up the casualty-count, and it can rapidly swing a game once it gets going. Enemies will often pull ahead in kills while you're munching on their heroes, only for the Watcher to get onto the frontlines and turn the tables. Don't be afraid to pull in quite a few models: as long as you have the higher Fight value, the Watcher has exceptionally high chances to win a duel no matter what it's facing. Being engaged with lots of enemies both increases the amount you can kill in a turn and reduces the number of enemies facing your Goblins. It's yet another way to increase the speed at which you're Breaking the enemy while slowing down their attempt to do the same to you.

The Watcher wades into the fray to turn the tide against the Army of the Dead
Finally, the fourth way of using Tentacles is to setup multiple killboxes for warriors. This is most commonly useful when your lines are too close to the Watcher to get multiple enemy warriors into base contact without them being accidentally peeled off by your Goblins. It can also be used when you want to both grab an enemy hero and pick off some key enemy warriors. In any case, it's basically the same as setting up a killbox for an enemy hero, except this time you're making sure the enemy warriors are being met by an appropriate level of force to rapidly dispatch them. Things like Giant Spiders or Goblin Captains are perfect for ensuring that the model you grab gets immediately stabbed. As with all the killboxes, be aware of exactly where the enemy model will be moved to. It's no use setting up a mean killbox if you leave a gap somewhere else that's closer to the enemy. Also be aware of who has Priority, and thus who can control which fight your Watcher ends up in.

From this position, the first Knight you grab is facing a Giant Spider and some Goblins, the second is facing the Spider Queen and Durburz, and the third is taking on the Watcher. Ouch.
These options describe how the Watcher will function in almost every single game. You're generally spending a few turns killing characters, then wading into the fray and catching up on killcounts once the opponent's threats are neutralised. You're aiming to use the Watcher not just to kill the enemy, but to reduce the speed at which they're killing you. By taking out their combat pieces and banners— and even the basic warriors that are standing in inconvenient spots— you can get a double effect and snowball things in your favour.
Let's explore that last point with an example. Here, the Dunharrow player has charged into the Moria lines at full force. The Spider Queen and Watcher are probably likely to kill 4 enemies between them, but if the Warriors of the Dead kill 6 Goblins then Moria will still end up Breaking first.
Not exactly the situation Moria wants here
On the other hand, if the Watcher pulls 3 Warriors of the Dead into combat with it then the scales are radically shifted. Even if it still only kills 2 enemies this turn, that's 6 more Dunharrow models that are not killing Goblins this turn (counting the 3 spear supports that are no longer supporting anything). That could easily translate into 3 fewer dead Goblins this turn, flipping the tempo of the game in your favour.
Suddenly a lot less dead Goblins this turn
Finally, it's worthwhile discussing what the rest of your army is doing while the Watcher wins you the game. This depends a little on your points level: at 500 points and below, the Watcher is probably your only threat, while this should change when you hit 600. If you army is just the Watcher, its Bat Swarm buddy and then Goblins, then your gameplan will normally be as simple as keeping the Watcher protected as it eviscerates your opponent. If you have a couple more threats (for example, the Spider Queen and a Giant Spider in my 600-point list) then you can use those models to increase the rate you kill the enemy or sweep through isolated pockets of warriors. A key tool to remember is using your Watcher to protect your other combat pieces. The Spider Queen would be pretty concerned to see Azog barreling into her, but if she's wholly within 6" of the Watcher then you can just yank the Pale Orc over to your Bat Swarm for a good old Watcher hug.

Pictured: a casualty pile after Azog got too close to the Watcher
Another sneaky trick involves grabbing one hero with the Watcher while your support monster fights a second enemy threat. Call a Heroic Combat with the Watcher or a Captain in that fight, kill the hero they're fighting, then use the Heroic Combat to fly your Bat Swarm into the other monster's combat. There are very few heroes that can survive a Spider Queen with Bat Swarm support, and that's especially true if they wasted their Might on a now-useless Heroic Strike. It's a niche play, but a backbreaking one when it works.
I've painted a pretty rosy picture of the Watcher here, and not without good reason: it's a phenomenally powerful model, with truly unique capabilities. However, as with all MESBG models, it's neither unbeatable nor without it's weaknesses.
Beating the Watcher
As ever, planning to beat the Watcher can start at the listbuilding stage. The most obvious way of doing so is by reducing your reliance on big combat characters. If you've brought Azog or Aragorn Elessar, then it's going to be very hard for you to win without exposing your hyper-expensive model to a 'yank and gank'. On the other hand, if your list is '40 Uruk-hai Warriors with some cheap supporting heroes' then it's much harder for the Watcher to cripple you Turn 1. The Watcher is terrifying, but you can still out-tempo it with the right lists.
This is ultimately not a great matchup for the Watcher list, for all the tricks it can pull
Another way of doing this is to increase the range of your damage output. Massed shooting can whittle down the supporting Goblins without daring the reach of Mr Tentacles, giving you a leg-up in the tempo game. The Watcher is extremely slow once it's on the field, and a list that can keep dealing damage from afar is one of the hardest matchups for this style of army. Shooting can either kill too many Goblins for the Watcher to catch up, kill the Bat Swarm or even take out the Watcher itself. Any of these outcomes (the latter two of which you can read about
here and
here) are extremely bad for the Watcher's commanding player, and can force them to step outside their standard gameplan and improvise.
The Watcher showed up here and just got diced off the board by Hobbit bows. Not my brightest move
This focus on impacting the game from outside of 6" can also influence your choice of heroes. Spellcasters are generally quite happy sitting behind your lines, normally at a distance where the Watcher can't grab them. Be careful with your pre-measuring though, to make sure the Moria player can't pin your caster with a Bat Swarm then shuffle their Watcher 2" forward and grab you. 8" is the real danger zone, and that can extend further once you take into account things like Barges and them moving after you on a turn you have Priority.
If you do keep your eye on that threat range, spellcasters can be quite a hassle for lists built around the Watcher. This can be by shutting it down with magic directly (although remember it has 5 Will and Resistant to Magic, so this option isn't always viable), or even by targeting its supporting models. If the Bat Swarm is Commanded out of position then the Watcher will be less inclined to grab enemy combat heroes— especially if the Bats are moved somewhere they can be ridden down and destroyed.
This matchup is gonna be a lot harder now I don't have a Bat Swarm anymore
Even simply Commanding a Goblin to wander over and stand in your opponent's kill-box can be a huge hassle— although make sure the next-closest spot for your models to be pulled is actually a safe option and not just a marginally-less-certain death. Finally, some spellcasters can bring Blinding Light, which can be a huge impediment to the Watcher's damage output. It takes some careful positioning to keep the caster covering your battleline but outside the Watcher's reach, but if you pull it off it's a huge deal.
Outside of listbuilding, there are still some ways to make life challenging for the Watcher's player. If you have enough damage output you can try and play a tempo game of just breaking through the Goblins faster than the Watcher can take out your combat pieces. The goal here isn't necessarily to wipe out the Moria list, but to bust a hole in their lines so you can start charging the Watcher and/or its Bat Swarm. Once you can start peeling off one or the other of those models then you make them both vastly more vulnerable, and can leave your heroes free to rampage. This is exactly the time when the Watcher player may use some of the tricks I mentioned above for taking on multiple heroes in a turn: either dismounting one hero with the Tentacles so they can't Heroic Strike while hitting the other with the Bat Swarm, or using Heroic Combats to get double duty out of a single Swarm. In general, I don't think tempo games are the best way to take on the Watcher, but if the only tool you've got is a sledgehammer then you may as well see how swinging it goes.
If you don't fancy your chances at killing enough Goblins in time, then it's worthwhile focussing on the objectives instead. The Watcher can only be in one place at once, and while it's got a surprisingly-long threat range it's still pretty slow. In games like Domination or Reconnoitre, use the placement of the objectives and your models to force the Moria player into fighting on several fronts. They'll get to pick which one they drop their Watcher at, but if you then disengage and retreat on that front then you can potentially gain the edge on the other.
The Watcher can support the push on one objective, but probably not both of them
Finally, if all else fails, you can always trust to blind luck. If your opponent rolls poorly, the Watcher may not even show up on the field. Even once it's there, it's almost always relying on both a roll for number of shots and a roll to hit in order to setup the combats it wants. If the Watcher moves and has no Might remaining then there's a roughly 1/6 chance of it failing to hit with any of it shots. If that happens, then this 200-point model will end up sitting there doing nothing for a whole turn. Those odds rapidly diminish if it's stayed still and/or has a Might point to spend on guaranteeing a hit (to ~1/12 and ~1/30 respectively), but they're still absolutely within the realm of possibility. I've played a game in which my Watcher rolled a 1 for number of shots and a 1 to hit for three turns in a row, all while the Goblin King rampaged through my lines and ignored my carefully-assembled killbox. This was obviously not a particularly likely outcome (~1/27,000, by my maths), but it drives home the point that sometimes the Watcher will just whiff.

The Goblin King is blissfully oblivious to my repeated assassination attempts
It's part of why I normally bring the Watcher in earlier than would otherwise be optimal: who knows when you'll fail that 3+ roll to arrive? Better a 200-point model in a sub-optimal position than one that shows up 3 turns too late to do anything. It's not always quite as simple as that, because while it's not on the field your opponent has to plan around it's unexpected arrival anywhere on the board. But generally I'm hoping for more from my centrepiece model than my opponent stressing about their potential positions a little bit.
My Watch is Ended
As you can probably tell by the length of this article, I'm a huge fan of the Watcher. It's probably my favourite model in the game, in all it's weird gribbly glory. Nothing else has the same level of unpredictable tricks, or rewards practice and experience quite so well. I genuinely believe it's one of the most powerful models in the game, but only once you know how to use it. Before then, it's an over-priced and squishy model that is far too vulnerable to enemy heroes and will never make it's points back.
I hope this article gave you lots of ideas on how to get the most out of the game's only Kraken, and your plots for the domination of Eriador are thickening as we speak. Alternatively, I hope it's prepared you for what's coming in the long-foretold Watcher meta, as the world adapts to the presence of Beornings and Dragon Emperors by hard-countering them into oblivion. In any case, I'd love to hear your thoughts on the Watcher and your experiences with/against it.
Until next time, may your Watcher never fail their rolls to arrive!


Thanks for the shout out (and a great read) - my usual way of dealing with the watcher is the walk-away approach you mentioned (or just having more than one threat). Having used the Watcher only a little, I can say that setting up the kill zone and keeping it up is the hardest thing - Goblins don't stand up to prolonged fighting or archery.
ReplyDeleteI am curious about something: in scenarios like Storm the Camp, Destroy the Supplies, or Reconnoitre, is there value in deploying the watcher on the opposite side of the board (to walk off and get points or control a camp)? Or is it better to deploy with the rest of your army for protection? Or does it depend entirely on what else is in your list (such as with/without the Spider Queen)?
Glad you enjoyed! I definitely agree that skirmishing away from the Watcher is always the best option where it's viable, and armies that are built around doing so are easily some of the list's hardest matchups. And of course, some scenarios just don't allow for it: if you're playing Hold Ground then you're eventually going to have to fight the Goblins in the centre whether you like the idea or not. But when it's an option, it's absolutely the best call.
DeleteI'm not sure I agree that shooting really makes the killbox too hard to setup/maintain though. Goblins die, and that can certainly thin out the line in front of the killbox, but it takes quite a lot of casualties before that becomes too much of an issue. And if the enemy just manages to snipe out a Goblin to un-Trap their leader then you just Rend them instead, which is normally about as effective and striking a Trapped opponent anyway. Of course, if the enemy snipes out the Bat Swarm then you can be in trouble, but that's only happened once so far and is probably easy enough to forestall if you realise they're going to try for it.
Really great question re deploying across the board. I think it can be the right call, but only quite rarely. You really need the matchup to be one where you're not too bothered by the enemy being able to charge your Watcher, which doesn't come up that often. Normally the risk of getting swamped then a hero Striking is just too great a risk, as it basically just loses you your 200-point centrepiece straight away. On the flipside, my recent game against the Shire in Destroy the Supplies is one where I should have taken that risk and dumped it down in the midst of the Hobbits, and I almost lost because I played too conservatively with it.
I can definitely imagine my answer might change a bit in a list without any real mobility options like the Spider Queen or Marauders, but I think that's probably just a bad way of building the list at anything above 400 points. The Watcher is just so unexpectedly vulnerable that I'm almost always keen to hide it behind my lines.
I love the Thunder Slug. I've only brought it to one tournament. I went 3-0-1. The Tie kept me from getting 1st. Incidentally, that Tie game was also when I first learned about Hurin's "Line of Command" special rule... I'll never let him live in another game. lol I'm definitely going to break it out in a bunch of tournaments next year. It's really fun to use.
ReplyDeleteHaha, I'd never heard the name Thunder Slug but I definitely like it! Hurin's definitely a huge annoyance, especially for a force like this one that's so frequently picking up the Leader VPs otherwise. I'll be interested in hearing how the Watcher does next year!
DeleteI thank you. lol. I believe I coined 'Thunder Slug'.
DeleteIn that game I actually killed WT Boromir 2 turns before that with what you have dubbed "yank and gank" and thought I was going to win the game 3-0. He told me on the last turn that I wouldn't be getting those VP's. lol
I'm definitely going to be bringing it a lot more next year. I'll let you know how it goes. I posted on another thread recently about AoL. I just won a 20 player major tournament 9 days ago with that LL. It's crazy good. I had 2 Major Wins, 2 Minor Wins and a Tie in that tournament. I only gave up 4 TP's and 7 TP's in all 5 games.
That sounds like typical Hurin, but a buzzkill haha!
DeleteDefinitely seems like AoL is a bit crazy, I've been testing a variety of lists with it. I'm particularly fond of a 16 Venomback Spider build at 600 points, although I acknowledge that it's likely not the best way of running the Legion. It's just so fun!
This comment has been removed by the author.
ReplyDeleteGreat blog. I've had a look at your other posts and I'm intrigued by your 600 point list. I have a 500 and 600 point tournament upcoming and I am considering the Watcher for both. Would you be able to share your 500 point list?
ReplyDeleteI have never played the Watcher before so it's really interesting to read your analysis. I can see that my instincts would have been to play the Watcher far too aggressively and I understand now why that wouldn't have worked.
One concern I have is that, even with the Spider Queen and Giant Spider, there are so many unfavourable match-ups and a few scenarios that would be an uphill battle. What would your approach be against the following armies:
- Any Rohan list with mass throwing spears whether that's Riders of Theoden or Defenders of Helm's Deep?
- Any list with a lot of bows?
Also, how does your approach change when the Watcher has been reduced to 3 attacks?
Cheers
Glad you enjoyed!
DeleteThe 500-point list I used to use was basically the Watcher, 3 Goblin Captains with no extra equipment, 2 Warg Marauders, a Bat Swarm and 20 Goblins. 3 Captains is more than you really need, but the warband slots get quite tricky otherwise. Bear in mind that I haven't taken the 500-point version to a tournament, so there may be other builds that are better. The key is just having lots of Goblins, the Bat Swarm and a bit of extra mobility.
There definitely are some unfavourable matchups for the 600-point build, although I would caveat this somewhat by saying I've been consistently surprised by how winnable most games are with it. It's one of those armies that has so many tricks that it can adapt to adverse situations really well, even though it prefers to just be chewing through big combat heroes. It definitely has bad matchups, as all builds do, but the fact that it's off-meta can be a huge help in making opponents underestimate it and let you back into the game.
You're definitely right to identify those lists as challenges, and they're definitely not easy matchups. If the scenario is one where they can kite you forever, then it can be quite a challenging game. Thankfully, most scenarios mean you're getting ahead on points if they kite for too long, at least in tournament timeframes, so they have to come within reach of your Watcher eventually. If they're really keen on kiting, then you can use suicide Broodlings to tie down enemy leaders and let your army rush them, but that's a bit less of an optimal situation. Similarly, you can drop the Watcher in amongst the enemy if you're not scared by their heroes, but that's pretty rare.
In general, I don't really plan around going down to 3 Attacks. I've only ever lost the Watcher twice, and in neither game was it in a position to do anything with 3 Attacks or 6. Generally if the Watcher is taking more than very limited damage then your lines are broken and it's probably game over anyway. And as you've picked, that's normally due to massed shooting haha
Hello,
ReplyDeleteI love the idea, I've never seen a watcher in action and i can't wait to try it.
I really hate the spider queen model, so I'm thinking about replacing it by a shadowlord that would bring warg riders for mobility.
The list would be 1 gob cap + 12 gob, 1 gob cap + 10 gob + 1 bat, shadowlord + 5 warg rider and the watcher
The shadowlord seems to fix at least one or two problem of the list, it protect you from shooting and give you some magic to balance the randomness of the watcher (immo or instill fear sounds great). At higher point value it can also bring black numenoreans to have a def6 terror frontline.
I love the list idea, I absolutely agree that the Shadowlord is a great addition, the combination of magic and archery protection is very solid. You do lose a lot of hitting power, but you are also getting some good tools for that price. I think Compel is the best tool really, in order to bring enemy heroes within 6" of the Watcher.
DeleteOne unfortunate downside is that you do need to bring Durburz for the yellow alliance, so you'd probably need to drop some Warg Riders to upgrade one of those Captains. I wonder whether potentially the build would work better at 650-700 points, where you could bring a few more warriors and potentially a mount for the Shadowlord. At 700 I could definitely see him on a Fell Beast being a good complement to the Watcher