
Today’s article is a bit exciting, because it’s the 100th article ever posted on this blog! Well, it was meant to be, but Clash happened before I got this one ready so it's actually the 102nd. Oh well.
Since the dark times of November 2020 I’ve posted 102 articles, documented 20 tournaments and 68 tournament games, and had a little over 200,000 views. That’s honestly really humbling, and to all of you who’ve been reading, commenting and (hopefully) enjoying along the way: thank you. It means so much to have people genuinely interested in my silly little blog, and hopefully I can continue putting out content that brings a bit of joy to people’s mornings.

Speaking of which (and moving away from the
sappy/self-congratulatory stuff), today’s battle report is especially
100-themed, because I’m pitting 10 x 100-point lists against each other in one crazy
battle royale. Is the game balanced for 100-point lists? Nope. Is it balanced
for 10 different armies to face off against each other? Nope. Am I gonna do it
anyway? Absolutely.
The armies

Number 1:
Fimbul on Fell Warg
5 Hunter Orcs
Number 2:
Grinna
15 Goblin Town Goblins
Number 3:
2 Mirkwood Spiders
3 Giant Spiders
Number 4
Wild Warg Chieftain
Dead Marsh Spectre
Orc Warrior
Number 5
Corsair Bo’sun with spear
6 Corsair Reavers

Number 6:
Holfoot Bracegirdle
Fatty Bolger
8 Hobbit Shirriffs
4 Hobbit Archers
Number 7
Theodred on horse with shield and throwing spear
Number 8
The Master of Laketown
10 Laketown Guards
Number 9
4 Dúnedain
Number 10
Rider of the Dead
5 Warriors of the Dead with shield, 1 spear
We’ve got quite a spread of lists to play with, exploring a
few different versions of what could be good at 100 points. There are several
‘hordes’, with Goblin Town fitting in a whopping 16 models, the Shire managing
14 (with 4 bows and 9 Burly models to boot, plus Fatty to make up the extra 10
points), and Laketown sitting on 11 (with F4 and a 12” banner for the first
couple turns of combat). There are two lists taking advantage of the fact that
I’d removed the requirement to have a Hero of Fortitude as a leader to just
skip heroes entirely, with Dunharrow and the Dark Denizens both fitting in more
punch and durability into their 5-6 models than you might expect.
Multi-Attack warriors are always strong at low points, so
Fimbul is bringing along the obligatory Hunter Orcs, the 4 Dúnedain are
comfortably out-Mighting and out-shooting everyone, and the Corsair Bo’sun’s
little band of Reavers looks extremely scary, especially as they’ve got the
only other banner effect on the table.
Finally, there are the two big hitters: Théodred all on his lonesome, and a sneaky Angmar concoction relying on Fell Light-ing enemy warriors out to be pounced on by the Wild Warg Chieftain. Both are head-and-shoulders scarier than anything else on the field, but can they survive being swamped by the larger enemy forces?
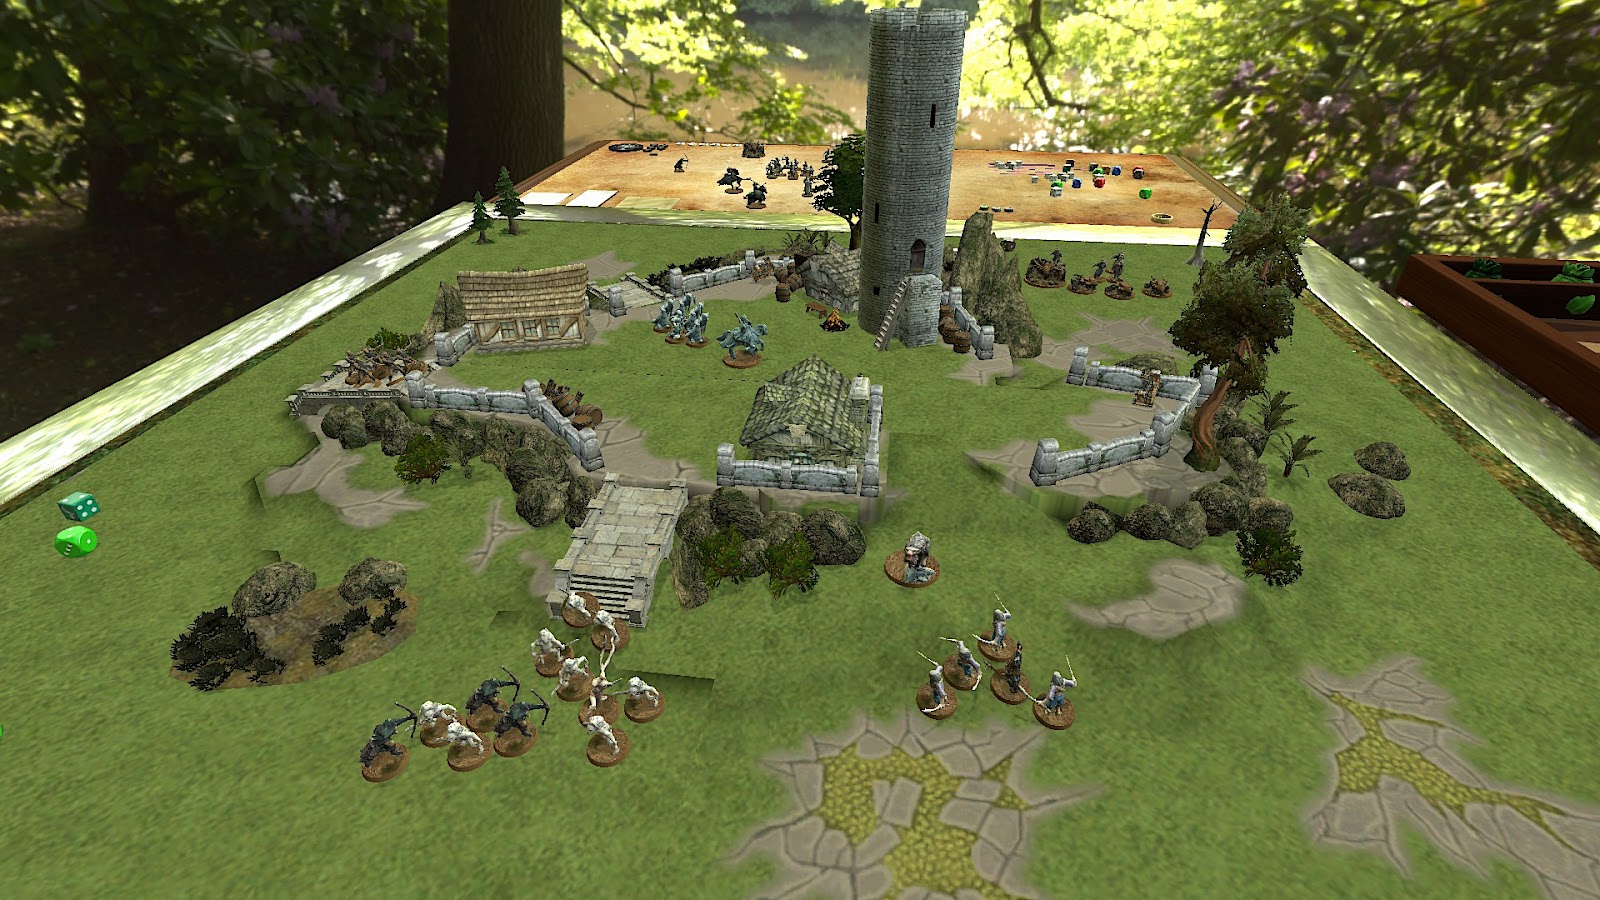
Scenario

For the scenario, I decided to opt for a modified version of Hold Ground, in which whoever had the most models wholly within 6” of the centre at the end would take out a win. The game would end on a 1 or a 2 after more than half the armies were Broken, and Wounds inflicted on enemies previously would act as tie-breaker if the middle was exactly contested.
Turns 1-2: Deployment and initial
engages
The game started tiresomely enough: it turns out that
determining Priority order between ten different armies is not something MESBG
was designed for. That was quickly straightened out, however, and we were onto
Maelstrom deployment.
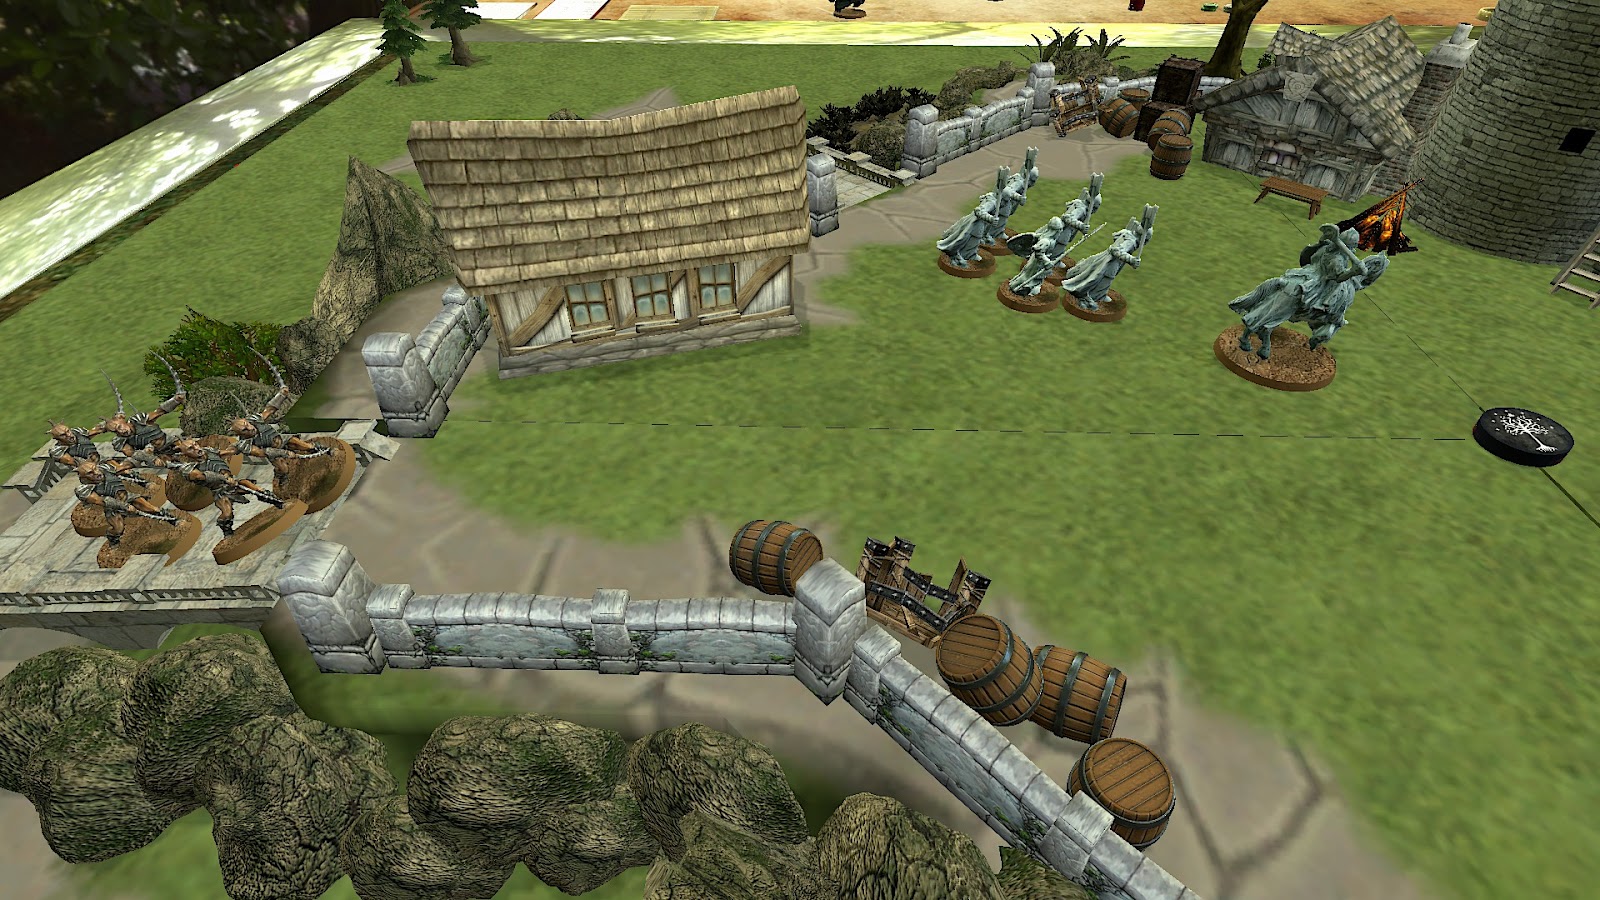
All bar Dunharrow and the Rangers came on in the first turn, with the remaining 8 factions basically pairing themselves off into mini-clashes. Angmar had surged onto the field first only to be followed on by a horde of Goblins, which the Shire popped up to shoot before having the Corsairs outflank them from the other side.

Fimbul and his band took a straight
path for the middle, but Théodred showed up 6.1” away on their flank and lobbed
a throwing spear their way. It missed, but he was clearly setting up for a
scary charge next turn.

Finally, the Spiders surged on near the Laketown warband, even managing to Paralyse a Guard with a web. Neat!

Turn two started with Laketown, who pushed forward to get
closer to the centre and braced for the Spider charge. When it came it was
lethal, with another Guard being Paralysed on the way in (and predictably
minced) before the Giant Spiders killed another two for no reply. A bad first
combat for Laketown, especially given that they’d burned a Might on the
Master’s banner effect.

Elsewhere, Théodred went hurtling into combat, although he
missed again with his throwing spear. Fimbul countercharged and the Hunter Orcs
wrapped around him, setting the stage for one big Strike-off. It went
Théodred’s way after he burned another Might to get a 6 on his duel roll, and
he followed it up by cleaning decapitating Fimbul after the Orc failed his Fate
roll on a 1. Lovely.

In less interesting news, the Dúnedain came in and started
sniping at the Goblins– doing no Wounds– while the Army of the Dead showed up
far from all the other forces and started sprinting for the centre. At least
one army had remembered the victory conditions.
The Goblins swarmed onto the Angmar warband, killing the lone Orc but losing two Goblins to the Wild Warg Chieftain in return. And finally, the Corsairs charged into the Hobbits and hacked down Fatty and 4 Shirriffs, although two Reavers lost their one-on-one fights and were slain by Shirriffs. Embarrassing!

Turns 3-4: Slaughter on all sides
Surprisingly, there were no Heroic Moves called this turn;
all sides were either happy enough with the Priority order or were saving their
(very) limited Might for bigger things. As such, proceedings started off with
the Hunter Orcs swarming into Théodred, determined to avenge their Captain. He
was forced to burn a Might to fend them off and failed to do even a single
Wound back, ensuring he’d be facing another 10 Attacks next turn.

In the south, the Goblins swarmed over the Wild Warg
Chieftain (those who passed their Terror checks, of course), although the
Spectre did peel off a spear support with a Fell Light then charge into another
two. That ended up being the wrong call, as while the Warg spent Might to win
its Fight and kill another couple Goblins, the Spectre was taken out by a
wildly-swinging Goblin. Angmar was the first army to Break!
Nearby, the Hobbits surged around the Corsairs, but their
luck was much less good this turn, and three Shirriffs were slain for no
Corsair losses. The Shire was Broken as well!

In the north-east, the Spiders had carefully charged into only 4 Laketown Guards, and the C2 Laketown promptly failed every single Terror check to get more models into the fray. Ouch. That said, the Master’s banner put in serious work, and two of the Guards managed to win their fights and wound Spiders, while a third even survived a lost combat! The other Guard died a horrible, horrible death though, of course.

The Dunharrow and Rangers had continued to trek towards the
centre on Turn 3 and did the same on Turn 4, with the Rangers in position to
threaten the Goblins next turn. Goblin Town, meanwhile, left a single Goblin to
tie up the Wild Warg Chieftain before flooding to the middle, hoping to swarm
onto it with their superior numbers before their rivals could arrive on the
scene.

In the west, Théodred was again charged by the five Hunter
Orcs, but this time couldn’t get the 6 he needed. The Hunter Orcs capitalised
in style, throwing 20 S4 hits at him and effortlessly toppling the heir of
Rohan. Ouch!

Things went a little better for Laketown in the north-east, as while they lost another two models they did successfully manage to take out the injured Mirkwood Spider as well. That was without the benefit of the Master’s banner as well, which was especially impressive.

The Hobbits did less
well, losing Holfoot to a failed Break check before getting absolutely rinsed
by the Corsairs. By the end of the combat there were only one Shiriff and one
Archer remaining, while 4 Reavers and the Bo’sun were still going strong.
Turns 5-7: Hustle for the middle
Winning Priority on Turn 5, the Rangers went hurtling into
combat with Goblin Town, setting up a juicy Heroic Combat with two Dúnedain on
one Goblin. Goblin Town was then left with a tricky dilemma: they could press
to the centre (now held by Dunharrow) with their remaining 8 models, but the
Ranger Heroic Combat would likely slam into their backlines and cut a bunch
more of them to pieces. In the end, the Goblins opted for the surprisingly
heroic option of surging back to partially surround the Rangers, hoping to kill
a couple this turn before turning back to the centre.

Elsewhere, the Wild Warg Chieftain, Corsairs and Hunter Orcs
all sprinted to the centre, while the Army of the Dead consolidated their grip
on it. The Corsairs also found time to hack down the last Hobbit Archer as they
ran, although the final Shirriff managed to survive by dint of running in the
opposite direction to make himself an unappealing target.
The solitary duel between the Laketown and the Spiders
continued in the north-east, with another two Guards being torn to pieces for
no reply. This Broke the Laketown, which probably wasn’t a great sign for their
future prospects.
Finally, the clash between the Goblins and the Rangers was a
very mixed affair. The Heroic Combat went off flawlessly, and the Rangers used
it to peel off several Goblins that had wrapped around them. However, the
Dúnedain who called it promptly lost his combat against a single Goblin by 1,
before being Wounded and failing his Fate roll (again, by 1). His buddy also
lost his fight against the lone Goblin he’d peeled off, before being Wounded as
well (although he at least passed his Fate). On the plus side, they won the
other two combats, including a clash between a Dúnedain and Grinna with three
friends. Grinna Struck but botched his rolls, and two more Goblins were slain.
As we came into Turn 6, Dunharrow was solidly in control of
the centre, but there were a number of factions that could threaten them, and
only 4/10 armies were Broken. Anyone could take the win (except maybe the lone
Hobbit Shirriff, busy running away from blood-mad Reavers as fast as his little
legs could take him).
The Laketown won Priority and had mixed luck on their
Courage tests. On the one hand, the Master passed his Break check and held his
forces on their battlefield, which was a great effort. On the other, they then
failed every single Terror check to charge, allowing the Spiders to turn tail
and sprint for the centre. I guess this is the downside of C2 warriors!

The Corsairs were up next, and they slammed into the Wild
Warg Chieftain. It promptly messed up its duel roll and was absolutely rinsed,
with the angry pirates killing it twice over. Not a great showing for Angmar,
who became the second tabled faction.
Nearby, the three Rangers were swarmed by the Goblins, with
two Dúnedain being dragged down in exchange for a single Goblin. Grinna’s band
were making their mark!

Over in the centre, the Dunharrow strategically charged into
two Hunter Orcs, using Terror to ward off the others while running down one
with the Rider of the Dead. This was already a great trade, but more
significantly it kept the other Hunter Orcs out of the centre for another turn.

Turn 7 began with Dunharrow following up on this advantage
to keep the Hunter Orcs pinned back, sending three models back into the centre
to confirm their control there. Both the Spiders and the Corsairs retaliated by
sprinting for the centre, managing to slip two and 3 models respectively within
6” of it. Goblin Town also hustled that way, with just one Goblin being charged
and taken out by the last Ranger.

Finally, the two shattered forces (the Shire and Laketown)
had markedly different turns. The Master failed his Break check and fled,
taking two of his remaining three Guards with him, but the final Hobbit stuck
around and began the slow slog back to the middle. Maybe if the game continued
another 5 turns, and he passed all of his Break checks, and the other factions
all killed each other, he could be relevant?

The only real excitement in combat this turn was Dunharrow
winning both combats against the Hunter Orcs but failing to take out either of
their foes. This was definitely a more positional turn than the bloodbaths of
the last few!

At the end of this turn, I initially thought the game ended.
I’d misremembered Goblin Town’s Break point as 8 rather than 9, and as such
Grinna had had to pass a Break check at the start of his move. More
significantly, it had meant that more than half of the armies were Broken at
the end of Turn 6, leading me to roll for the game to end at the close of Turn
7. It came up with a 2 and that was that, with a tie between the Corsairs and
Dunharrow for most models in the middle. As the Corsairs had slain vastly more
enemies than the two Hunter Orcs the Dead could claim, it was a narrow Corsair
victory on the tiebreaker!
However, upon writing up this battle report, I realised my
mistake. Tabletop Simulator had autosaved the game at the point where I left
it, and I decided to rectify the error by playing on until the game ended properly.
And so, we end up with the proper timeline, in…
Turns 8-11: Bloodbath in the centre
The Corsairs won Priority on Turn 8, and had a bit of a
challenge: they really wanted to charge and kill the Warriors of the Dead, but
the Reaver Mindless Killers rule only lets them charge the closest model if
they fail their check (or deliberately choose to fail it). As such, they’d lose
their bonus to-Wound and immunity to Terror if they didn’t charge the Spiders
in front of them. The Reavers shrugged and threw themselves at some Giant
Spiders.

Dunharrow continued to play it safe, putting 4 models into
the centre and deliberately screening out both the Hunter Orcs and Goblins from
getting within 6”. The ghosts had the advantage, and they were determined to
maintain it!
Elsewhere, both the last Laketown Guard and the last
Shirriff passed their Break checks to continue slogging towards the centre,
while Grinna got charged by the last Ranger after omitting to call a Move. He
swiftly realised the error of his ways as most of his remaining Goblins fled
(the single casualty last turn had Broken Goblin Town for real this time),
although Grinna at least had the satisfaction of murdering the final Dúnedain.
Goblin Town was down to three models, but they were continuing to kill stuff!

The Rider of the Dead ran down another Hunter Orc, and we
had our first three-way combat of the game! A Warrior of the Dead was facing
both a Giant Spider and a Corsair Reaver, with the Reaver ending up taking the
win and Wounding the Spider. Things went less well for the three Reavers and
Bo’sun taking on the last Giant Spider, with Dark Denizens winning the roll-off
and killing two Reavers. Ouch!

In this new and altered timeline, the roll to see if the
game ended came up with a 5, so we were onto Turn 9.
That began with the last Laketown Guard failing his Break
test and disappearing from the battlefield. It hadn’t been the best of games
for poor Laketown. The last Hobbit Shirrif also fled, having finally decided
that he didn’t want any part of the terrifying melee happening in the centre.

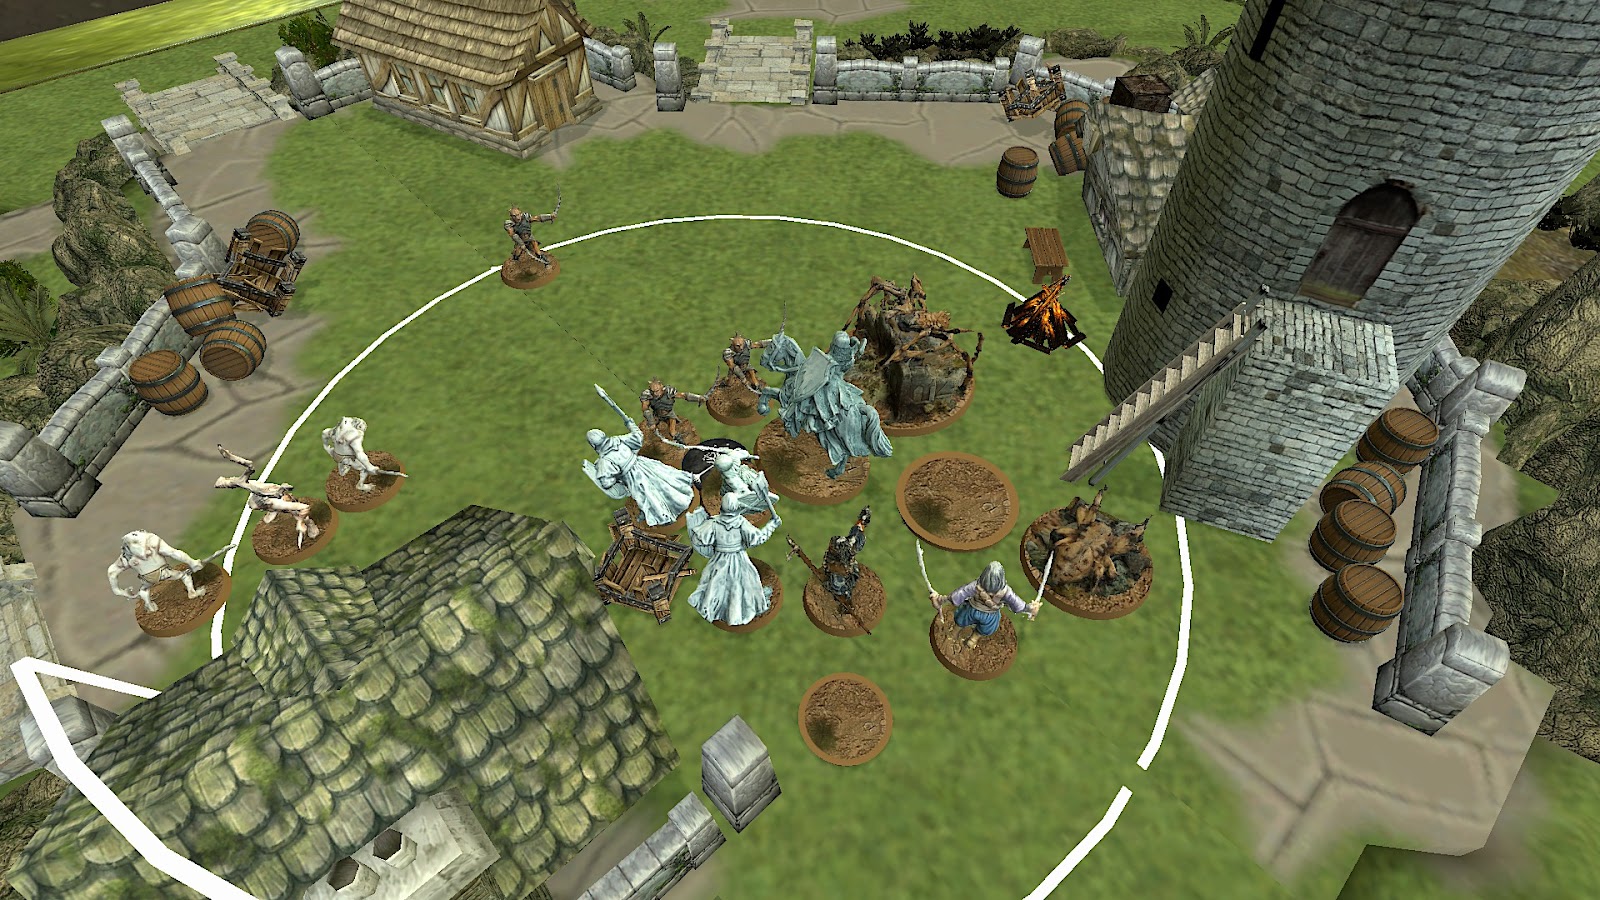
That melee was highlighted by a Reaver being Paralysed by a
Mirkwood Spider, before surviving the attentions of two Warriors of the Dead.
By this time there were 5 factions surviving in the centre: Goblin Town, with
Grinna and a pair of Goblins; Dark Denizens, with two Giant Spiders and a
Mirkwood; 3 Hunter Orcs; the Bo’sun with two Reavers (one now Paralysed); and
Dunharrow with 5 Warriors of the Dead and the Rider of the Dead.

As such, all surviving factions began prioritising Dunharrow, knowing that they needed to whittle down those numbers to have a chance at victory.

Terror checks and the mindless rage of the Reavers made that
tricky, but by the end of Turn 10 Dunharrow was down to 4 models. The dice came
up high and the game didn’t end, so victory could still go to almost anyone!
Finally, Turn 11 was a bloodbath. Dark Denizens lost its
Mirkwood Spider and one Giant Spider, while the Bo’sun and Grinna each slew a
Warrior of the Dead. It was a devastating toll for these two factions, made
even more devastating when the dice finally came up with the 2 to end the game.

That left 3 factions tied for first, with 3 models apiece in
the centre: Corsairs, Goblin Town and Azog’s Hunters. That meant that we’d be
going to tiebreakers to determine the winner, with wounds inflicted being the
deciding factor. Azog’s Hunters had killed Théodred and one Warrior of the
Dead, while Goblin Town had slain 4 Rangers, an Orc, a Warrior of the Dead and
a Spectre. But the Corsairs absolutely stomped them both, having killed a
Spider, two Warriors of the Dead, the Warg Chieftain and 11 Hobbits.

As such, the winners of the 100-point battle royale are the Corsairs of Umbar!
Reflections
Whew, that was bloody! By the end of the game the surviving 5 factions had 12 models between them, while the others had been tabled long before. I was surprised by how close the game ended up being, with a handful of rolls in the final turn (or any of the many rolls to see if the game ended) being decisive.
I was also surprised by which factions died earliest. I had high hopes for Théodred, but those Hunter Orcs proved a little too nasty. Laketown would probably have done better against a force that didn't cause Terror, while the Shire really just got massacred by those nasty Corsairs. Angmar seemed like it was perhaps too tricky of a list for its own good, and the Rangers really underperformed. They slammed into the back of the Goblins and then just swarmed and taken out.

This game was a hoot all the way through, and I'd definitely recommend giving something like it a try if you're looking for a bit of silliness and a break from competitive play.
As ever, thank you to you all for reading these articles. It means so much to me, and I hope it brings a bit of joy to you all.
Until next time, may the game always last just long enough for you to clutch out the win!
Really fun post - was totally pulling for Theodred and the WWC, but I also knew that Terror at a points level like this is going to be very, VERY powerful (as would Terror-bypassing rules). I do wonder if downgrading Theodred (pity he didn't get his charge bonuses, like, at all) to someone like Elfhelm and giving him some friends who could skirmish and shoot might have done a bit better? There would still have been a numbers disadvantage, but with 10+ dice against you, Theodred's gotta get a 6 or he's toast.
ReplyDeleteYeah, I thought that the two big-hero lists might have done better than they did, but alas, sometimes that's just how things go. I think the deployment didn't help the Angmar list (it would have liked to skirmish a bit probably, and instead had to brawl straight away), but Theodred didn't really have any excuse other than Hunter Orcs being scary.
DeleteIt's definitely an interesting thought on Elfhelm, although I think you could only fit one cavalry model along with him. So probably whoever he brought along would have wound up getting charged by Fimbul or the Hunter Orcs, at which point Elfhelm probably has to commit as well (and likely gets killed by Fimbul et al). Maybe Dernhelm plus 2-3 buddies would have been better? I guess then you're still partly footslogging, but at least you still have the F5 A3 hero to kill things