
Astride his horse, the Witch King of Angmar watched his forces assemble on the plains of Gorgoroth. An observer would have noteda sharp contrast between the sable-clad Morgul warriors and their flamboyant Haradrim allies. Orcs and fell Númenóreans alike were grim-faced and disciplined, standing steady in neatly dressed ranks, while the Haradrim chattered and boasted atop their high-stepping stallions.
The Witch King saw none of this trivia; his fell sight
looked beyond the mundane world to the spirits shrieking across the shrouded
plain. The land was disturbed by some force that was not his master's, some
evil that was foreign to these parts. Something deeper, something older.
Suddenly, a burst of colour and heat drew his eye, as
well as the more ordinary attention of his troops. From a flaming chasm
stretching from one outcropping of the mountains came a creature of fire and
darkness, shadow and flame. It pulled itself through the gap and straightened
itself up, letting loose a roar of expected conquest. Behind it came an endless
tide of small creatures, all blades and glinting armour.
As the sound of beating drums filled the choked air, the Witch King and his captains were already springing into action. Lines were reformed and warbands began to move, converging on this new and unexpected threat. This field belonged to his master, and he would suffer no foe to tread it. After that, the march would continue, and the world of men would fall at last.
Today’s battle report is covering a particularly interesting
matchup: the current meta hotness of Witch King/Suladân, clashing with an old
contender in Depths of Moria. Mordor with an allied Suladân is obviously a
powerful list, but the Depths do bring some interesting counters to it. Immunity to Terror, a battlefield-wide banner and the utterly unstoppable
force that is the Balrog all contribute to make the fight more challenging for
Mordor than they’d really like.
So who will win? Can the raw efficiency of Mordor outpace the battering ram of the Balrog? Read on to find out!
The lists
Mordor/Serpent Horde
Witch King 3/10/2 on horse with
Crown (Army Leader)
Suladân on armoured horse
Mouth of Sauron on armoured horse
Zagdush
19 Black Númenóreans
19 Morannon Orcs with spears and
shields’
Orc Tracker
Serpent Rider
44 models, 11 Might, 4 fast models, 1 bow

This list has it all. It’s got a really solid infantry line, with D6/F4 troops backed by S4/D6 spears and a 6” banner. It’s great against low-Courage armies thanks to a Terror frontline and Harbinger of Evil. Enemy heroes don’t feel awesome about facing double casters, and all four heroes can mix it up in combat quite comfortably. The numbers are quite high for their quality, and there aren’t many weakpoints for an enemy to target. Overall just a solid, efficient list. There’s a reason that lists like it have won vastly more tournaments than any others in the last year.
Depths of Moria
Balrog
Goblin Captain
2 Blackshield Shamans
Goblin Drum
38 Goblins, with 2 bows, 18 spears and 18 shields
44 models, 4 Might, 0 fast models, 2 bows

A lot of Goblins, a couple of tricks and one very big combat piece
This list, on the other hand, has one absolutely insane centrepiece, backed by the cheapest infantry possible and some sneaky magic. Goblin Warriors aren’t great, but with a battlefield-wide banner and various buffs around the Balrog they stick around a lot longer than you’d expect. Even when they don’t, the list can’t be Broken thanks to the Balrog doing its best Sauron impression, and enemy heroes are generally terrified of having their weapons Shattered. Finally, the Balrog is the mother of all wrecking balls, ready to shred whatever it touches and keep moving. Noticeably, it’s entirely unbothered by the magical threat of the Mouth and Witch King, and it will tear through any of Evil’s heroes as soon as it can get its hands on them.Scenario Selection and Deployment
The three scenarios drawn for veto were Command the
Battlefield, Seize the Prize and Hold Ground. Moria immediately vetoed Seize
the Prize, knowing that the March and cavalry of the Mordor force would allow
them to screen off the relic in the first turn and probably hold onto it all
game long. That left Mordor with a choice of 2 Maelstrom scenarios, with Command
the Battlefield being selected because it allowed for the most spreading out
(and thus the greatest chance of avoiding the Balrog!).
Moria ‘won’ Priority on the first turn, but made up for this
poor luck by rolling well on maelstrom to bring in the Balrog and two other
warbands right next to each other. One Shaman had to burn its Might to do so,
but that was well worth it to avoid being picked off by a swarm of Mordor
troops. The other Blackshield Shaman failed to arrive, which was probably good for Moria really.

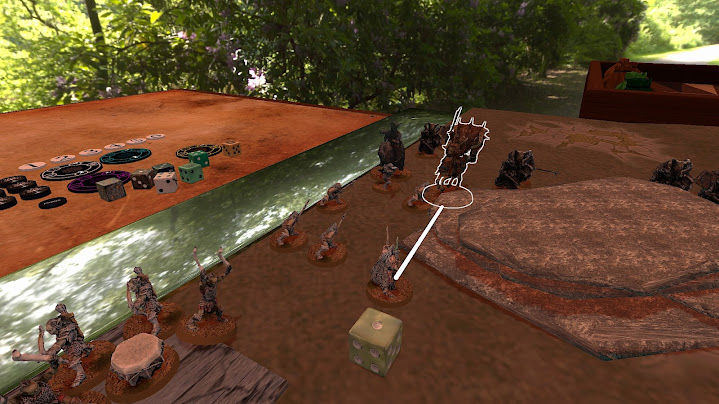
Some mixed rolling from Mordor saw the Mouth and Suladân
come on together in the north-west, while Zagdush’s warband mirrored them in
the south-west. The hope was that by pincering the Moria lines they could force
the Balrog to go either north or south, leaving the other half free to clean up
some Goblins. The Witch King failed to arrive, which was useful as a way to maintain
a threat for the next turn.

Turns 2-3: Initial engagements
Winning Priority, Mordor flung the Mouth and Suladân into combat, hoping to get some early kills before the Balrog could redeploy over. Otherwise the Mordor battlelines advanced from both sides, sweeping in to box in Moria. Unfortunately the Witch King again failed to arrive, creating a potential issue for Mordor. They really needed his combat ability and the troops in his warband, but couldn’t justify spending 3 Might to make sure he showed up in a useful spot. With a sigh, Mordor let him wait for next turn.
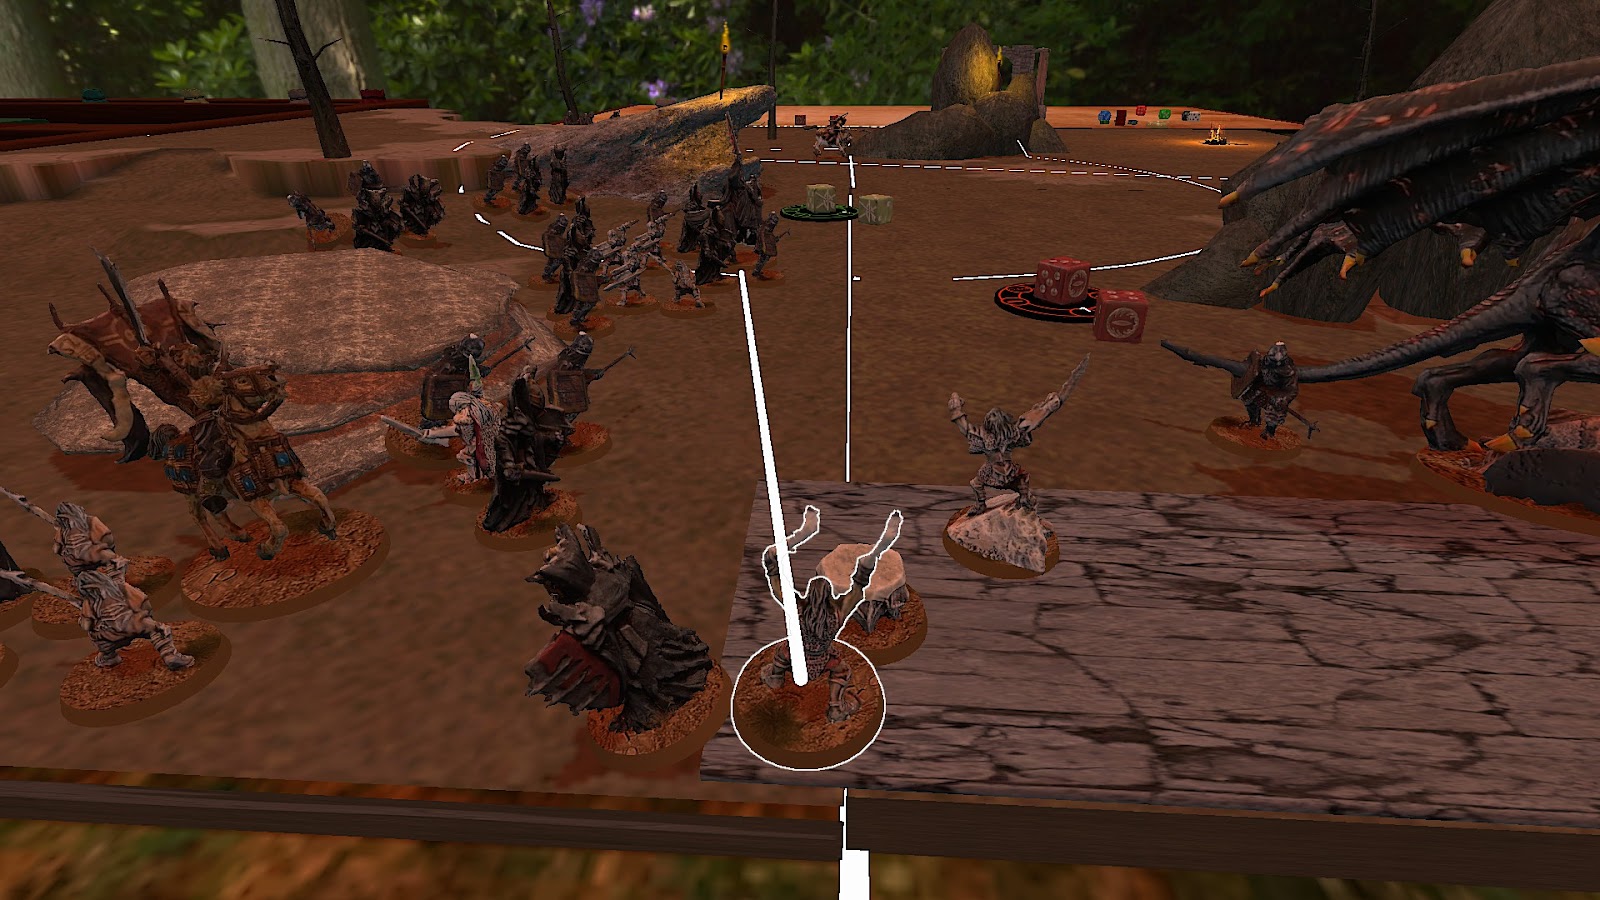
For their part, Moria was torn as to where the Balrog should
go. Suladân and the Mouth were by far the juiciest targets, but the Balrog’s
path to them was obstructed by a large rock feature, to say nothing of the
hordes of Goblins underfoot. Instead, the Balrog spun around and stomped
towards Zagdush, hoping to dispose of him before turning back to the centre.

That got off to a good start with a successful whip,
dragging Zagdush into combat with the Balrog. The Balrog rolled the critical 6 to win the fight, but
only managed to do two Wounds to the Orc, who burned Might to pass his Fate
test and survive. Not only did that keep Zagdush alive, but it also meant the
Balrog wouldn’t get a chance to Heroic Combat into his warband this turn.

Elsewhere, the Blackshield Shaman rolled a 1 while attempting
to Shatter Suladân’s sword, allowing the two Mordor heroes to hack their way
through a trio of Goblins.

Finally, the other Blackshield Shaman came in on the opposite side of the board, hoping to contest the two eastern corners.

Moria won Priority on the third turn and swiftly flung a
Goblin into Suladân and the Mouth, tying them up for the turn (although another
Shatter attempt saw another 1 rolled in what was fast becoming a trend).
Zagdush had called a Heroic Move to escape the Balrog and had gotten into a
pair of Goblins, while a brave Morannon took on Durin’s Bane. That went
as well for him as you’d expect, although all the Balrog could do off the
Heroic Combat was mince another Morannon.

The Mouth called a Heroic Combat as well, propelling him and
Suladân into more Goblins. Suladân slew his but the Mouth was beaten back in his
fight, in what would also become a bit of a trend.

Mercifully, the Witch King did arrive this turn, burning a
Might to show up in the centre of the north board edge. That allowed him to
peel off half his warband to chase the Blackshield Shaman in the east (alongside
the Serpent Rider already sprinting that way), while he led a sizeable thrust of
troops towards the centre of the battlefield, aiming to continue boxing in the
Goblins that were racing east.


Turns 4-5: Clash of lines
Moria won Priority on Turn 4, and more importantly won the Heroic Move-off between Zagdush and the Goblin Captain. That allowed the Goblins to pin down the Mordor forces on that flank, all while setting up a great Heroic Combat avenue for the Balrog to get into Zagdush.


The eastern
Blackshield Shaman continued to lead his warband south, hoping to avoid a clash
with the advancing troops from the Witch King’s warband, while the western
Shaman rolled a third consecutive 1 to cast against Suladân. 50 points well
spent!
For their part, Mordor mostly was just hustling to get their
troops into combat, sending their heavy infantry clambering over rocks to flank
the Goblins and bring their growing numerical advantage to bear.

In combat, the Balrog went first and shredded its two
opponents, before Combatting into Zagdush. This time the Orc Captain’s luck was
up and he was torn apart by his monstrous foe. Elsewhere, the Mouth again botched
against his foes, but several more Goblins fell to the Mordor battleline.

Mordor was moving first on Turn 5, and started by pinning down the Balrog again. It would just get to Heroic Combat and move anyway, but at least it would only be moving once this turn! The Witch King swooped in on the eastern front and Black Darted an isolated Goblin Drummer, while Suladân plowed into the other.
A swarm of Mordor infantry accompanying the Witch King slammed
into the nearby Goblins, but the outnumbered Goblins gave as good as they got
against their much-superior foes. Suladân slew two more Goblins as the Mouth
botched again (being dismounted this time, awesome), but Moria's numbers were starting
to run thin in the western clashes. That wasn’t helped by the Balrog losing the
fight to a lonely Black Númenórean, who I imagine was feeling very lucky
to be alive after that.

Finally, the Blackshield Shaman accomplished
something at last by fighting off 3 Mordor warriors. He didn’t hurt any of them, but
even surviving was a good outcome here.
Turns 6-7: The drums fall silent
Mordor won another clutch Priority, and also the Move-off between the Goblin Captain and Suladân. That allowed Sulâdan to swing back around behind the Mordor troops along the board edge, preventing the Balrog from easily getting into him and shutting down (read: obliterating) his banner. The Witch King also struck again with a Black Dart to kill the last Goblin Drummer, turning off Moria’s banner effect starting the following turn (the Drum rules are weird).
The Witch King then cantered
south, aiming to take out a pair of Goblins running to contest the south-east
corner.
Elsewhere a horde of Morannons and Black Númenóreans smashed into the surviving Goblins in the centre of the north-west quadrant, overwhelming them and putting most to the sword. Suladân and the Mouth both bounced off their opponents, while the western Blackshield Shaman survived once again.

The eastern Blackshield Shaman had spent two turns attempting first to
Shatter the lance of the nearby Serpent Rider, then to Tremor him to death when he
came closer. He rolled a 1 both times, so this clearly just wasn’t the game for
the Shamans.

Almost the sole bright spot for Moria was the Balrog, which killed
the Númenórean it was facing before smashing through another Morannon on its
way towards Suladân. Still, by the end of the turn Moria had taken 22
casualties to a mere 8 for Mordor, putting them far behind on tempo and making
it very hard to hold table quarters.

Moria won Priority on Turn 7 and slammed the Balrog forward into
two more Mordor warriors, determined to carve a path through to Suladân before
the Serpent Lord could get away. But (as is so often the way with the Balrog)
it lost its fight against two shielding opponents, being pushed back and slowed
down for the turn.

By this stage there was carnage across the board, but
perhaps the most impactful combats were the Witch King, a Black Númenórean and
a Serpent Rider combining to take out two Goblins racing for the south-east.
That was made possible by the Blackshield Shaman rolling a 4 to cast a Tremor
onto the Serpent Rider that would have gone through both combats. The Shaman
had spent its Might on a Maelstrom roll earlier, meaning that the two Shamans
between them had successfully cast no spells!

Turn 8: The Balrog awakened, but
Mordor ascendant
Moria was scarily close to quartering, but still weren’t Broken
thanks to the Legendary Legion’s bonus. Winning Priority on Turn 8, they went all-in
on one final attempt to take out Suladân with the Balrog, hoping against hope
that the surviving Goblins could hold out long enough for it to turn the tide.
Mordor responded firstly by swarming Black Númenóreans into
the fray, leaving the Balrog facing 4 spear-supported opponents. It also managed
to wedge one more model in to screen off the Balrog, ensuring that even if it slew
all its foes it couldn’t get into Suladân without being peeled off.

The Balrog was enraged by this show of cowardice and
promptly massacred all four of its foes, before slamming into two more warriors
and killing them both as well. 6 warriors dead in a single turn: if the Balrog
had performed like this all game then Mordor wouldn’t have had a chance!

Ultimately, however, it was to no avail, as the Goblins
elsewhere were quartered. Most devastatingly, the Witch King managed to ride
down two more Goblins in the south-east, flipping that table quarter to
majority-Mordor on the very final turn!

The other table quarters were no better, with Mordor having more than double Moria’s models in the north-east, north-west and south-west quarters. That gave Mordor 7 VPs (although the points for Breaking Moria and Wounding the Balrog were entirely out of reach), while Moria was still some way off Breaking Mordor in return for a total score of 7:0 to Mordor!

Game analysis
That game was pretty brutal, with combat in 3 quarters of
the board across many fronts. In the end it came down to the Mordor warriors
being so much better than their Goblin counterparts, such that they could carve
a path through faster than the Balrog could catch up.
Overall, the Mordor strategy of pincering the Moria lines to
prevent the Balrog efficiently bouncing between targets paid off, as by the
end it had still been unable to get to Suladân. The Moria response to it (going
after Zagdush instead of Suladân and the Mouth) may have been a mistake, but it’s
also hard to say for certain. If it had stomped north then it would have had
several turns of doing nothing while Zagdush and his warband chopped through
Goblins in the south, and after that the Mouth and Suladân may have just disengaged
anyway. It felt like there were no right answers for Moria there, but I’m not
sure that they picked the less-right option.

Ultimately, the game exposed both the strength of the Mordor
list and the weakness of the Moria one. For Mordor, the ability to pivot back
and forth between the punchy combat heroes and the grindy battleline was
crucial here, as Moria could only neutralise one with the Balrog while the
other wreaked havoc. And for Moria, the Legendary Legion’s single-minded focus
on the Balrog definitely hurt them here. The Balrog actually did okay this
game, killing 12 warriors and Zagdush. That may not be 350-points worth of
kills, but it’s certainly a good effort. Unfortunately, where things fell apart
was that the Goblins killed exactly one Mordor model between them, across the
whole game. One!

This Legion really only functions if the Balrog absolutely
carries the team, and at least for me that seems optimistic. If your opponent
is smart enough to screen off their important heroes from the Balrog then it
will really struggle to do damage fast enough to outpace the crumbling Goblins,
and I struggle to imagine that working any better at low points.

The flames recede…
The Witch King brought his blade down one more time,
shattering the helm of the Goblin he was facing. He wheeled around his horse,
looking for another foe, but already the Goblins around him were melting away, transforming
from a frenzied war host into a chittering rout. The Witch Kings troops were amongst
the horde, blades rising and falling as they corralled them back towards the mountains.
Over in the distance, the fire and fury of the great
demon were undimmed, and the Witch King knew he had not the power to face it without
his master. But it too was turning, following after its defeated minions and
cloaking itself in shadow once more.
As silence fell on the bloodied battlefield, the Witch
King raised high his blade in victory. This field belonged to his master once
more, and the hosts of Morgul would march onwards. At their hands, Gondor would
fall.
I hope you enjoyed this battle report; I really get a lot
out of combining the narrative and competitive aspects of this game, and I hope
that came through in this report. Let me know if the ‘backstory’ distracted from
the game too much, or on the other hand if you’d like less of the competitive
analysis and more of the narration.
Until next time, may your spellcasters roll better than these Shamans!
I loved the narration! By any chance do you read ACOUP?
ReplyDeleteI do actually (an excellent historical blog, which readers can find here: https://acoup.blog/, although I truly have no idea what gave it away in this article! I'm beyond curious, why do you ask?
DeleteI should have clarified! It was the reference to the blades rising and falling as the Orcs pursue the goblins, which I know comes from Dr. Devereux comparing Rohan in the movies to historical cavalry. ACOUP is my favorite blog ever, although you're in the top 5 too!
DeleteI'm not sure I specifically took the line from there, but he does definitely use that phrase in one of his articles. I think it's a pretty common phrase in fantasy writing to be honest, it's hard to really attribute it anywhere. Not that I'd stint Brett a well-deserved attribution, it's a great blog, and I'm very happy to be in his esteemed company!
DeleteDid the Balrog use his "and Flame" rule at all? It's not a shooting attack, so it can be used even if he's in combat - and it could have been used to finish off Zagdush if we as ever within 3". I've used it to pluck someone who "just got away" a bunch of times. It's particularly good as a way to dismount cavalry, as both the horse and rider suffer the S9/successive S5 hits . . .
ReplyDeleteGreat batrep though - it was a hard setup for Moria (something you just have to be ready for if you field a 350pt/0 Might hero)!
He actually didn't; I believe Zagdush was a tiny bit too far away on the turn that it might have mattered. And then after that there wasn't really a great time, although it would certainly have been nasty on the following turn against Suladan. It certainly feels like one of the biggest learning curves with this Legion!
DeleteYeah, Maelstrom is always a challenge. At least it didn't end up like my first game at the Qld GT, where the poor Balrog didn't get to kill a single model all game after some bad Maelstrom rolls!