
As such, I thought I’d put out an article diving into this exciting model and how best to take advantage of him. I’ll talk through his best- and worst-case scenarios, his strengths and weaknesses, the standard gameplan you should adopt with him, and then the situations in which you should divert from that plan. Hopefully, by the end of this you should have a good idea of how to make use of this exciting model. And if you’re more keen on working out how to stop his rampage (boo!), then also make sure to check in next week for an article on how to defeat the Terror of Arnor.
Highs and lows
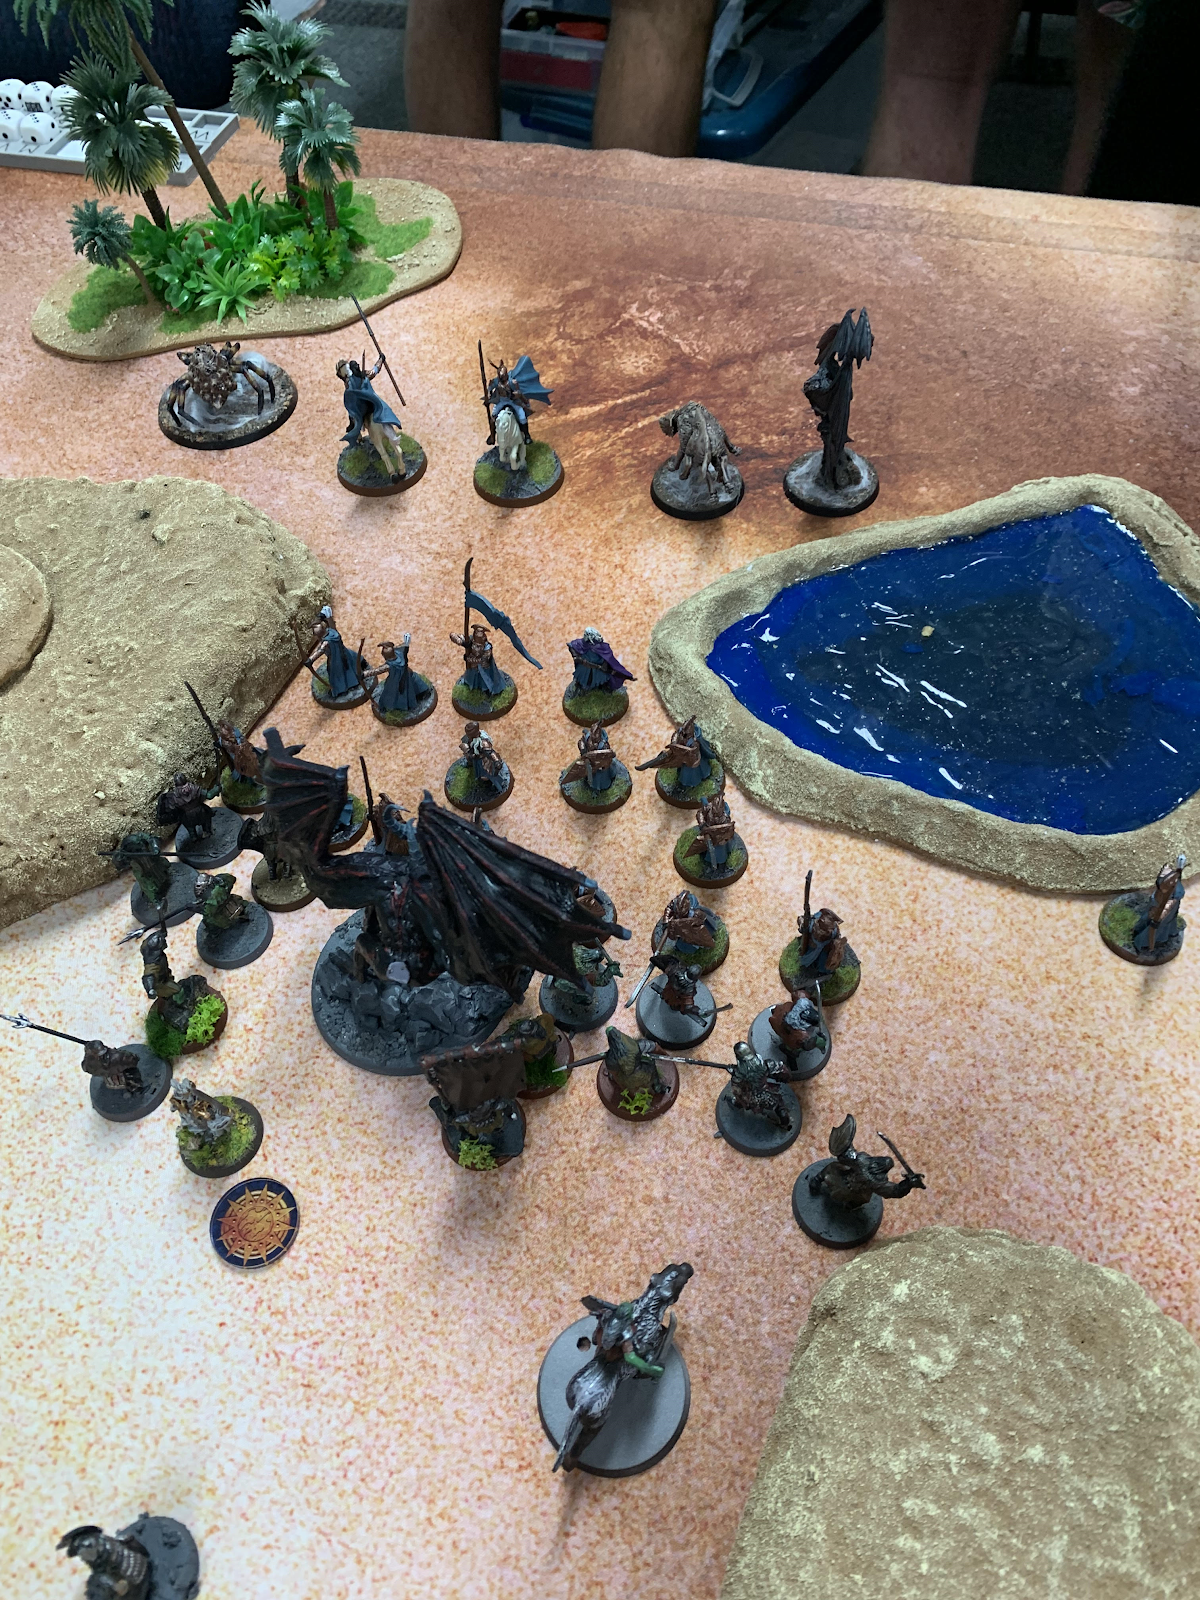
An example of Gûlavhar at his absolute best came up in a
game against Tom and Monty at the recent Doubles event I attended. Combat
started with Gûlavhar charging into two Elves that were screening Erestor. I
then called a Heroic Combat and pointed out that from this position I could
charge into either Erestor or Gildor, in Tom’s backline. Rightfully concerned
by this, Tom burned his last two Might on calling a Strike with both models. Gûlavhar
killed the two Elves he was facing, then ignored the Elf heroes and Combatted
into the banner bearer hiding in their backline and took it out. On the next
turn, with the Elves out of Might to Strike, Gûlavhar charged and killed both Elf
heroes. The turn after, he Heroic Combatted into Dáin and took him out as well.
Across 3 turns, Gûlavhar crippled an 800-point force almost singlehandedly.

On the flipside, a somewhat-less-recent tournament game saw Gûlavhar
pinned down against the Champions of Erebor following some lost Move-offs.
Several Dwarf heroes got into combat with him and Struck up, forcing him to
call a Defence to survive the first round before being taken out on the second.
Pinned down against Striking heroes, Gûlavhar felt exceptionally vulnerable.
I give these examples to show the variety of results Gûlavhar
can achieve. He can singlehandedly win games, but can also crumple under
pressure if misplayed. From here, let's dive into the underlying strengths and weaknesses that you (or your opponents!) can exploit to get these outcomes.
Strengths and weaknesses
Strengths:
-
Damage output. If you can get Gûlavhar
into a fight against models with F6 or below and no way to Strike, your
opponent will generally be picking them all up at the combat’s end. 10 S8
attacks is a truly ludicrous amount, and there are only a handful of models
that can survive a lost combat if you’ve charged.
-
Mobility. He flies, and that means you
get to pick your fights. One of the key determinants for whether a monster is
competitive is whether it can fly, and that’s perhaps more true here than
anywhere else.
-
Flexibility. As a result of this mobility
and the innate options that come with being a monster, Gûlavhar has a
sometimes-baffling number of choices available to him on most turns. This is a
huge strength, because you can adapt on the fly (pun entirely intended) and
always have options available to you. It's also a potential weakness, because you
always have a bunch of bad options available to you that make it easy to mess
up.
-
In the Angmar faction. This feels like a
somewhat weird strength to have, but it’s absolutely critical to understanding
this model. That's because Gûlavhar doesn’t have a particularly good profile. Compared to
Gwaihir he’s arguably overcosted, and there are plenty of other top-tier heroes
and monsters that can do the things that he can do. What makes Gûlavhar unique
is that he fits neatly into Angmar, which has an unparalleled range of ways to
mess with your opponent, all of which happen to synergise perfectly with what he does. Without
the full suite of Spectres, Terror Orcs and massed magic, Gûlavhar will never
reach anything like his full potential. And conversely, without his ability to
swoop across the battlefield and take immediate advantage of whatever weaknesses your control tools have forced, Angmar has much less ability to capitalise on
their strengths. It’s an extremely symbiotic relationship, and one can’t
understand this model outside of that context. For reference, I have (almost)
always run Gûlavhar with the Witch King, Spectres, and a Barrow Wight and/or
Captain if I can fit them in, but I’ve heard he synergises excellently with a
Shade as well. There are options here, but he really needs some amount of the
Angmar suite to shine.

Weaknesses
-
No Strike. This is probably the first
thing a lot of players notice when looking at this profile, and it is a
legitimate weakness. If Gûlavhar had Strike then it would dramatically
influence how your opponent could play against him, even if you’d ideally not
be using it very often at all. This is a weakness that must be played around,
but it’s also a weakness that really can be played around.
-
Vulnerable to shooting. This weakness has
always been present, and has been intensified a little (especially in Evil
matchups) by the recent FAQ. D5 with no Fate is just a pain, and it means you
will often take a wound or two on the slog into combat. You can generally then
get stuck in and heal back up, but it certainly has the potential to be
annoying.
-
Hates botching. This isn’t really a
weakness unique to Gûlavhar, in that any mounted combat character is terrified
of losing an early combat and getting dismounted. But Gûlavhar certainly cares
more about an early botch than most monsters, as even a couple of warriors can
strip valuable wounds off him and slow down his rampage. You can end up in a
frustrating vicious circle, where you lose a couple of wounds to basic
warriors, then get charged and lose the combat because of your reduced number
of Attacks, take more wounds, get even less reliable at winning fights and
killing models etc… See the second game of this tournament against Nick’s Gondorians for an example of
this.
-
Hates F7+ heroes. If Gûlavhar can’t
reliably win a fight against a model when they’re not Striking, then he never
wants to end up in combat with them. Magic can compensate for this sometimes,
but relying on magic is always relying on dice, and sometimes the dice just
don’t feel like complying.

Default gameplan
We’ve talked about the best and worst outcomes for Gûlavhar,
and the strengths and weaknesses that can lead to them. Gûlavhar’s standard
gameplan is basically a logical extension of those sections, in which you’ll
try to leverage his strengths to produce the great outcomes while mitigating
his weaknesses to avoid the bad ones. That starts all the way from deployment,
in which you’re aiming to make it easy to…
Step 1: Get stuck in
As discussed, Gûlavhar is not a fan of enemy shooting (to
put it lightly). As such, the less time he spends being shot at the better. On
centreline deployments of any kind that’s generally pretty easy, as there’s a
limit to how far back your opponent can realistically hide. It gets trickier in
scenarios with 12” deployments, where you may need to brave several turns of
shooting before you can get to the killing. You might be tempted to race ahead
of your Orcs to get into combat ASAP, but this is often a trap. An unsupported Gûlavhar
is likely going to need to spend a lot of resources to survive, and isn’t
really a threat.
Instead, hang back and use cover and range to keep yourself
safe. There generally isn’t much benefit to arriving before your Orcs, and you
move twice as fast as them. As a result, you can easily afford a turn or two of
loitering in positions that mitigate your opponent’s shooting before you need
to start swooping forward. Remember, while most models no longer block LoS to you, tiny bits of terrain still can. Abuse those weird loopholes in the FAQ!

Finally, remember that you’re playing Angmar, and have
access to both Spectres and Compel. Spectres are generally your best tool for
forcing an enemy model forward out of their formation, letting Gully swoop into combat a turn early. See our third game of this tournament for a particularly effective
example of this. Compel is also useful for leveraging Gully’s threat a turn ahead as well: if you can threaten to Compel an enemy hero forward to be
charged by Gully, then a smart opponent will burn whatever Might/Will they can to
avoid it. Your big monster is now already costing your opponent valuable
resources, and you haven’t even made it to combat!

Step 2: Threaten enemy heroes
Here we touch on Gûlavhar’s most powerful ability: his
reputation. Your opponent knows that if Gûlavhar gets into their
critical models on your terms then they will instantly disappear in an explosion
of gore. So any competent opponent will therefore expend resources (here
defined quite broadly) to prevent this. What you want is to make that as
expensive a proposition as possible for your opponent.
Examples of how your opponent will try and protect their
important models range from the extreme (bubblewrapping the hero in their
backlines with multiple layers of anti-fly formation) to the
expensive-but-necessary (calling Heroic Strikes on turns that you could Heroic
Combat into them, even if they otherwise don’t benefit from the extra Fight
value) or the optimistic (trying to screen you out with a single line of
models). There’s basically a spectrum here from methods that keep your
opponent’s best pieces totally safe but cost a lot of resources (including the
enemy hero not fighting this turn, or lots of warriors standing around doing
nothing in order to prevent Gûlavhar landing somewhere) right up to methods
that don’t keep their heroes as safe but are potentially less expensive (like
just screening their rear with a couple of warriors).
What you want to do is force them into the most expensive
options. That can involve psychological mind games: nothing like letting your
opponent know the ways that you could conceivably threaten a model that you
have no interest in targeting this turn anyway. It can also involve ‘forcing’
more expenditure: maybe your opponent has successfully screened their hero so Gûlavhar
can’t get into them, but then you Spectre a model away or Heroic Combat through
the screen and now they need to call a Strike or die. It can also involve a
combination of tools: perhaps they’ve screened their hero, but you Spectre one
model away and cast Compel on them with the Witch King, while threatening to
charge their screen and Combat with Gûlavhar. Now they need to resist this
spell at all costs (and will spend any resources necessary to do so), and even
if they do they will still need to Strike in order to dissuade you from
charging them. Your opponent’s hero has now spent most of their resources and
they haven’t even fought yet!

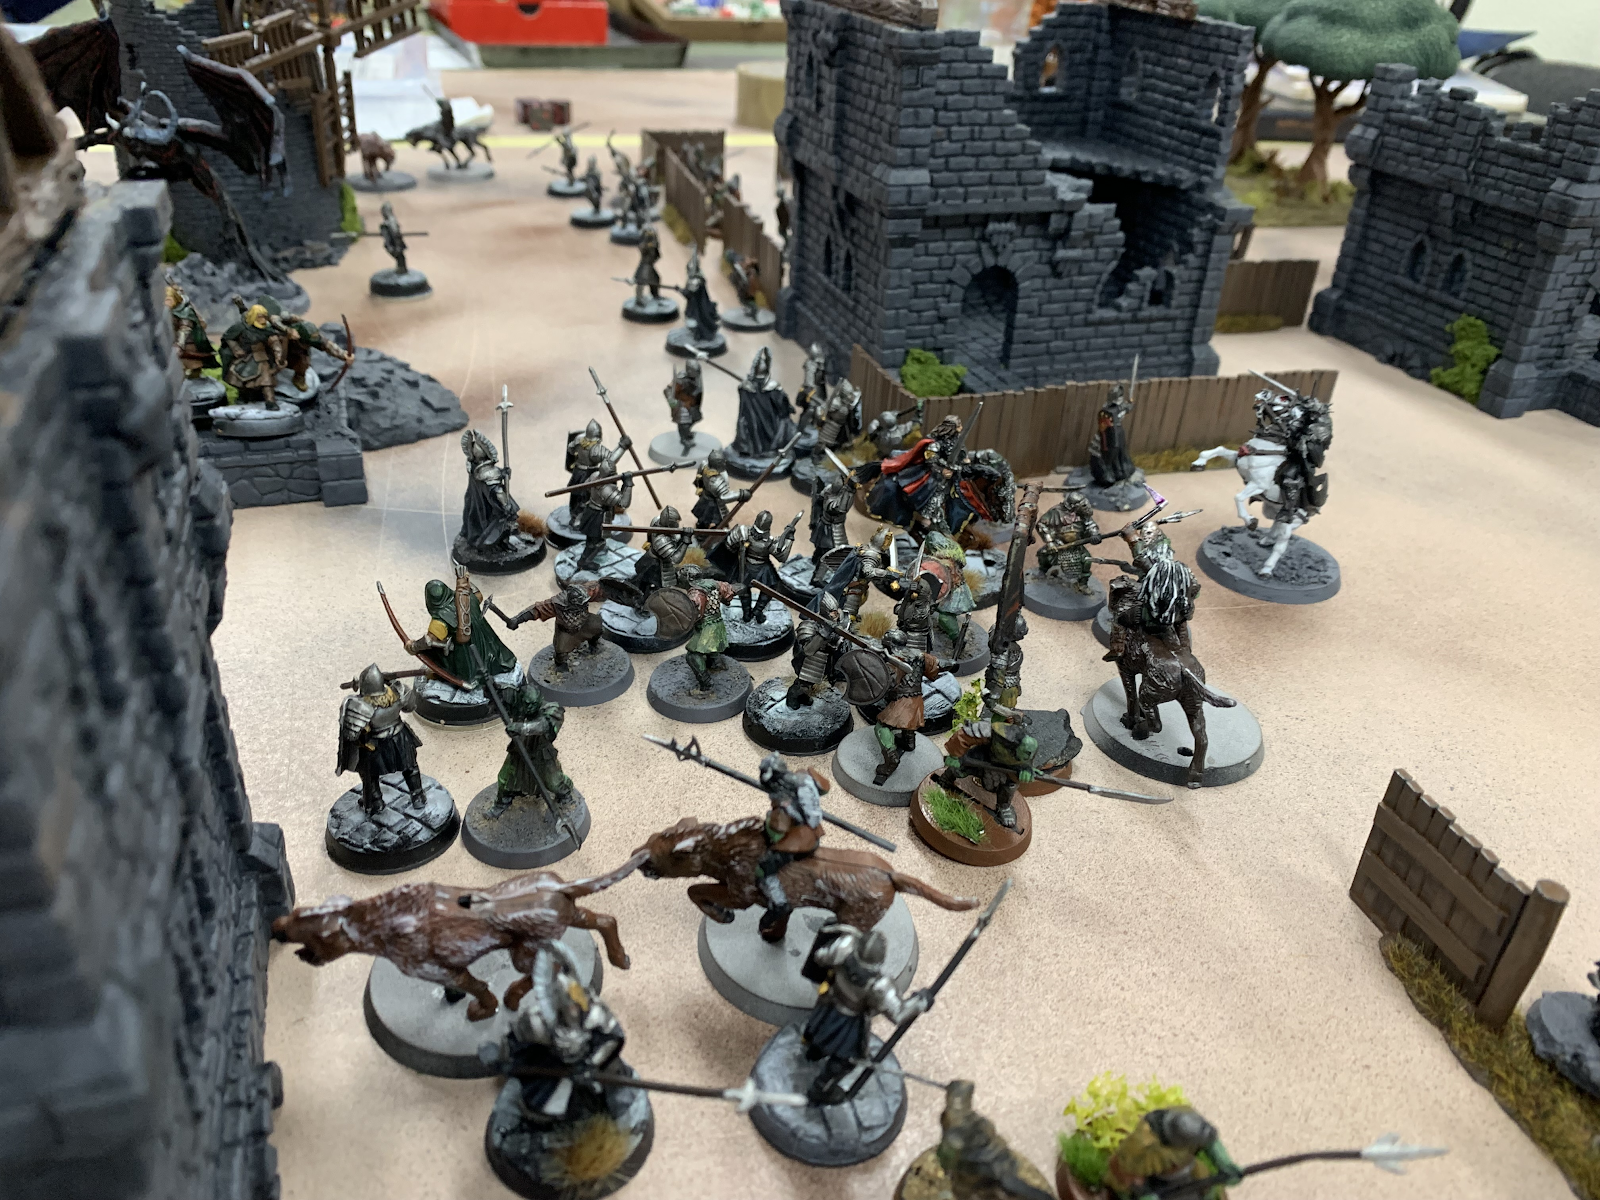
Let’s take a game I played against Nick’s Gondorians as an
example. Nick had carefully screened his backlines with heaps of Warriors of
Minas Tirith, trying to prevent me lining up a Hurl with Gûlavhar into Elessar
and Hurin. Already, the mere threat of what Gûlavhar can do had forced around 100 points of enemies to stand around doing nothing instead of taking the
fight to my Orcs. I responded by swooping into two Gondorians in the
screen, threatening to open up a gap and Combat into either Elessar or Hurin.
Playing Fog of War, Nick knew that if he lost Hurin it would basically be game
over, so he was forced to both Strike with Hurin and Combat with Elessar.
Elessar went into Gûlavhar and got picked up in a single turn.

In effect, what happened here is that the threat of Gûlavhar
cost Nick the use of a bunch of warriors, Might on Hurin, and then also his
army leader. Even had Aragorn not died this turn, the mere threat of Gûlavhar
had already forced Nick to burn a lot of resources. He wasn’t wrong to either:
I probably just win the game instantly if he lets me get into Hurin, so all
resources expended are worthwhile. The key to using Gûlavhar well is forcing these
impossible choices for your opponent. Incidentally, Nick ended up winning this
game: he pinned down Gûlavhar and wounded him, and kept Hurin safe all game for
a narrow victory. Even when things go right for Gûlavhar, he’s still far from
impossible to beat!

Step 3: Follow through on your
threat, or don’t
Once you’ve got your
opponent’s heroes under threat, the question becomes whether to make good on
that threat.
Let’s assume that you’re playing against an excellent
opponent who has successfully screened you out, and who has dedicated enough
resources to properly neutralise your threat. You could still fly Gûlavhar into
Dáin, but that seems pretty risky now that he’s called that Heroic Strike. At
this point, you’re best-off making use of that insane mobility to get value and
stay safe somewhere else on the battlefield.
Getting value basically means ensuring that your 200-point
centrepiece is still achieving useful things even after you’ve baited out
resources from your opponent. That often just means killing warriors: if Dáin
Struck up and killed the two Orcs he was facing but you Combatted through 4
Iron Hills Dwarves, then things are going your way. Aim for expensive elites
here, including banner bearers, cavalry, or lesser heroes like Captains who
might have no good way to protect themselves. Consider lining up a good Hurl if
your opponent has allowed you one, or even using Spectres to set up little
pockets where you can charge into 3-4 enemies at once. Be sure to get your
opponent’s agreement with your positioning in the movement phase though:
nothing worse than lining up your Hurl and then getting to combat, only to find
that you’re actually a millimetre off hitting their banner.

The other key consideration when not going into the enemy heavy-hitters
is keeping Gûlavhar safe. In particular, you’re looking to forestall the
worst-case-scenario of a big Striking hero and some friends getting into your
D5 centrepiece and picking you up. So start by looking across the board and
identifying what models can actually threaten Gûlavhar. If they can’t hit F7+,
then they’re not a threat. If they can, but you can reliably neutralise
them with magic (e.g. they’re out of Will, or down to just one and you have
multiple casters ready), then they’re also not a threat. If they can hit F7+
and you can’t reliably neutralise them with magic, then prioritise avoiding
their threat range.

Sometimes it just won’t be possible to both dodge these
threats and get value from Gûlavhar. In that case, be prepared for things to go
wrong. That starts by making sure another hero is within 6” of Gûlavhar to
potentially call the Heroic Move next turn, because Gûlavhar really doesn’t
want to be burning his own Might for Moves if at all possible. It also means
trying to keep his flanks secure with your Orcs and other models. If Gûlavhar
has Might for Heroic Defence and can back away, then he can definitely survive
a couple turns against 1-2 enemy heroes. If he gets Trapped or runs out of
Might, then you better be winning elsewhere because you’re probably losing Gûlavhar.
Let’s step back a moment now, and discuss what happens if
your opponent hasn’t been able to protect their key models. Perhaps they rolled
snakeyes to resist your Compel, or they didn’t think to/couldn’t call the
Strike, or your Spectres successfully peeled open their screens in an
unexpected way. At this point, you now have the choice to either dive in to
pick up their hero, or to play it safe and get value elsewhere. As before, the
choice is determined by the two considerations of value and safety.
For value, you’re ideally looking at how critical the model
is to your opponent’s gameplan. In my game against Nick, Hurin was actually the
key target rather than Elessar, because he was carrying around 6VPs just by
existing. More generally, the key models are generally the ones that can threaten
Gûlavhar, or that are bringing critical buffs to your opponent’s army. If you
get a chance to go into Círdan with Gûlavhar, then that’s almost always going
to be worthwhile to take away his Terror and Fearless bubbles.

Staying safe includes a similar range of considerations as
before, but has the added wrinkle that sometimes the right call is sacrificing Gûlavhar.
If he gets to go in and kill your opponent’s centrepiece model, and then
your opponent has to burn resources on his other heroes to beat down and kill
him, then that’s probably a great trade for you overall. Remember, Gûlavhar is
worth no points to your opponent in 16/18 scenarios. Opponents love to kill
him, but sometimes the sacrifice is worth it to guarantee that things go your
way elsewhere.
Finally, it’s worthwhile considering Hurling for a moment.
Opponents are often terrified that I’m going to lob a model through
their battleline and into their heroes, and will devote lots of resources to
preventing this. I find it surprisingly uncommon for that to actually be the
best call, however, for a number of reasons. First, Hurling into a hero and
dismounting them is great, but the easiest Hurl to prevent. It’s pretty
transparent what you’re doing, and the wrong order of Heroic Combat resolution
can often allow them to get out of the way of the flying model. It often forces
you into dangerous positions as well, which can make it much less worthwhile.
Dismounting a big hero is great, but not if it costs you your centrepiece model.
In saying that, if your opponent doesn’t screen for this well then it can be
the best option, especially against heroes with F7/magic resistance that you
have little hope of actually killing. But generally, you’re better off looking
for a way to get Gûlavhar in to actually kill the model rather than focussing
on dismounting them.

Second, Hurling down the battleline is often way less effective than
people think. For one, if you’re going through a bunch of combats then it will
likely kill more Orcs than enemies, which dramatically reduces the value of the
move. Against a D6 enemy, twice as many Orcs as enemies will die, which is
rarely going to be a trade that works in your favour. That’s particularly true
when you take into account the fact that you could probably have struck
normally and killed 2 enemies, so something like 2 enemies and 1 Orc dead from
the Hurl is actually a step down. It also requires very specific model
placement, which frequently isn’t consistent with your goal of keeping Gûlavhar
safe. In game two from this tournament Evan was able to take out Gûlavhar with Thranduil
because I had put him in position to Hurl down the Elven line. Very much not
worth it. Again, there are exceptions here (all-cavalry armies being the huge
one), but generally Hurling isn’t as good of an idea as it might seem.
Step 4: Repeat steps 2-3 until
either your opponent or Gûlavhar is dead

When to deviate from this plan?
The above steps are how a practiced Gûlavhar player will use
him in 9 games out of 10. But that 10th game does occasionally happen, and it’s important to be able to recognise it.
Firstly, there are moments where Gûlavhar has a more
important strategic role to play than killing enemies/threatening their
leaders. If Gûlavhar is picking up the enemy relic in Retrieval then
skedaddling, that’s a great use of him. If he’s burning their supplies, or
holding a key objective on the final turn, or just killing the models that
would otherwise do that for your opponent, then you’re getting value from him.
This is good advice for any model, but particularly relevant here because Gûlavhar
can fly.
Secondly, sometimes your opponent’s heroes just don’t care about Gûlavhar very much. It doesn’t matter how big of a game you talk, Sauron is not going to be spooked into burning resources to stop Gûlavhar getting into him. Same deal with the Balrog, or with a lot of F7 heroes. Elendil is particularly annoying, as he will chop through your lines while laughing off your magic and daring Gûlavhar to take the chance. Bad times. In those instances, Gulavar becomes a glorified warrior-killer, chowing through as many dudes as he can every turn. I’ve faced both Sauron and the Balrog in recent tournaments (captured here and here), and in each game Gûlavhar went wherever the big scary monster wasn’t and killed everything he touched. It’s very hard to get your full 200 points worth of value from doing this, but do you know what else stops you getting value from Gûlavhar? Getting him punted by the Balrog.

There and back again
If it wasn’t made clear by the previous
three-and-a-half-thousand words, I adore Gûlavhar. He’s one of those rare
models that dominates a game, but without being overpowered. In the hands of an
experienced player he will do amazing things, but misplay him for one turn and
he’s gone. It’s a wild ride, and one I recommend to any player. Just, be sure
to get some practice games in first.

I hope you enjoyed this extremely deep dive into the strategy behind one of MESBG’s most interesting profiles. Until next time, may your Gûlavhar never flub his rolls!
Such a great article - and an excellent review! I think having glass cannon heroes in MESBG is great, since they give you the satisfaction of being awesome, but also encourages your opponent to try to beat them (since they can go down). Playing with the Balrog is often a very different experience - the lack of Might means your opponent knows they can beat him by just getting a 6 when he doesn't, but even when they do beat him in combat, the D9/10 Wounds is often enough to blunt even the strongest of heroes from dealing any serious damage. Gulavhar is . . . a very different story. :)
ReplyDeleteGlad you enjoyed! I totally agree re glass cannons, it really feels like you've worked for it when they get to do their thing. And your description of playing with the Balrog certainly aligns with my experience, and is part of why I've found it a little frustrating: it feels like the Balrog ends up winning the game or doing next to nothing, and often my play isn't the deciding factor either way. And you're definitely right that its near-invulnerability certainly makes trying to take it out a miserable experience. Whereas a nice tasty D5 monster with no Fate feels so much more tempting!
Delete