
Hello again! I’m back after a long hiatus with another 40k battle report, this time using the newly-released rules for 10th edition. I wrote a (comparatively) brief text post on Reddit for my first game, which you can find here, but unfortunately my Aeldari games haven’t really lasted long enough to make good battle reports. Turns out they’re pretty strong, who would have thought?
In any case, my first proper battle report sees me leading
the Imperial Knights against Matt’s Necrons. Both of these armies have seen
some hype in the initial weeks of the edition, and hopefully this game will
showcase what they can do.
One quick note before we start: it's the start of a new edition, so there will almost certainly be a number of rules errors in this game. In fact, just as I'm typing this I've discovered that we played Reanimation Protocols wrong in a significant way (see the Day 1 FAQ). So, please, be kind to all the content creators out there for the inevitable errors. But in any case, read on for an epic clash of robots and much larger robots!
Imperial Knights
Crusader with gatling, battle cannon, 2 stubbers, stormspear
rockets and Mythic Hero 440
Canis Rex 405
4 Armiger Warglaives
560
3 Armiger Helverins
435
Vindicare Assassin
80
2*5 Exaction Squads
70
1990 points

This list is a classic 2/7 Knights list of old, now updated
to take advantage of the ease with which Imperial Agents can be allied in (and
the bargain prices on the big Knights to fit them!). I’ve been absolutely
loving the Crusader since it was first revealed, and at 415 it puts out a
frankly sickening amount of damage. It also buffs two of my Helverins to hit on
2s, which makes them extremely reliable at range. Canis Rex is in as well
because he’s substantially cheaper than the Valiant I was trying out and
he gives me some real combat punch to scare people out of the midboard. Plus,
he gets free strats every turn (not battle round, interestingly) which is great
for a CP-starved faction like Knights. The Exaction squads are for actions and
holding points, while the Vindicare is there to threaten enemy characters and
maybe sneak me into Honoured by killing the enemy leader.
Necrons
Overlord with reanimation orb 85
Technomancer with cloak
60
Chronomancer 50
Plasmancer 55
Reanimator 95
Lokhust Lord with Veil of Darkness 105
3*2 Cryptothralls
120
Hexmark Destroyer 70
10 Immortals with Tesla
140
6 Lokhust Destroyers
180
1 Lokhust Destroyer
30
2*3 Heavy Destroyers with gauss 270
1 Heavy Destroyer with gauss 45
2*20 Necron Warriors with reapers 480
Doom Scythe 225
2020 points (kind of…)

It was only after the game that we realised that Matt’s list
was actually 20 points over. However, this was somewhat mitigated by the fact
that we discovered at almost exactly the same moment when we realised that Matt
had totally forgotten to bring the Doom Scythe in and had left it in reserve all
game long! Clearly this was the Silent King punishing him for his dishonourable
tallying of points! So in the end Matt played the game 195 points down and we
didn’t get to see how the big death ray went against my Knights.
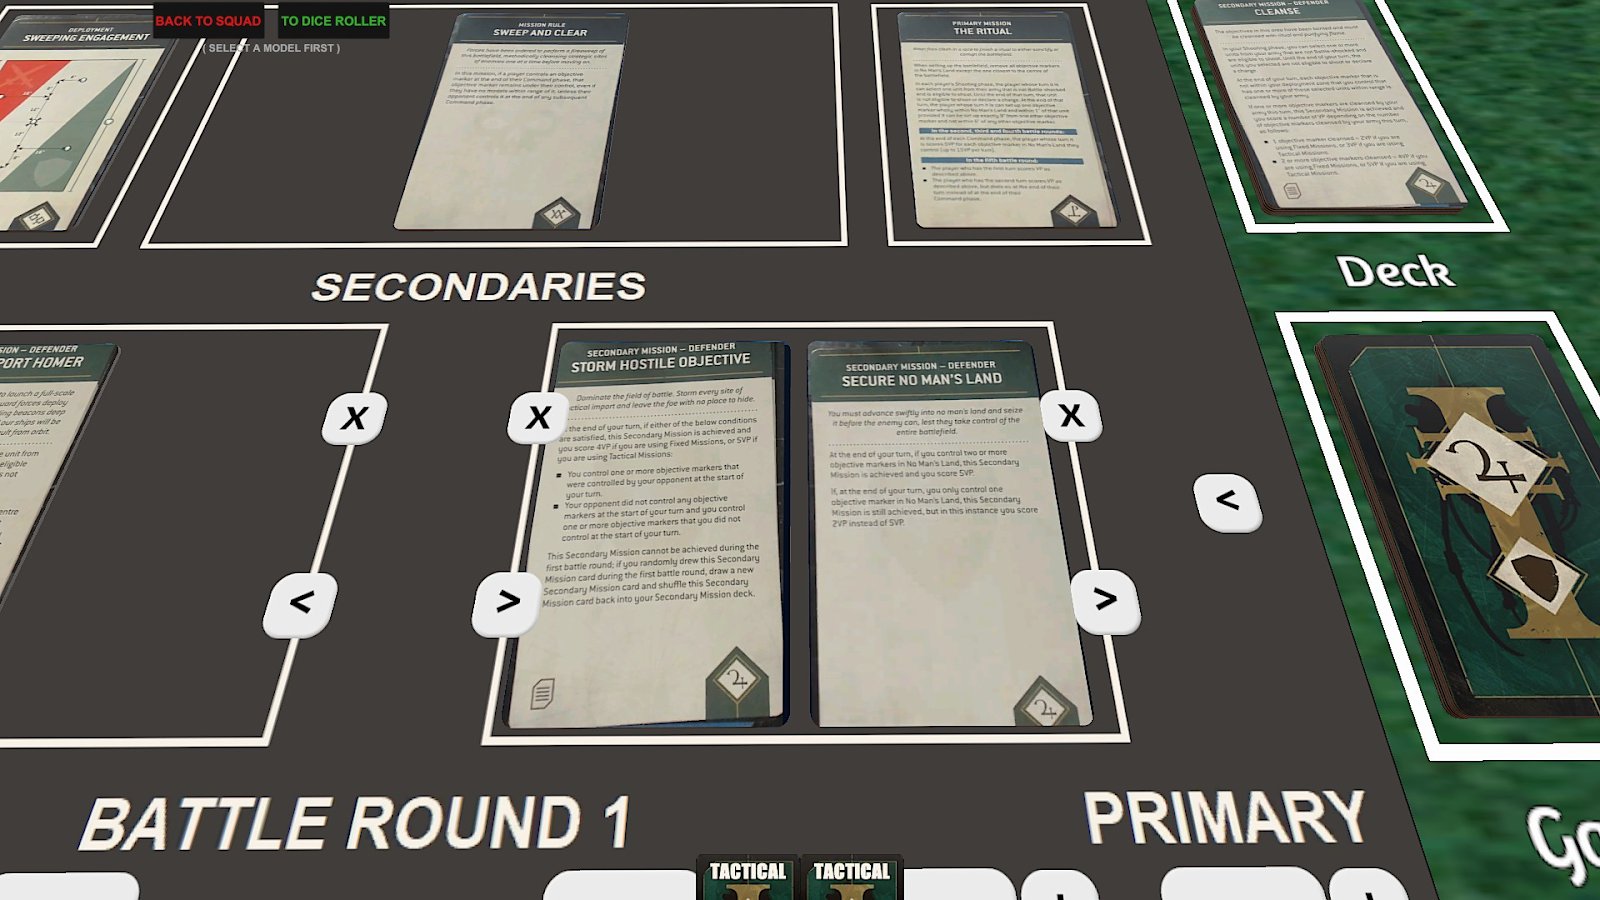
Mission, Deployment and Secondaries
We drew Sweeping Engagement, Sweep and Clear and The Ritual for
the scenario. Sweep and Clear would probably help me a little bit, but was
largely irrelevant in the context of The Ritual and the heavy Primary focus of
both of our armies. Needing to take actions to create objectives would force
real choices for both of our lists, and certainly made me feel good about the
choice to bring some Agents along.
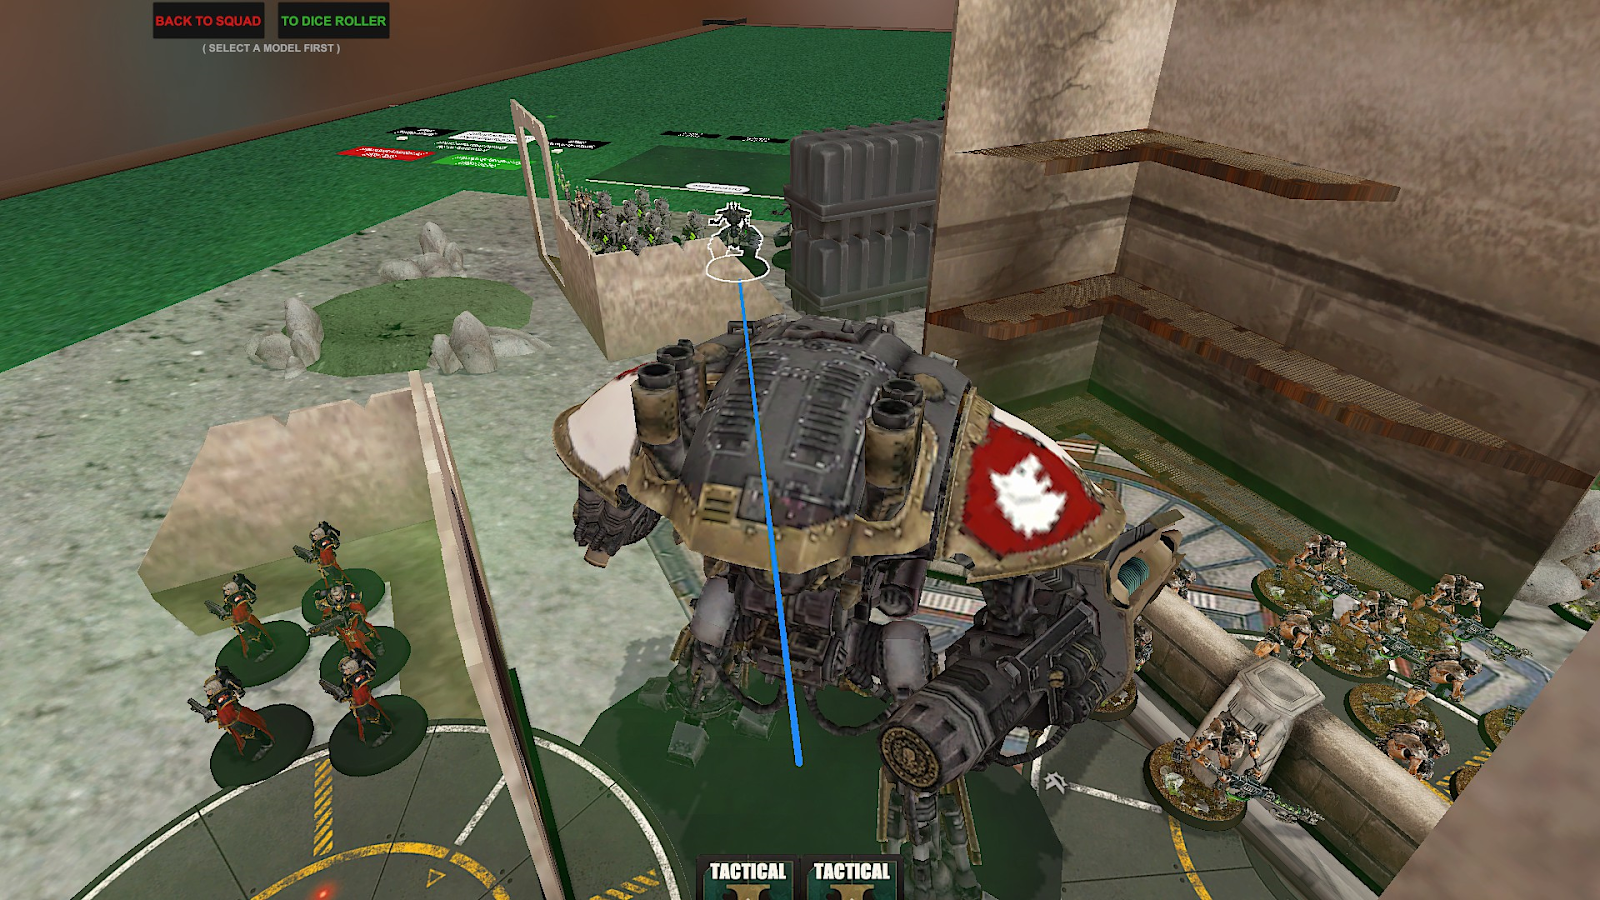
I deployed quite aggressively, ready to rush forward and do some early damage. I figured that the Heavy Destroyers would likely get one big turn of shooting at me regardless, so I may as well just wear it on the chin for the sake of better positioning.

Matt did his best to hide his shooting
pieces from my shooting, with the Warriors out in the open in order to flex
their near-invulnerability to chip damage. The Hexmark, one Lokhust Destroyer
and one unit of Cryptothralls went into reserve (alongside the Doom Scythe,
rip).

For Secondaries, we both picked Tactical objectives. Matt
contemplated taking Fixed objectives to take advantage of Bring it Down, but
ultimately couldn’t make any of the second options work. Something like Behind
Enemy Lines or Teleport Homers was likely to force commitments every turn that
the Necrons wouldn’t necessarily want to make.
One note on FAQs here: we decided to play with the ‘reroll
all 1’s to hit and wound’ interpretation of the Lay Low the Tyrants. I don’t
think that’s the effect of the current English rules as written, but given that
all the non-English translations of this rule state that all 1’s can be
rerolled, we think it’s just a typo from GW. Isn’t the start of a new edition
fun?

Both of us wanted to go first here, as an Imperial first
turn would probably allow me to get at least some guns onto the critical Heavy
Destroyers.
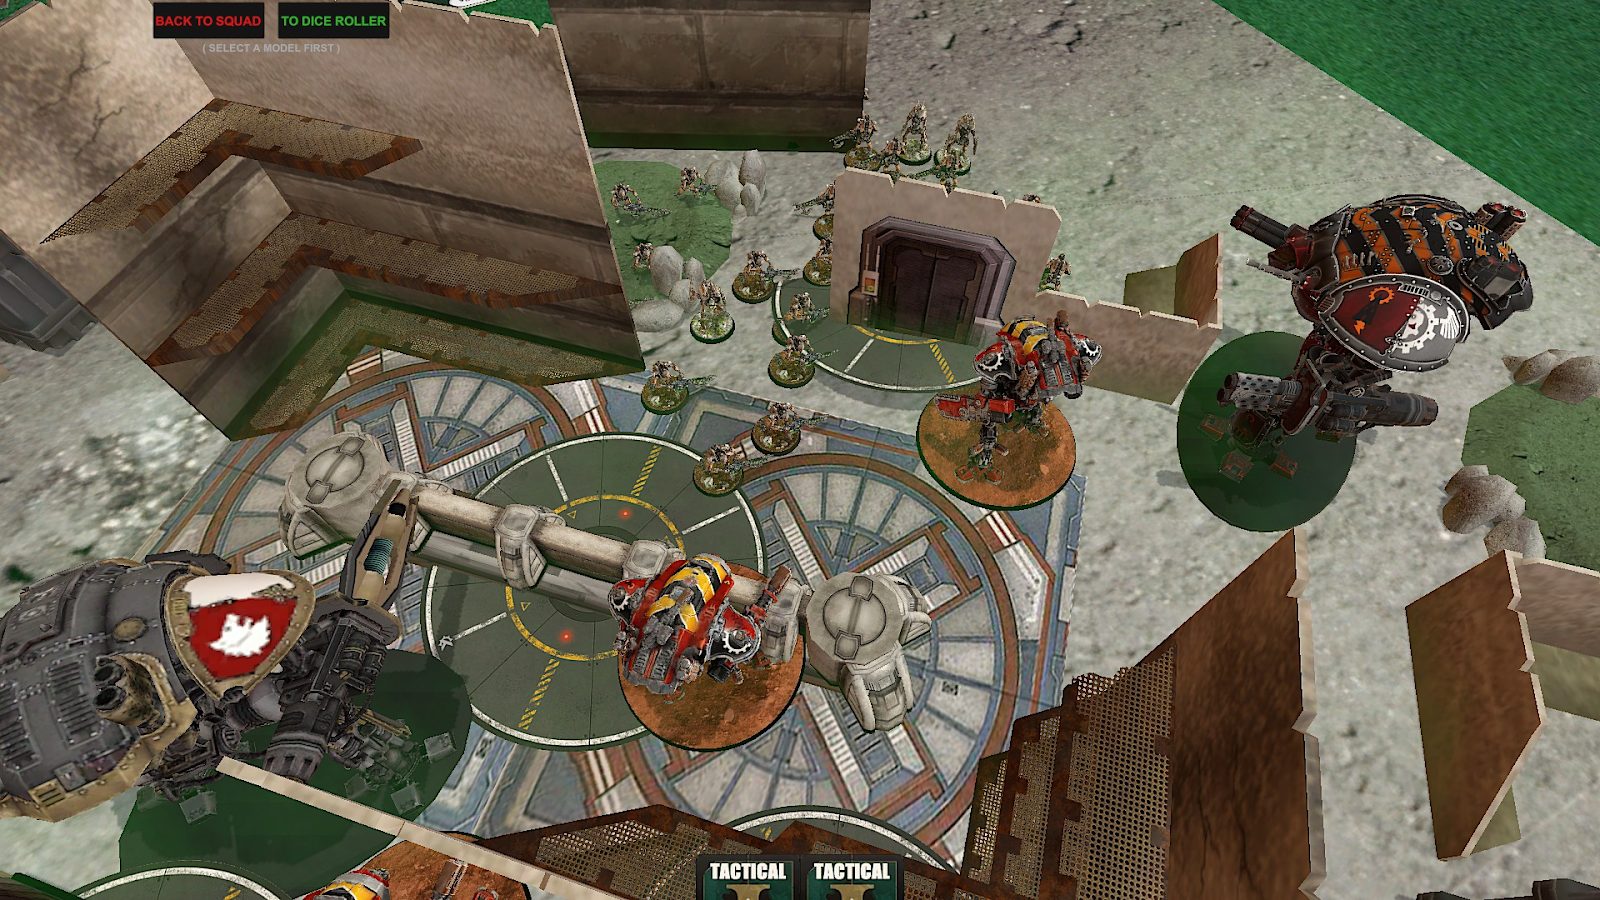
Imperial Knights Turn 1

Drawing Area Denial and Investigate Signals, I had a pretty
clear plan for the first turn: send some Armigers into my corners and run
everything else forward while creating my first objective in a safe spot.
Canis, two Warglaives and the Crusader pushed forward into the centre, while
Helverins went up both flanks to start harassing the Necrons at range. An
Exaction squad placed my first objective, while one Armiger on each flank Investigated
Signals for 4VPs.


In the shooting phase, my Helverins largely bounced, with two Immortals dying on the left and the Heavy Destroyers laughing off the hail of auto fire they faced. The big Knights, however, did much better. Canis rolled a mere 1 shot with his big gun, but got to spend a CP for free to reroll the shot count. After Sustained Hits he ended up with 6 hits and massacred 5 Lokhust Destroyers, gutting one of Matt’s key shooting units before it got to move.

The
Crusader briefly contemplated splitting its shots, before deciding to fire
everything into the unit of Heavy Destroyers it could see and absolutely
evaporating them. Those big guns hurt!

With some good damage done and both Secondaries
accomplished, it was a solid first turn.
Necrons Turn 1

Matt drew No Prisoners and Behind Enemy Lines, the latter of which was nearly impossible for him to complete. The models I’d spread out to Investigate Signals last turn meant that there weren’t even any good gaps in my backfield for a suicide Veil from the Lokhusts.
In any case, the Necron turn was relatively simple. The Lokusts chipped a couple of damage onto Canis through his free Rotate Ion Shields, while the Heavy Destroyers failed to bring down either of the Helverins on my right flank.

In the centre, the Technomancer Warriors placed the first Necron
objective, while the Chronomancer Warriors chipped 4 wounds off the central
Warglaive before using their free 5” move to swarm onto the objective and flip
it. This was going to be a slog.

At the end of his turn, Matt discarded Behind Enemy Lines, but held onto No Prisoners in the hope that he could pick up a couple of Armigers next turn.
Imperial Knights Turn 2

My cards this turn were very mixed, with Extend Battle Lines
being an automatic success but Assassination being a challenge. I’d probably
need to clear whole squad of Warriors in order to achieve it, which would
probably be quite a challenge.
That more or less dictated my plan for the turn: the right Helverins
were going to target the Heavy Destroyers, while basically everything else was
going to go into the central Warriors.

First, the boring stuff: the second Exactor squad placed
another objective on my side of the midboard, while the Vindicare ruthlessly
overkilled a random Necron Warrior after deciding he couldn’t get an angle on
any of the characters. Canis fired back at the two Lokhust Destroyers who had
targeted him last turn and massacred them to leave the Destroyer Lord alone and
out of LoS, and the two Helverins cleared out the large squad of Heavy
Destroyers. That BS2+ from the Crusader was already showing its value!
In the middle here, Matt also used Rapid Ingress to drop his
Hexmark down near the back end of the Warriors. This meant that he could shoot
back at me every time I targeted that unit! His S6 Ap-1 D1 shots wouldn’t do a
heap to my Knights, but it was an annoying clip of damage to be facing on my
own turn.
Finally, an absolute torrent of firepower flew at the
central warriors from the Crusader, 1 Helverin and all 4 Warglaives. After all
the guns had ceased the Warrior blob was down to 7 Warriors and no Cryptothralls
and I was feeling pretty good about the kill, only for Matt to play Protocol of
the Undying Legions and restore 7 of them to (un-)life. We misplayed this
somewhat and allowed the Cryptothralls to be brought back for only a single
wound each, but in any case it was a nearly backbreaking amount of model
recovery.
So it was down to combat and Canis Rex to finish the job.
Charging forward, he used Tank Shock to get 6 mortals and down one Cryptothrall,
before using Thunderstomp to gain Devastating Wounds on all his attacks.
Scoring a whopping 14 hits off 10 attacks, I managed to get 3 sixes to wound
and wipe the unit almost exactly with the resulting mortals. It was a near
thing, but the destruction of one of Matt’s two big bricks let me reclaim the
centre objective and scored me Assassinate.

Nearby, one of my other Armiger killed a single Cryptothrall
in combat, which would instantly come back to life at the start of the next command
phase. Ah well.
Necron Turn 2

With No Prisoners left over from last turn, Matt drew Investigate Signals. This was quite a solid draw, as by bringing in his reserves in the corners and Veiling his Lokhust Lord into my back corner, he could pick up an easy 6 points.
Edit: I’ve just realised that the new wording on Veil actually wouldn’t allow this. Matt would have had to declare that he was using the Veil at the end of my turn (i.e. before he knew what his Secondaries were, and thus before he knew that he would want to Veil that turn). Ah well, you live and you learn.

In the centre, the surviving Warrior blob stayed locked in combat with
the the Warglaives it was ineffectually swatting at, using Consolidation moves
and Reanimation to box in Canis and prevent him getting to the new Necron
objective (handily placed by the Hexmark a moment before).

The only other excitement for the turn were the Tesla
Immortals with the Plasmancer, who stepped out with their double-exploding 5’s
and 6’s and targeted an Armiger, doing a mere 4 wounds after FNP saves. Turns out
this edition is really harsh for small arms fire against vehicles, no
matter how many shots it has.
At the end of his turn, Matt scored 6 points for Investigate
Signals, but finally gave up on No Prisoners and traded it in. With all his
antitank guns dead, actually killing anything would be extremely challenging.
However, the slipperiness and resilience of the Necrons meant they couldn’t quite
be counted out.
Imperial Knights Turn 3

I drew Overwhelming Force and Cleanse, forcing me to kill
units on objectives and complete actions on midfield objectives. Both quite
doable for at least some points.
My left flank was fairly simple, with one Warglaive dropping back to shoot/charge the Lokhust Lord in my backfield, while the Helverin and another Warglaive moving to do the same to the Tesla Immortals and lone Destroyer.

The centre-right was a bit more complicated though. I could either throw
everything into the Warriors and hope to repeat last turn’s success, or I could
try and pick up the rest of Matt’s units to try and limit his ability to score Secondaries. In the end I opted for the latter, as the odds of a bounce on the
Warrior unit were a bit too high to justify letting Matt’s squirrelly small
units live.

So the shooting began with Canis obliterating the Hexmark
Destroyer (who had chipped wounds off several Knights though his sneaky return
fire and free Overwatch), before the two Helverins gunned down the Reanimator
and one Cryptothrall. In the end I had to devote the Crusader’s gatling cannon
to finishing them off, although its slew of other weapons did manage to kill
about 9 Warriors/Cryptothralls from the surviving blob. Naturally, almost all
of them promptly stood back up again as Matt played Protocol of the Undying
Legions. Urgh.

Over on the other flank, the Vindicare completely missed the
Plasmancer in the Immortals unit, although the unit was otherwise taken down to
only a single model by the Warglaive’s shooting and combat. Unfortunately,
Protocol of the Undying Legions again came in clutch to allow 4 of them to come
back, wrapping around my Warglaive to reach towards the central objectives. Oh
no.


Similar frustrations occurred in my back-left corner, where the Warglaive badly wounded the Lokhust Lord before charging in and Tank Shocking him to death. Unfortunately, ‘death’ is a very temporary state for the Necrons, and the Protocol of the Eternal Guardian let the Lord stand back up, now outside my engagement range. This army is ridiculous.

At least the Helverin
succeeded in gunning down the lone Destroyer. They can’t get back up if you
kill the whole unit!
Finally, Canis Rex went smashing into the Warrior blob,
killing around a dozen between his free Tank Shock and sweep attacks (with
Thunderstomp played for devastating wounds). Except because I’d activated the
Warglaive first over on the left flank, Matt could now use Protocol of the
Undying Guardian again on this unit to bring back another 5 models,
snaking around Canis as he flailed ineffectually at them.

This turn was frustrating, but Matt was now down to just a
couple of units and their attached leaders, plus the Lokhust Lord. I’d also managed
to score another 9 on Secondaries and was wracking up Primary, so if I could
keep playing whack-a-mole with his bricks then I should be able to edge him
out.
Necrons Turn 3

Matt’s mixed luck with Secondaries continued, as he drew
Assassination and Teleport Homers. Either could be possible here, but the
Lokhust Lord was the only one in position to do either (either by killing my
Vindicare or Deploying the Homer in my backfield) and would have to choose
between them.
However, the sneakiness of his bricks continued to infuriate me, with the Immortals reanimating another two models before falling back onto one of the objectives I’d placed, held only lightly by an Exaction squad because I hadn’t though he was in position to threaten in. This was a noticeable error from me, as there was no reason not to have all 5 of them on the point.

Similarly, in the centre the Warriors used reanimation and a
fall-back move to reclaim one of their objectives from Canis, as well as to
flip the centre objective back from me. These Warriors are nightmares!

Finally, Matt made the call to charge my Vindicare with the
Lokhust Lord, going for Assassinate. It was a big call to go for the 7” charge
instead of the guaranteed points for Teleport Homers, but Matt reckoned that he
needed the bigger swing that taking out one of my backfield pieces could give
him. In any case, the Lord made his charge but flopped his attacks, and a lucky
invulnerable save from the Assassin meant she could slink away to safety on the
next turn and Matt scored neither of his Secondaries.

Imperial Knights Turn 4
My Secondaries this turn were excellent, with both
completing almost automatically on the current board state. With that in mind,
I went all in on damage this turn, throwing everything into finishing off Matt’s
last few units.
Over on my backfield objective, the Vindicare fell back to
allow the Warglaive another attack run. Thermal Spear blazing, it evaporated
the Lokhust Lord.

Nearby, the Immortals were targeted by one Helverin, three
Warglaives and one Exaction squad, and were finally whittled down to just two
models remaining. One Warglaive went in to finish the job, killing both Immortals
with Tank Shock and then chopping the Plasmancer down in combat. That flank was
secure!

Finally, an absolute hurricane of shots came at the last Warrior brick. Both Helverins, a Warglaive and both big Knights fired everything into it, and finally the damage began to stick.

This was cemented when Matt opted not to use Protocol of the Undying Legion after Canis shot. His logic was that he still had about 13 models remaining in the unit, and he’d rather use the strat after the Crusader fired to save me getting extra shots from Blast on my battlecannon. The logic made some amount of sense, but the Crusader (who had remained stationary to pick up Sustained Hits for the turn) promptly made him regret it by wiping the whole unit, including both characters!

Annoyed, Matt stood his Overlord back up again with Protocol of the
Eternal Guardian, but he was facing down two Helverins and was removed again
immediately after.

With that, the Necrons were out of models and it was an
Imperial Knights win! Playing out the last turn of Secondaries, I would have
drawn Behind Enemy Lines and Capture Enemy Outpost, for a final score of 95:26!

Post-Game Analysis
On paper, this game was a brutal, one-sided stomp. I rapidly
destroyed Matt’s best anti-tank units (aside from the one that he left in
reserve and we forgot about!), didn’t lose a single unit and tabled the Necrons while
outscoring Matt by a lot. Ordinarily I wouldn’t bother to write up a game like
this, because it’s not that interesting (see my note at the start about not
bothering to do a battle report with my two Aeldari games so far).
However, the reason I wanted to write up this game was because
I think it really highlights a few interesting things about the two factions
involved.
First, and most obviously from the scoreline, Imperial
Knights are pretty cranked. Being able to put down that many units that are
nearly-invulnerable to small arms is a huge advantage, and means that an
opponent needs to have specific anti-tank tools to threaten you at all. Couple
that with the truly insane damage output of some of their units (particularly the
Crusader, which was killing multiple units a turn even before I remembered it
has a scary rocket pod on the top!), and you can often alpha-strike out the
only units that can reliably hurt you back. There are ways to play around it
(Matt should probably have put all his Destroyers in reserve and gone for a
hard beta-strike, for example), but it’s an intimidating combination. Until it
runs into Aeldari, of course, but that’s true for most everyone.

Interestingly, Towering wasn’t really an issue here in any huge
way. It helped me get good shots into Matt’s castle on Turn 1, then did very
little else for the rest of the game. I could have gotten those same shots from
the Crusader by just deploying further to my right flank and then moving in to
the centre on the next turn instead of starting centrally and moving right, so not a huge difference there. Same thing for Canis Rex shooting at the Destroyers on the first turn, where he could have actually lined up a shot without Towering anyway (they'd hidden from the Crusader). At least on tables with some tall Ls ,
Towering has generally felt more ‘neat’ than ‘oppressive’ in my games of 10th
so far. If anything, the things that have felt more oppressive have been the
defensive statlines on the big Knights and Armigers, rather than precisely
where they could shoot.

Less dramatically, the Necrons actually felt like they had a
huge amount of potential here. Watching those Immortals and especially the
Warriors just stand back up after I’d finished shooting them — before snaking
all over the board to ruin my Primary — was pretty dispiriting. I could
definitely see an army based around triple Warrior bricks being extremely
scary. After all, I was going into this with the firepower of a Knight army,
and that firepower stayed basically fully active all game. What would something
like a Tyranid or Drukhari build do, especially once it started losing assets
to the return fire? Our misplaying of the placement of the Reanimated models did make a noticeable difference for the Primary stealing, but even the raw durability was intense.

As far as the specific lists run, I quite liked mine. Canis
Wrecks, as ever, and the Crusader is easily my favourite of the big Knights. I’m
not really enjoying the Vindicare so far, as that lone Warrior is literally the
only thing he’s killed in three games. Still, he does force my opponents to
keep characters behind walls, so he probably retains a place in the list for
the moment. The Exaction squads are just amazing though, and I’ll keep running
them forever. 35-point units with a 4+ save and a 5+ FNP, what a bargain! Don’t
mention that if I’d had OC2 Voidsmen instead I would have held one extra
objective on Turn 4.

For the Necron list, the big bricks were insane, but the
rest of the army only felt so-so. The Heavy Destroyers feel somewhat necessary
to deal with big stuff, but they evaporate so quickly to return fire that it’s
hard to be excited about them. The answer may be to run the Seraptek Heavy Construct
and rely on it for anti-tank, but hopefully there are other options available.
Finally, I thought the Immortals were a little unexciting. It was obviously a
tricky matchup for them, but I’m just not sure AP0 D1 is a profile you want to
be running much this edition, no matter how many Sustained Hits you get.
How am I liking 10th?
Honestly, I’m having a blast. The armies are as questionably-balanced
as they were last time we had Index-hammer, but the changes to the core rules
and mission packs feel amazing. I love that big stompy robots and tanks feel
like you need specialised weaponry to deal with them, rather than just melting
everything with a hail of efficient medium-strength weapons. And my initial misgivings
about missions being Maelstrom of War have been well and truly dispelled. Needing
to adapt each turn to deal with the sudden need to assassinate an enemy leader
or get models into the corner is extremely fun, and makes missions feel a lot
less predictable and same-y than in late 9th. Complexity is
genuinely down, and even having a heap of generic strats that you turn to
regularly is a nice change from the piles of faction-specific sneaky ploys we’re
used to.

Obviously, as mentioned, the faction balance is a lot less
fine-tuned than it was this time 2 months ago. That is to be expected in any
big shift of this magnitude, although I was perhaps expecting something
Knight-level overtuned rather than Aeldari-level busted.
I do have some confidence that James will fix some of the more egregious highs and lows in time, and at least we have the unpredictability of the new-edition meta to keep things interesting until then.
Thanks for reading, and I hope you enjoyed!
Comments
Post a Comment