It’s nearly March already, and it’s time to start the year’s tournament circuit. To that end, I attended The Fates Return on Saturday (25/02/23, life really got away from me last week), a 500-point tournament with 4 rounds and some quirky scenario rules. It was organised by David Thompson again at the Irresistible Force store in Logan, and I was looking forward to testing out my slightly unusual list to see what it could do.

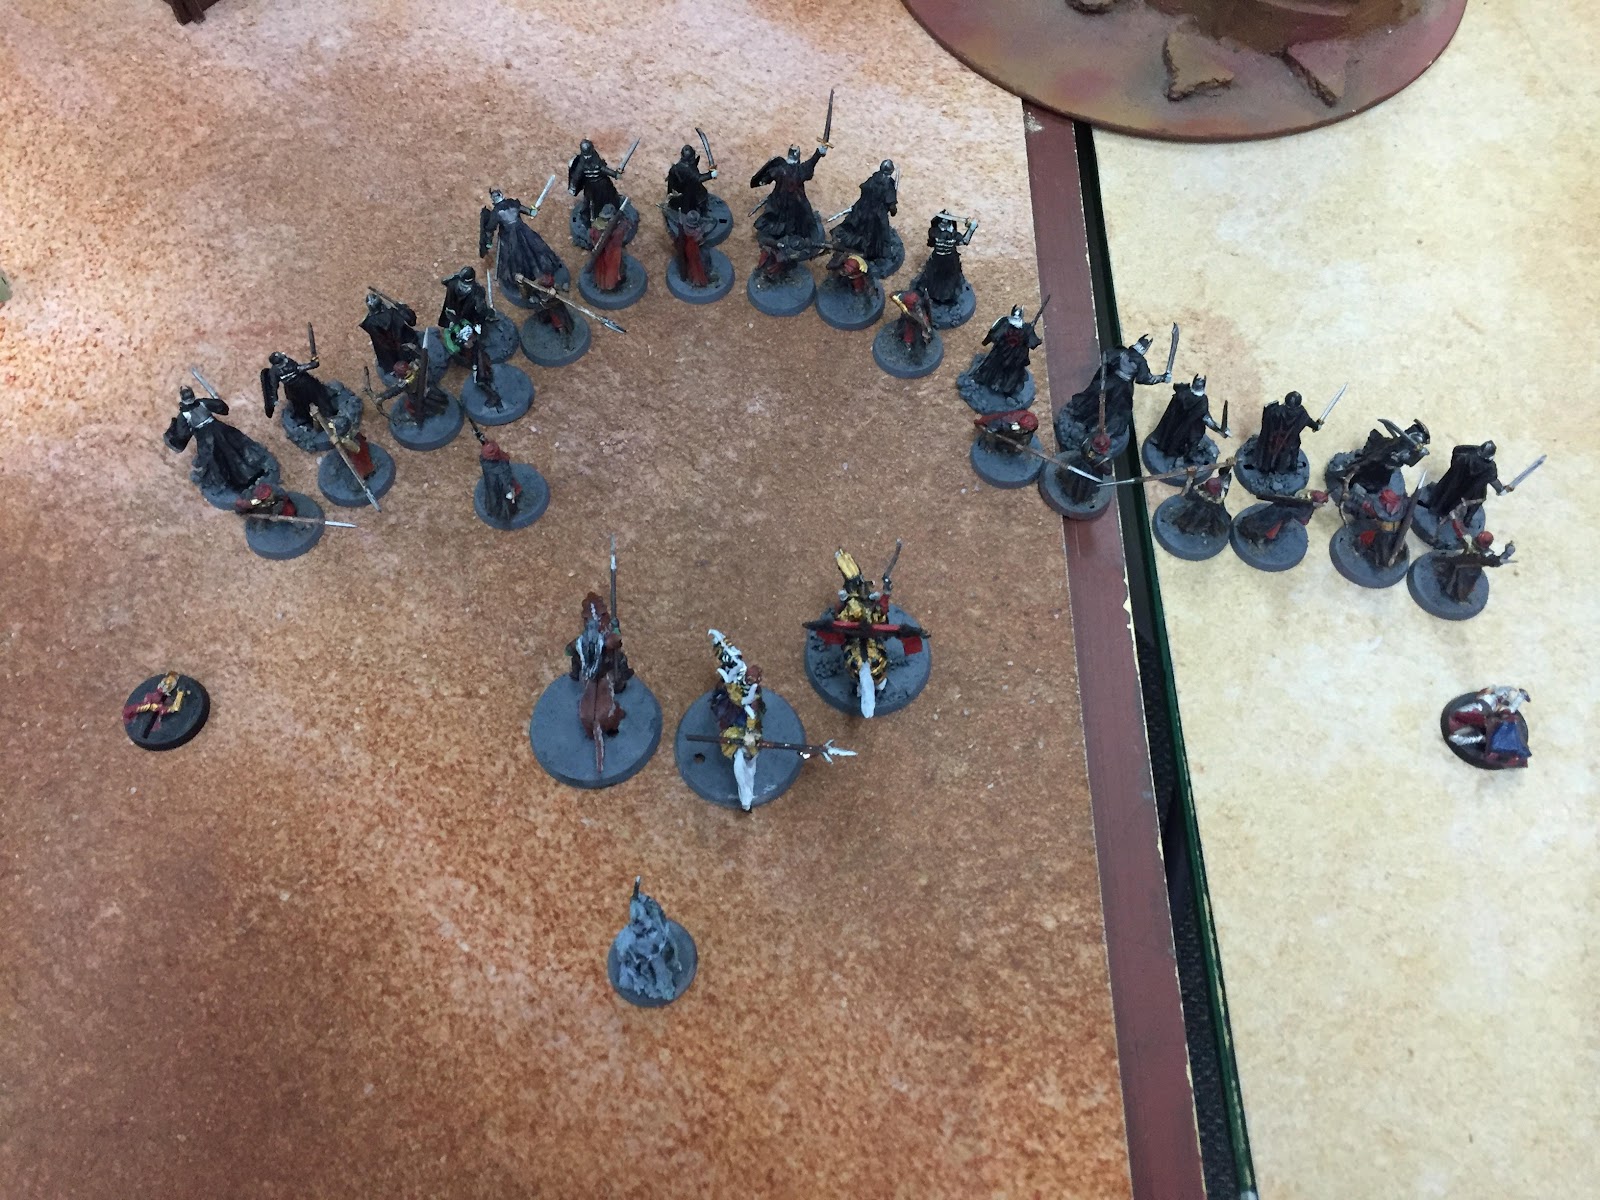
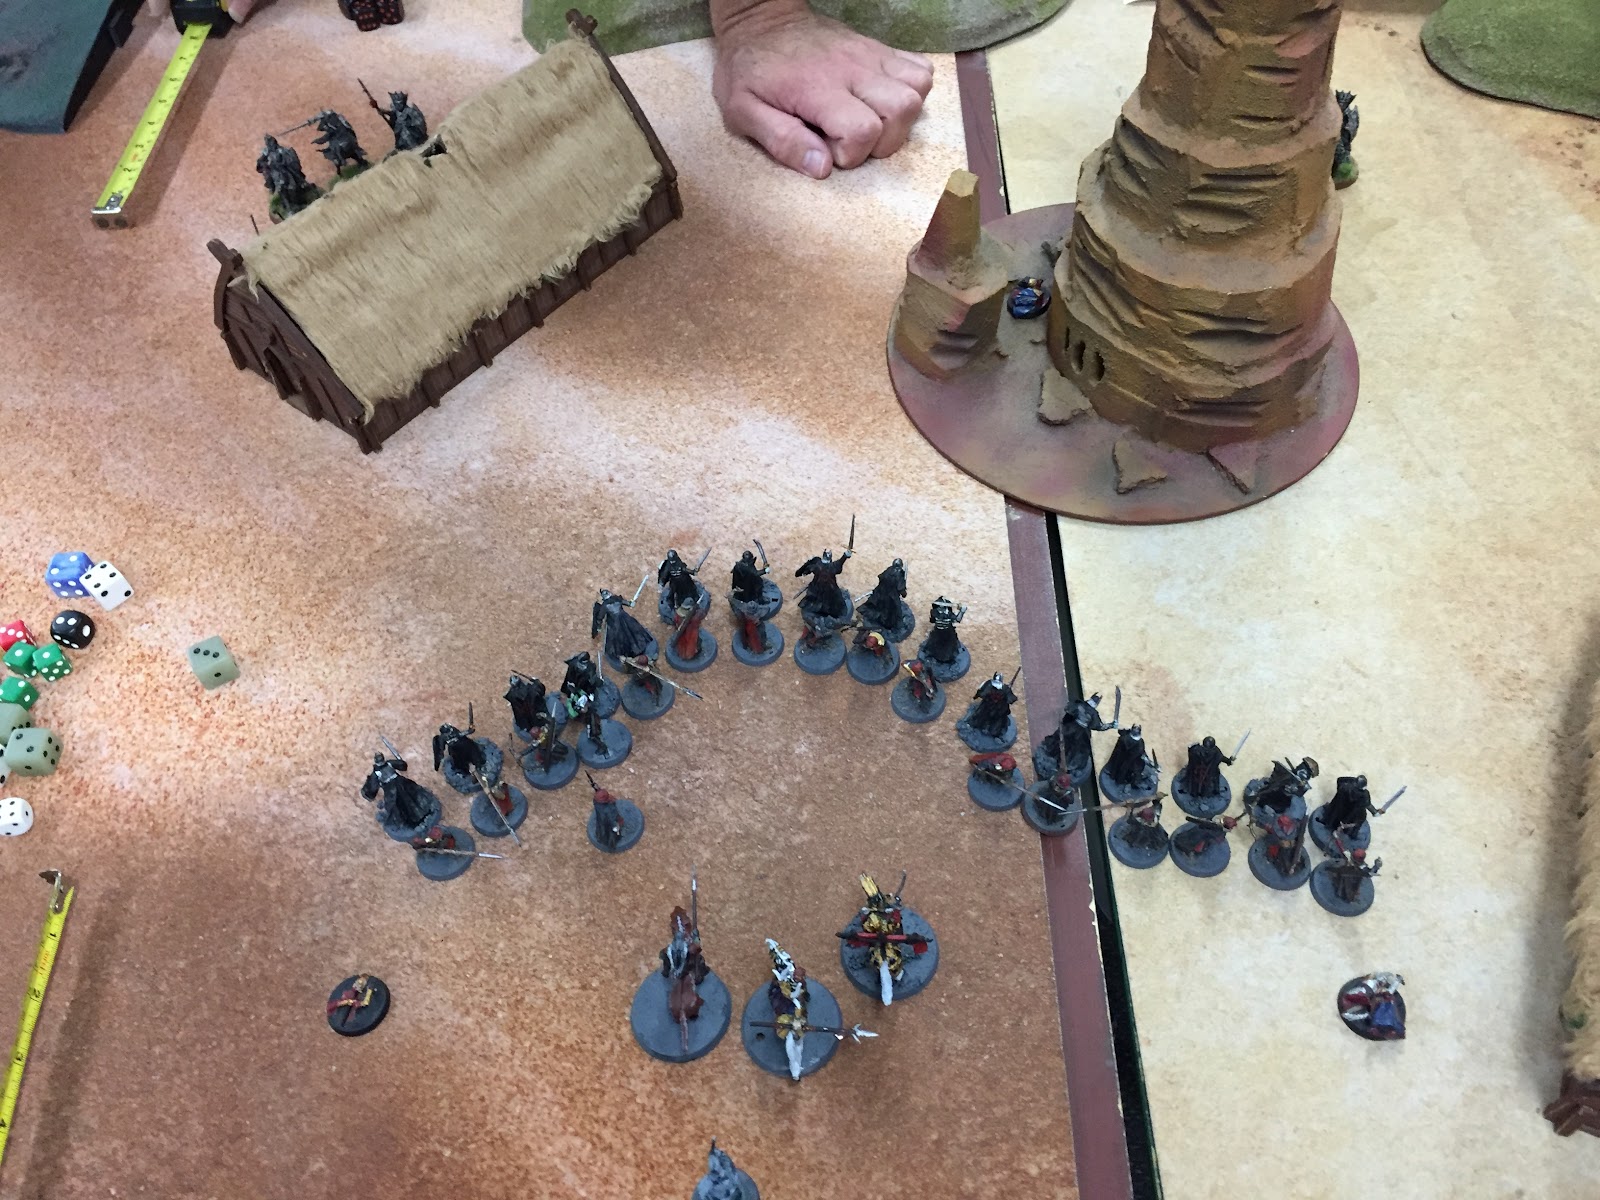
Warriors of Gondor clash with the misguided Men of the South
Tournament Format
This tournament was going to have a tight day of gaming, with 4 x 1.5 hour games at 500 points, scenarios chosen using the veto system. Each scenario had an interesting special rule which David had obviously put a lot of time into crafting, ranging from an extra Fate point in Round 1 to a free banner reroll on one hero in Round 2 and various free rerolls in Rounds 3 and 4. There were also ‘secret’ objectives for each round, which I won’t mention much because (spoiler alert) I was never in a position where any of them were realistically viable for me. That was somewhat unfortunate, as they gave 5 tournament points each, which meant they collectively were worth as much as an additional major win. Again, at the risk of spoiling the report, this became pretty relevant later.
Listbuilding

The army assembled for war. Yes, it is a lot of models for 500 points
From the moment I knew the tournament would be at 500 points I knew the rough outline of the list I would bring. I’d recently converted up a ton of Black Númenóreans, and was dying to put them on the field. The list was inspired by one listed on I Came, I Saw ages back, which combined a budget Witch King and a mounted Suladân leading Black Númenóreans backed by Haradrim. I thought the list had a lot of potential and made only some fairly minor tweaks, although as I’ll discuss below there was one quite controversial aspect of the list that I went back and forth on a lot.
My list was as follows:
Warband 1:
Witch King 3/10/1 (no Crown, Army Leader)
16 Black Númenóreans
Tracker
Warg Rider with throwing spear
Warband 2:
Suladân on armoured horse
Serpent Rider
16 Haradrim with 16 spears, 9 bows
500 points, 37 models, 10 bows, 6 Might
This list aims to have answers to just about everything. At 500 points 37 models is a lot, especially when the whole frontline is D6 and F4. That means that against elite armies like Elves I’m generally going to be outnumbering them by at least 12 models or so, which is absolutely massive. On the flipside, against lists that outnumber me then chances are my Terror plus Harbinger will be devastating, and combine with the F4/D6/big banner to give me a sizeable edge in the initial engagements. The list has the numbers, D6 and March to cross the field against shooting lists, and the shooting to do solid damage to armies with less bows. And it’s got the numbers and magic to blunt a big enemy hero, while Suladân can be devastating against lists that can’t match him. It aims for a ‘middle road’ approach that should give me a shot in basically every matchup. So if I lose, I can’t blame the list!
Of course, there is one absolutely gaping absence: the Crown of Morgul. And naturally enough, it was on this point that I did the most soul-searching by a long way.
The analysis of bringing the Crown or leaving it at home obviously started from the point that it is amazing value, and massively improves the Witch King’s capabilities. He becomes way better at both casting and combat for a measly 25 points, and that is a huge amount of value to be leaving at home.

The difficulty is that the Crown isn’t really 25 points, it’s actually about 50. Because in order to take advantage of that improved combat ability, you really need at least a horse, and definitely one extra Fate, and almost certainly at least 2 more Will. Those are all great value purchases, but at that point you’re going down 7 models in order to beef up the Witch King. And while he would be dramatically more powerful, he’d also need to do vastly more in order to make up for the numbers disparity (which likely means putting him in more dangerous situations and risking those Army Leader VPs). On the other hand, if I just went for the Crown with no additional upgrades then I’m still unlikely to risk him in combat with any regularity. I’d be getting some noticeably better casting, but it seemed hard to justify that at the cost of 3 models. This conclusion was further reinforced by the knowledge that Rounds 3 and 4 would give both sides free rerolls anyway, which both decreases the need for the Crown and increases my opponent’s capacity to Resist spells.
I don’t think either variant of this list (adding the Crown and dropping 3 models or making the Witch King a proper combatant and dropping 7) is a bad list. But at 500 points I’m always inclined to take numbers over toys, so I opted for no Crown. Plus, it would make for a good excuse if I got hammered in every game.
The rough theme of the list is that the Black Númenóreans and Witch King are actually Dîmlokhi conjured by Suladân using the power of Mardat’s sword, backing up his force of Haradrim like the Army of the Dead fought for Aragorn. The two Orcs don’t really fit this theme, they just helped fill in the points I had left over.
Round 1 against Justin’s Rangers, 8:1

Halbarad's warband getting ready to pepper me with arrows
The first game of the tournament saw me up against Justin’s Rangers, with Arathorn, Halbarad (without the banner) and 14 Dunedain. For those keeping track at home, that’s 20 Might and 16 bows, which was a pretty nightmarish looking list. For better and worse we were playing on Pool 1, which is the Maelstrom one. I believe Justin vetoed Command the Battlefield, leaving me free to pick Hold Ground to hopefully leverage my superior numbers into VPs.
The first few turns did not go well, with Suladân opting not to spend a Might point and getting placed in an awkward bottleneck between the board edge and a terrain piece, while the Witch King rolled two 1’s and decided to chill for the first two turns. Justin came in and killed 3 Haradrim with shooting, then another couple after I started rushing towards him on the next turn. Finally the Witch King came in, burning two Might to show up with his Black Númenóreans between the Haradrim and Arathorn’s warband, although I lost 2-3 more models to shooting anyway. On the next turn Justin called a Heroic Move and retreated out of their charge range, peppering me with yet more shooting from his other warband. The Witch King did attempt to Compel Arathorn out into the open where Suladân could ride him down, but Justin wisely burned 2 Will and 2 Might to Resist.

On the next turn Justin counterattacked into my Númenóreans and began ripping them to pieces, killing 5 Black Númenóreans in a single fight phase while the remainder of my force began to move towards the centre (currently occupied by Halbarad’s warband). The casualties were rapidly mounting, and I think I hit at least 15 losses before even a single Ranger fell.

I also made a mistake here, flinging the Warg Rider into Halbarad’s warband to stop them shooting for a turn. It worked, but also let him Heroic Combat the whole warband off it and smash into my advancing lines with brutal effectiveness. Not exactly a move I couldn’t have predicted, but I think I was getting a bit rattled by the power of those bows.

On the next turn I finally began to get my own back a little, using a Heroic Move catapult with Suladân and a few warriors to reduce Justin’s central warband to only 3 models. Unfortunately one of those models was Halbarad, who managed to Heroic Combat through my lines after killing a Serpent Rider and Haradrim in a single combat. He slammed into the Witch King, but thankfully failed to score a wound in combat. The Witch King had spent his Fate earlier in the turn to survive a volley of arrows from Arathorn’s warband, so I was grateful not to lose my leader to Halbarad’s assassination attempt.
I was now Broken, and lost the critical Heroic Move-off on the next turn. Both my heroes were tied up, with Halbarad getting into the Witch King again, and several of my surviving warriors headed for the hills. I did manage to get a couple more models into Suladân’s fight and use the resulting Heroic Combat to try and rescue the Witch King, but Halbarad’s Heroic Strike saw him fend off both my heroes at once (although thankfully he failed to capitalise against the Witch King again). However, I’d put myself into a winning position in the middle, if the game just ended. It didn’t. Oh no.
The next few turns are a bit of a blur, as Justin continued to hack down my handful of remaining warriors. Suladân was hitting his stride though and ran down several more Rangers, eventually Breaking Justin back. If the game had ended on the first, second or third turns after Break then I would have had a major win. If it ended on the fourth turn after Break then I believe I would have had a minor win, as the tattered shreds of my army tried to hold the Rangers back from the objective.
Finally, in the fifth turn after I was Broken, my last Black Númenóreans and Haradrim hacked down his last Ranger in the centre. The Witch King managed to win a fight and kill another Dunedain, while Suladân won a roll-off to survive against Halbarad, Arathorn and two Dunedain. Both of our armies were utterly spent, but I had the only models within 6” of the centre. That gave me an 8:1 win, that in no way reflected how brutally Justin had slaughtered my army or how close the game had felt throughout.

MVP: Suladân for killing enough Dunedain to put me back in the game.
Round 2 against Tim’s Mordor, 5:5
This round I was facing Tim’s Mordor in Pool 2, which I think is the least interesting pool in terms of vetoing. He vetoed Capture and Control and I vetoed Breakthrough, but frankly any of these three scenarios would have produced similar outcomes.
Tim had a list that was similar to mine in some respects, with the Witch King and Mouth of Sauron leading a frontline of Black Númenóreans backed by Morannon Orcs, with 4 each of Trackers and Morgul Knights. The key difference in our lists was that his Witch King was 3/16/3 with the Crown and an armoured horse, which meant I had at least 12 more models than he did. I also had a 6” banner while Tim didn’t have one, so I was quietly confident that if our lines clashed mine should come out way ahead. Finally, I had 10 bows to his 4, so I should win a shooting war as well.

Frankly, this matchup favoured my list by a long way, especially in an objectives scenario. I deployed next to the two objectives I’d placed at the back of my deployment zone, ready to draw him forward with my shooting then swamp Tim and mop up from there. I was a little too full of confidence, all things considered.
Unfortunately, Tim didn’t take the bait. He very wisely opted to skulk around behind cover, making lots of little moves to keep me guessing about his intent while doing his best to dodge my sightlines. This was definitely the right call for him, as in doing so he had a clear shot to the middle and would be able to funnel my troops into a narrow gap between two terrain pieces.
This shouldn’t have been an issue, really. I had the numbers and the banner, and should have just bulled forwards and dragged him into a war of attrition. I could have sent a detachment to flank around the central rock formation and still had plenty of numbers in the middle, while Suladân’s banner should have seen me pull ahead across the board. Tim is a good player and would no doubt have made life difficult for me by sending cavalry into my backfield to be annoying, but ultimately it would have been an uphill battle for him against my vastly-superior numbers. That’s what should have happened.
Instead, I shot at him. A lot. Through gaps in terrain, while slowly creeping forward, I shot at him. I killed about 3 models with bowfire, then realising I was running out of time (and looking to save a Black Númenóreans who’d been Compelled out of position) I raced everyone forward.

Tim countered by sweeping a couple Morgul Knights round into my backfield to try and take my back objective, but thankfully I was able to get my Serpent Rider back to reclaim it after my Witch King Compelled his Knight off the point. In the centre we battered each other a tiny bit and rushed the central objective, with an annoyingly-placed spur of rock limiting how many models I could get within 3” of it.

At the end we each held our back objectives, and it was a dead tie for the central one. That left us on 5 points apiece for an unexpected draw!
To be honest, I felt pretty disappointed by this result. I went into this matchup holding almost all the cards, and Tim outplayed me on a strategic level. I have never really played shooting armies much before, and I didn’t have enough practice deciding when to keep leveraging my shooting and when to move in for the points. It was the right call to try and lure him out into the open initially, but once I’d realised he wasn’t going to budge I needed to charge forward and accept some casualties. I had fundamentally the wrong strategy from there on out, and it showed in the final result. That’s not saying that things would have been a foregone conclusion in my favour if I’d made better choices: Tim is a great player and would have made his own moves in response to my advance, and I’m sure he’d have made me work for whatever result was achieved. But this game was definitely a real learning opportunity for me.
MVP: Probably the Witch King I guess? No one really covered themselves in glory here.
Round 3 against Sam Lucas’ Gondor, 7:0
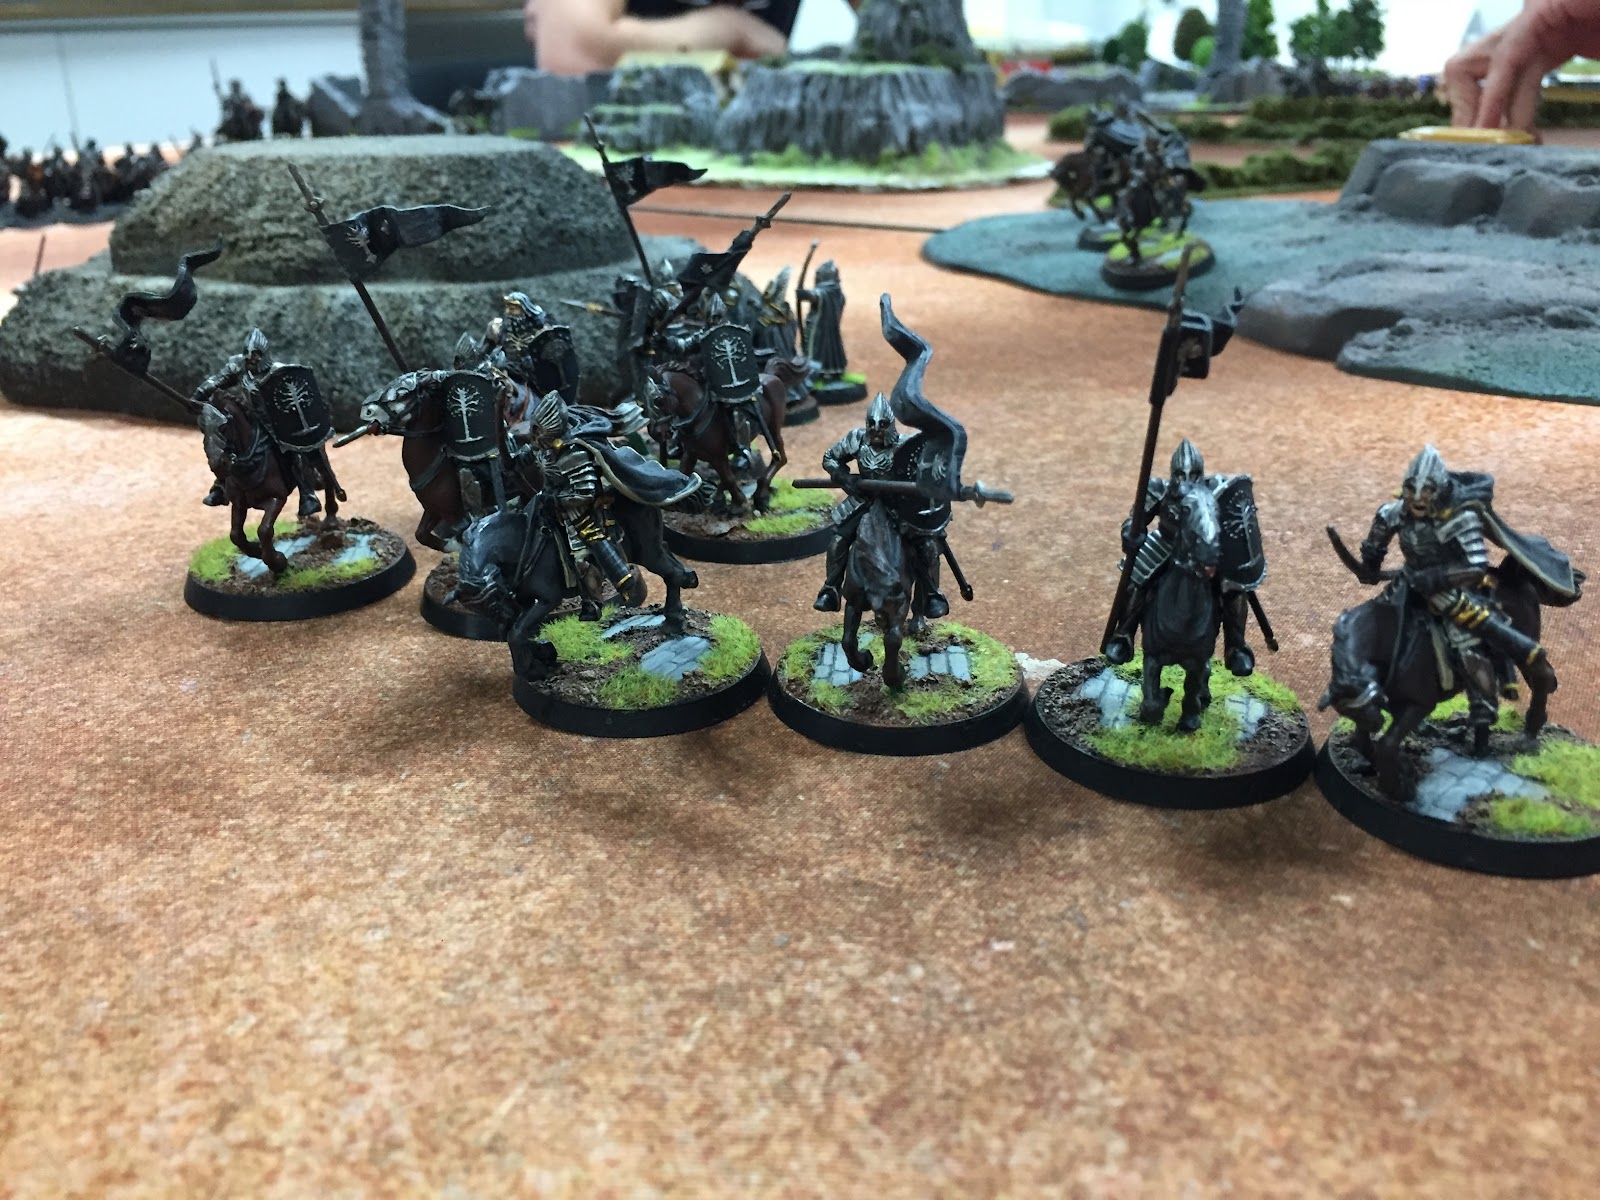
Sam's beautiful Gondorian King conversion is in the back left there
Sam was bringing a really beautiful and unconventional Gondorian list, with a tooled up King of Men, a Knight of the White Tower, lots of mounted Citadel Guard with longbows and a decent foot contingent. It was themed around Eärnur, the last King of Gondor, riding to Minas Morgul to challenge the Witch King to single combat (and die). Theme had obviously taken precedence over listbuilding optimisation in the decision to field the King— as Sam admitted during the game— but it was a super cool list and I was excited to face it.
We were playing Pool 4, and I immediately vetoed Reconnoitre because Sam had a large cavalry advantage. In return he vetoed Storm the Camp to stop me sitting back and shooting him to pieces, leaving us to play Divide and Conquer.
Perhaps the biggest challenge with this scenario was that the deployment in split corners meant that in order to deploy each of our warbands we had to run all the way around the row of 3 tables we were playing on, then run back to move the other warband on the next turn. It was quite comical really, but thankfully Sam was gracious enough to move my Black Númenóreans for me as they sprinted towards the middle.

My other corner was a lot more interesting, as Sam moved to pincer my fragile Haradrim between his shieldwall and his heavy cavalry. After messing up the previous game due to a poor strategy, I was extremely focussed on avoiding the same mistakes this time around. So instead of sitting back with my Haradrim and trying to castle up, I aggressively pushed towards the centre with Suladân leading the way. I think this took Sam a bit by surprise, and I was able to call a Heroic Move and get into two of his Knights and take them out on the next turn. The rest of his Knights and mounted Citadel Guards pulled back from my feisty Haradrim, who promptly turned on the charging Warriors of Minas Tirith and Fountain Court Guard. I swamped the Gondorians and managed to get lots of traps, and was rewarded by pulling ahead in kills while half my army was still out of the fight. Over the next couple of turns I was able to deal some substantial damage here, before my Black Númenóreans came sweeping in from behind to tear the heart out of Sam’s infantry contingent.
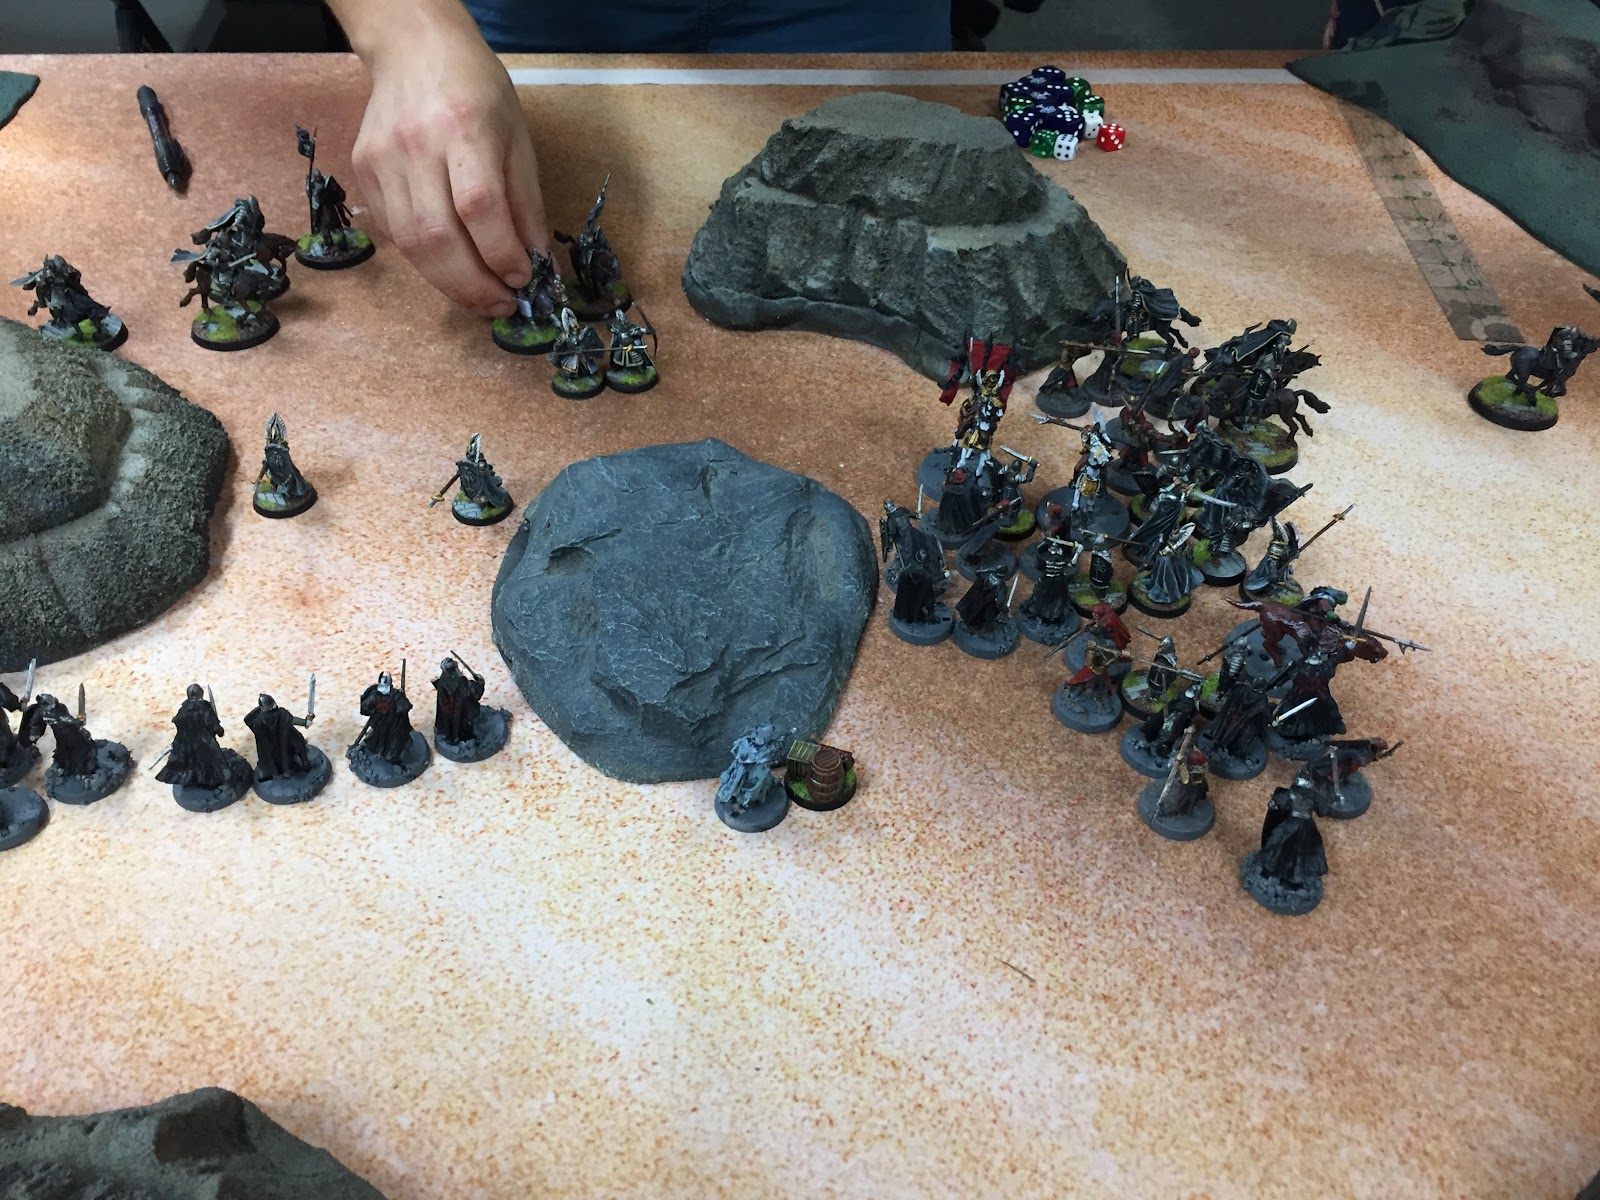

Things didn’t go all my way here, as Sam pulled some clever moves to blunt my output. I managed to Compel the Knight of the White Tower into the open to be charged by Suladân, but made the mistake of charging one additional Haradrim into combat alongside him. This allowed Sam to swing another Warrior of Minas Tirith into combat with Suladân to peel him off the Knight of the White Tower, frustratingly enough. I called a Heroic Combat to get myself back into the fight, but Sam’s King called his own Combat and managed to smash through and into Suladân. I proceeded to lose the roll-off and Suladânwas wounded 3 times, although he passed his Fate to survive.
On the next turn I again managed to Transfix the Knight and get Suladân into him while tying up the King, only for Suladân to botch and nearly be taken out. Still, his 6” banner was making a huge difference across the melee, especially once I got a couple of warriors into Sam’s banner bearer and took him out. As a result, I was pulling well ahead on kills, and was one model away from Breaking the Gondorians when time was called.
Elsewhere, my Black Númenóreans had done a sterling job of keeping Sam’s warriors pinned back away from the objective, taking advantage of the terrain to limit their ability to break through. Sam did manage to get one Citadel Guard narrowly within 3” of the centre, but ultimately the carnage in the main melee meant that I was in solid control of all 3 objectives for a 7:0 win.
This was a real palate cleanser after a disappointing Round 2, with my strategy of ‘ping-ponging’ between the two Gondorian warbands letting my Haradrim punch way above their weight. I think my dice may have been a bit hot towards the beginning, but it’s a little hard to tell; when you’ve got a numbers edge in combats and lots of Traps, the dice do tend to come out in your favour. This was definitely my favourite game of the tournament, and I’m looking forward to a rematch!
MVP: The basic Haradrim. Who needs heavy armour when you have aggression?
Round 4 against Josh’s Goblin Town, 7:0
 Goblin Town is always such a terrifying faction to face
Goblin Town is extremely powerful at 500 points, and I was quite concerned when I saw that I was matched up into Josh here. That is, I was concerned until I saw that we were picking scenarios from Pool 5, which gave us a choice of Contest of Champions, Lords of Battle and To the Death. I obviously vetoed Contest and Josh basically had to veto Lords of Battle, leaving us with one of the most lopsided combination of scenario and matchup I have ever played.
In short, the fact that I had a banner and Josh didn’t meant that he needed to run all the way across the table to me or I’d just win by default. As he did so I shot at him again and again and killed 10-15 models, reducing his numbers advantage significantly. Once the Goblins got there they were met with a solid wall of Black Númenóreans, with their flanks anchored between a building and the board edge.

To even get into combat (and not just keep getting shot!) the Goblins needed to pass Terror checks on effectively Courage 1, which they unsurprisingly failed in droves all across the line. The brave Goblins who did get in found themselves with 2 dice against my 2 plus a banner reroll, and my higher Fight value meant I was winning a huge amount of fights. Where the Goblins did win fights they were still wounding on 6s, while when I won fights I was wounding on 4’s, often rerolling 1’s.

The result of all of this was an extremely one-sided war of attrition, in which my shieldwall implacably ground down the Goblins. Josh managed to get his Goblin King into combat (after failing a couple of Terror checks thanks to me Draining his Courage with the Witch King), only for him to botch and fail to get off a Heroic Combat. Gollum tried to sneak into my backline with the Ring, only for Suladân to pass his Courage check to spot him and then ride him down. Eventually Josh was Broken, I charged his heroes and his army disintegrated from Break tests.
I think Josh played this game about as well as he possibly could have done, but really he was relying on me to make some big mistakes. When that didn’t happen, the Black Númenóreans shieldwall did what it was designed to and chopped his army to pieces.
MVP: The Black Númenóreans. This was their moment, and they took it.

With 3 major wins and one draw, I squeaked into third place!
Tournament Review
This was a fun tournament, and I loved getting to play against 4 great opponents. The short game length was definitely a challenge, with 3/4 of my games going to time, but I guess that’s the tradeoff for fitting in four games. SImilarly, I loved having so many people there, but the store was definitely at its absolute max capacity. I played two of my games on a board created from the ends of two tables pushed together, with a gap in the middle which yawned open whenever anyone on the neighbouring two games happened to bump the tables. Definitely a challenge, and I’m glad to hear that the next tournament at Irresistible Force will be getting to use both rooms!

On the other hand, the prize support was great at the tournament, with lots of great goodies on offer and fun dice for everyone. The scenario special rules were fun, if sometimes a little more complicated than they really needed to be, and I liked the secret objectives in theory. I’m not totally sure I liked that they provided Tournament Points instead of just counting for tiebreakers, but I am admittedly biased because I think they were what let Matt sneak ahead of me and into second place!
Overall, it was a great tournament and thanks again to David and the guys at Irresistible Force for hosting. And congratulations to Nick for taking out the tournament with his Cirith Ungol: anyone who can beat Goblin Town in an objectives game deserves the tournament win!
List and Strategy Review

A lot of bows, a lot of models, Terror, some mobility and some decent heroes. What more could I want?
Honestly, I love this list. In every single game it felt extremely powerful, and I always felt like I had the tools I needed. It has enough tricks to let me play around adverse situations, and backs that up with the raw muscle to just force through wins it shouldn’t. Against Justin’s Rangers everything went wrong early on, but my model count meant I could pull things back and get a major win. At 500 points it honestly feels extremely powerful, and there aren’t many matchups in which I wouldn’t back it. That many models with good stats backing up solid heroes, with Terror and magic and shooting, is honestly a bit oppressive. I didn’t always leverage it to its full capacity, but that’s hardly the list’s fault!
Now, for the real question: should I have taken the Crown?
In Round 1, the Witch King did spend a number of turns in combat, so having 3 Attacks would have made a big difference. And if he was mounted and powered up then I could have leveraged him as a second Suladân to get some Dunedain kills happening earlier. On the other hand, at the end of the game I had literally 2 warriors left. If I’d started with 3 less models (or 7 less!) then I would have Broken at least one turn earlier, and quite likely would have had no warriors left in the centre at the end, which would probably have flipped a major win into a draw at best.

We’ll skip over Round 2 (because nothing really happened) other than to note that it was my extra numbers that meant I was feeling so favoured in the matchup, and watering that down probably would have hurt more than a bit of extra magic would have helped.
Round 3 is a clear win for the list without the Crown to my mind. My magic did pretty much exactly what I needed it to anyway without the Crown, and I never had a situation where I would have wanted to fight with the Witch King. And those extra few models made a big difference, helping me to ‘wrap and trap’ Sam’s shieldwall and get those snowballing kills early in combat.

Finally, Round 4 hardly counts because it was so one-sided anyway, but would definitely favour the higher model count. Getting a beefier shieldwall helped me stake out more space and avoid traps, as well as letting me absorb the inevitable casualties more easily. The Witch King was never going to actually fight and his magic wasn’t a huge deal anyway, so the Crown would have done almost literally nothing.
So overall, I don’t think there was a single game where I regretted leaving the Crown at home. It’s an amazing piece of wargear and you should almost always bring it. But there is an almost in that sentence, and it turns out that it applies here.
As far as my play goes, I think the weekend went pretty well. Round 2 was obviously a real learning experience, and there was the odd blunder mixed in there (not seeing the lone Warrior of Gondor who peeled off Suladan in Round 3, for example). On the other hand, I'm quite proud of not letting the slaughter of my army— and some truly abysmal luck— get me down in Round 1. It was only writing this up afterwards that I realised quite how skewed the first few turns were, and I think it's a good sign that I wasn't paying too much attention to the bad dice at the time. Similarly, I'm glad I didn't get tilted by Round 2 and was able to tighten up my play for Round 3. And Round 4 was just an exercise in extremely conservative play to let my near-guaranteed win come to me. Overall, I need a bit more practice with shooting lists but I'm otherwise pretty happy with my play, and the weekend as a whole. What more can you ask for than to play 4 fun games against lovely opponents?
I hope you enjoyed this extremely long tournament report. As ever, I’d love to hear your thoughts: do you think this list has what it takes, or did it just luck into favourable matchups here? What would you have brought to this event? And most of all, was I wrong to ditch the Crown? Share below or on Facebook and I’ll do my best to reply to you all.
Until next time, may the game always end on a turn that you’re ahead!
Great tournament write-up as always! I like army lists that rely on their warriors to do the damage (though Suladan is no joke) - being able to spam almost 40 models at 500pts is pretty crazy. I'm curious - do you think Goblin-town would have had a better chance if they had a Scribe to bring models in behind your ranks? Seems like if they trapped your guys, they'd have a better chance of breaking you (though good luck taking down Suladan).
ReplyDeleteI think you've totally summed up the army there: almost 40 models is crazy, and Suladan is no joke! I definitely agree that warrior-focussed lists are a good time, and I like that they give so much room for error. If I didn't like my big monsters so much I'd be a horde player every time!
DeleteIt's definitely an interesting point re the Scribe, and at the time I actually was pretty sure that was how my opponent should have used his Scribe. I don't think it would have really made much difference (as you noted, I had Suladan plus two cavalry and a Tracker just hanging out behind my lines, so it would have been more annoyance than threat) but it could have been an issue at points. I should note that the scenario let each player force their opponent to reroll one dice roll per turn, which I often burned on messing with the Scribe, so he didn't really get to spawn that many Goblins anyway. Those that did show up came on the board edge outside my shieldwall, where they forced me to guard my rear a little but otherwise mostly died the same as their friends.
Love the list, Suladan + Witch King is one of my favourite combos to run. I think dropping the couple extra guys for the Crown is probably worth it, purely for the extra casting potential- the three attacks in this list is a nice bonus if anything. You basically make back the extra will by not needing to use as many in the first place to get the spells off. Congrats on the podium!
ReplyDeleteI definitely agree that the Crown would have been better value if I was planning to invest in any Will, and would definitely have been a better upgrade than anything else I could have put on the Witch King. Ultimately though I wasn't really relying on his casting very much (for a number of reasons), and I actually only ended up casting about 1-3 spells per game in the end. I'd probably have gone for more if I had the Crown, but it overall probably equates to 1 or 2 extra spells going off in a game. That could be worth the 3 models in some matchups (ones with big heroes) but I was pretty sure I had the edge in those matchups anyway thanks to my numbers. So I took the extra models instead to shore things up against lists with higher troop quality, which I think paid off for me here. Plus it's a style choice of course!
Delete