
This weekend I got to attend a new MESBG tournament and had an absolute blast. Being right in the middle of my final university exams, I’d basically written it off as a no-go. But the stars aligned just enough for me to buy a ticket and submit my lists last minute, and I was so glad I did.
Format
The format for this tournament was quite an interesting one:
5 games of Good v Evil at 200 points, on a 2x2 board, with no named characters!
Moreover, as you played through the rounds your Army Leader would receive a
variety of bonuses depending on whether you won or lost, ranging from either +1F
or Heroic Strike in the first round, to either +1D or +1S in the penultimate
game! This was extremely cool, and really made it feel like your unnamed
Captains were becoming true heroes of Middle Earth. It’s obviously not a format
that would work for larger games, but it was really fun for these low points
levels.

Lists
My loose idea going into this was to make both my Good and Evil leaders as powerful as I possibly could. The optimum amount of power for your choppy heroes is just enough to beat your opponent’s, so I figured taking heroes that could reliably beat enemy Captains would be the right approach.
To that end I brought almost the same Isengard list I took
to the last 200-point event I attended: The Assault on Helm’s Deep Legendary
Legion, with a super Uruk Captain with shield leading 12 Uruk-hai Warriors and
a lone Berserker. It went 3:0 last time I ran it, so fingers crossed the
absence of enemy named heroes would make my Captain even more devastating.

To support them I decided to take a King’s Champion leading
7 Dwarf Warriors (4 with shields). The King’s Champion is horrendously scary
for these points levels, I’ll have not one but two banners, and the list is just
tough to kill in general. The theory is basically that the King’s Champion
kills the enemy leader while the rest of the Dwarves stubbornly refuse to die.
Only ten models is low, but at least when you don’t have spears every model
gets to be on the frontline!

The rough theme of my lists is that Torak Shield-taker,
leader of Saruman’s assault on Helm’s Deep, managed to hack his way out of that
massacre and escape into the Grey Mountains. There, in a fertile valley far
from the eyes of men, his band of Uruk-hai chanced upon Orik Redbeard’s party as
they travelled south to warn Gondor of the mustering Easterling forces. As Uruk
strength clashes against Dwarven armour, it is truly a time for heroes.
Tournament Review
This tournament was really excellent. The format was
different and interesting, the rounds felt like they had the perfect amount of
time, everything ran really smoothly and the terrain was great. The prize
support and raffles were perfect as well! There were obviously some inevitable
pairings hiccups and the like, but by and large things flowed along perfectly.
I think that if this format is used again I’d tweak a few of the bonuses
slightly—
mostly to avoid having +1F available in the first round— but that’s the most nitpicky
of nitpicks. This was an awesome tournament, and I really hope Lawrence and
Jack host many more!
Round 1 v Jacob’s Númenor in Divide and Conquer, 12:0
The first round saw me paired against Jacob’s Númenor/Mordor
combo. It was his first tournament, and we had a lovely chill game with all the
slaughter you could ask for. The dice gave Jacob the choice of Divide and
Conquer or Capture and Control, and Jacob opted for Divide. That gave me the
choice of which matchup I preferred, and I ended up settling on Isengard v
Númenor because I was concerned his Ringwraith would be a hassle for my King’s
Champion.

We both deployed fairly aggressively and moved up towards the centre, with Jacob’s mounted Captain hurtling forward a little ahead of the rest of his force.
 Both sides race for the objectives
I was able to win Priority on the critical first turn of
engagement and swamp the Captain, but failed to get the 6 I needed on 8 dice
and lost an Uruk in return. Elsewhere along the lines two more Uruk-hai fell as
they tried to hold off the rest of the Númenóreans.
On the next turn I was able to win the Heroic Move-off and
trap the Captain again, smashing him from his saddle with my own super-Captain.
However, the rest of the front saw me lose another two models, so I was nearly
broken already!
Thankfully, from here the troops fighting the Númenor
Captain were freed up to smash into the rest of Jacob’s warriors, and the Uruk
Captain was free to rampage. He killed 5 Númenóreans over the next three turns
to almost singlehandedly Break Jacob, and it was all cleanup from there.
A special shoutout does go to the warrior on the end of
Jacob’s battleline, who spent the whole game locked in a back-and-forth duel
with a lone Uruk-hai pikeman. On the last turn, despite now being outnumbered
3:1, he was able to finally slay his opponent to be Jacob’s last model
remaining. A true hero of Númenor. Jacob played really well for his first
tournament, and managed to pull out a win in a later round, which was great to
hear.
For winning this round, my Uruk-hai Captain went up to F6
and my King’s Champion became F7! Woof.
Round 2 v Matthew Buckwell’s Rivendell in Command the Battlefield, 10:0
The dice gave Buckwell the chance to choose armies and he
immediately opted to take on my Uruks. Guess the King’s Champion has to wait a
little longer to sate his battlelust! With the choice of Retrieval or Command
the Battlefield, I decided I wasn’t interested in letting Buckwell’s two
Rivendell Knights and mounted Captain sneak around and steal my objective from
me. Picking Command, I managed to cleverly ‘lose’ the roll for Priority in the
first turn, then roll a six to come in right next to Buckwell’s surprised
Elves. They promptly killed a pikeman with shooting though, so maybe they
weren’t too surprised.
On the next turn, I won a critical Heroic Move-off to fling
my Uruks into the fray. Both Rivendell Knights were swamped and hacked down,
but my Captain failed to wound with any of his S5 hits. Elsewhere, two Uruks
and one more Elf were slain to give me a substantial numerical advantage.

Buckwell won the next turn’s Priority and charged in his
Captain, only to be beaten back and dismounted by the Uruks he’d attacked. My
Captain again failed to do any damage, but the rest of my troops managed to
bring the Elves down to 3 models.
From here, the game basically became one of my Uruk-hai
shielding to try and avoid quartering the Elves, while the rest spread out to
claim 3/4 quarters. In the end I surrounded the dismounted Captain with
overwhelming force to try and close the game in a suitably dramatic way. He won
the first combat and slew an Uruk, but failed to roll the 6 he needed to repeat
the feat and was hacked down.
Ultimately, the early lead I achieved from getting to come
in close to the Elves and win the Move-off just snowballed too much for the
Elves, but Buckwell was a great sport the whole time. Sorry again for picking
the Maelstrom mission!
Both my characters received Heroic Defence for winning this round, which was… fine, I guess.
Round 3 v Saxon’s Mordor in
Breakthrough, 11:0
Saxon was all-cavalry for both of his armies, with a choice
of mounted Rohirrim or a bunch of Morgul Knights. He was totally unsure of
which army to pick, so I suggested he face my Dwarves so I got a chance to use
them at last! It was probably the right call for him anyway, as my Isengard
would have outnumbered him by a lot and had the Fight value advantage. I had a
choice of Breakthrough or Destroy the Supplies, and once again opted for the
mission that wouldn’t give a sneaky cavalryman the chance to sweep in behind me
and score a bunch of points for free.
The other advantage of Breakthrough was that I got to deploy
straight on the line, which I took full advantage of. Only the King’s Champion
was slightly back from the front so that Saxon couldn’t get two cavalry into
contact with him. Getting first turn, Saxon decided that fortune favours the
bold and smashed into my lines with almost his whole force. His Marshal called
a Heroic Combat, but promptly lost his combat to a plucky Dwarf that hid behind
his shield. Elsewhere the charge stalled out, with a single Dwarf being ridden
down in exchange for two Morgul Knights. The D7 and banner rerolls of my list
had done its job!


On the next turn, I won yet another Heroic Move-off (yes,
that’s 3 from 3 so far!) to swamp the Evil cavalry. My Dwarves rolled hot on
their Terror checks and were able to bring down a couple more Knights, for the
loss of only a single Dwarf. Amusingly, the critical combat against the
Marshall saw me roll 5 ones and a two to wound, before rerolling all the ones
thanks to my Army Bonus into… more ones and twos. Great. On the next turn I won
Priority, tied down all the Morgul Knights and finally slew the Marshal,
although I required my last Might point to do so.

From there, Saxon was Broken, and one of his three remaining
Knights promptly fled. The last two fought hard, and one of them even survived
a cinematic 1:1 duel with my Champion, but in the end Saxon called it. The
Dwarves were just a bit too resilient, and the early momentum from the first
charge stalling and me winning the following Move-off was too much to overcome.
My theory is that the Morgul Knights had trouble aiming their lances so close
to the ground, and that’s why my Dwarves survived so well.
For his heroism in passing all his Terror checks, my King’s Champion (and Uruk-hai Captain) became Fearless. That would have been a lot more useful this round!
Round 4 v Tom’s Isengard in Contest
of Champions, 12:0
In between Rounds 3 and 4 we broke for lunch, and I ended up
having lunch with a couple of lovely guys who both happened to be running the
same Evil list as me. I don’t mean they both had Isengard, I mean they were
both running Assault on Helm’s Deep with 12 Warriors and a Berserker! It was an
amusing coincidence, especially when we realised that one of them (Tom) was the
only other undefeated player. So we came back from lunch to discover that lo
and behold, some Uruk blood was being shed on our table.
Tom had the choice of armies, and eventually decided that he
didn’t trust his Rivendell force to deal with my trusty Uruks. Apparently Tom
had used the super-Uruk Captain enough to be wary about taking mine on! I was
relatively happy with getting to use my Dwarves, as I now got to pick between
Fog of War and Contest of Champions. While Fog was tempting, as I could
basically guarantee one banner’s survival, the prospect of using my F7 King’s
Champion in Contest was too much to resist.

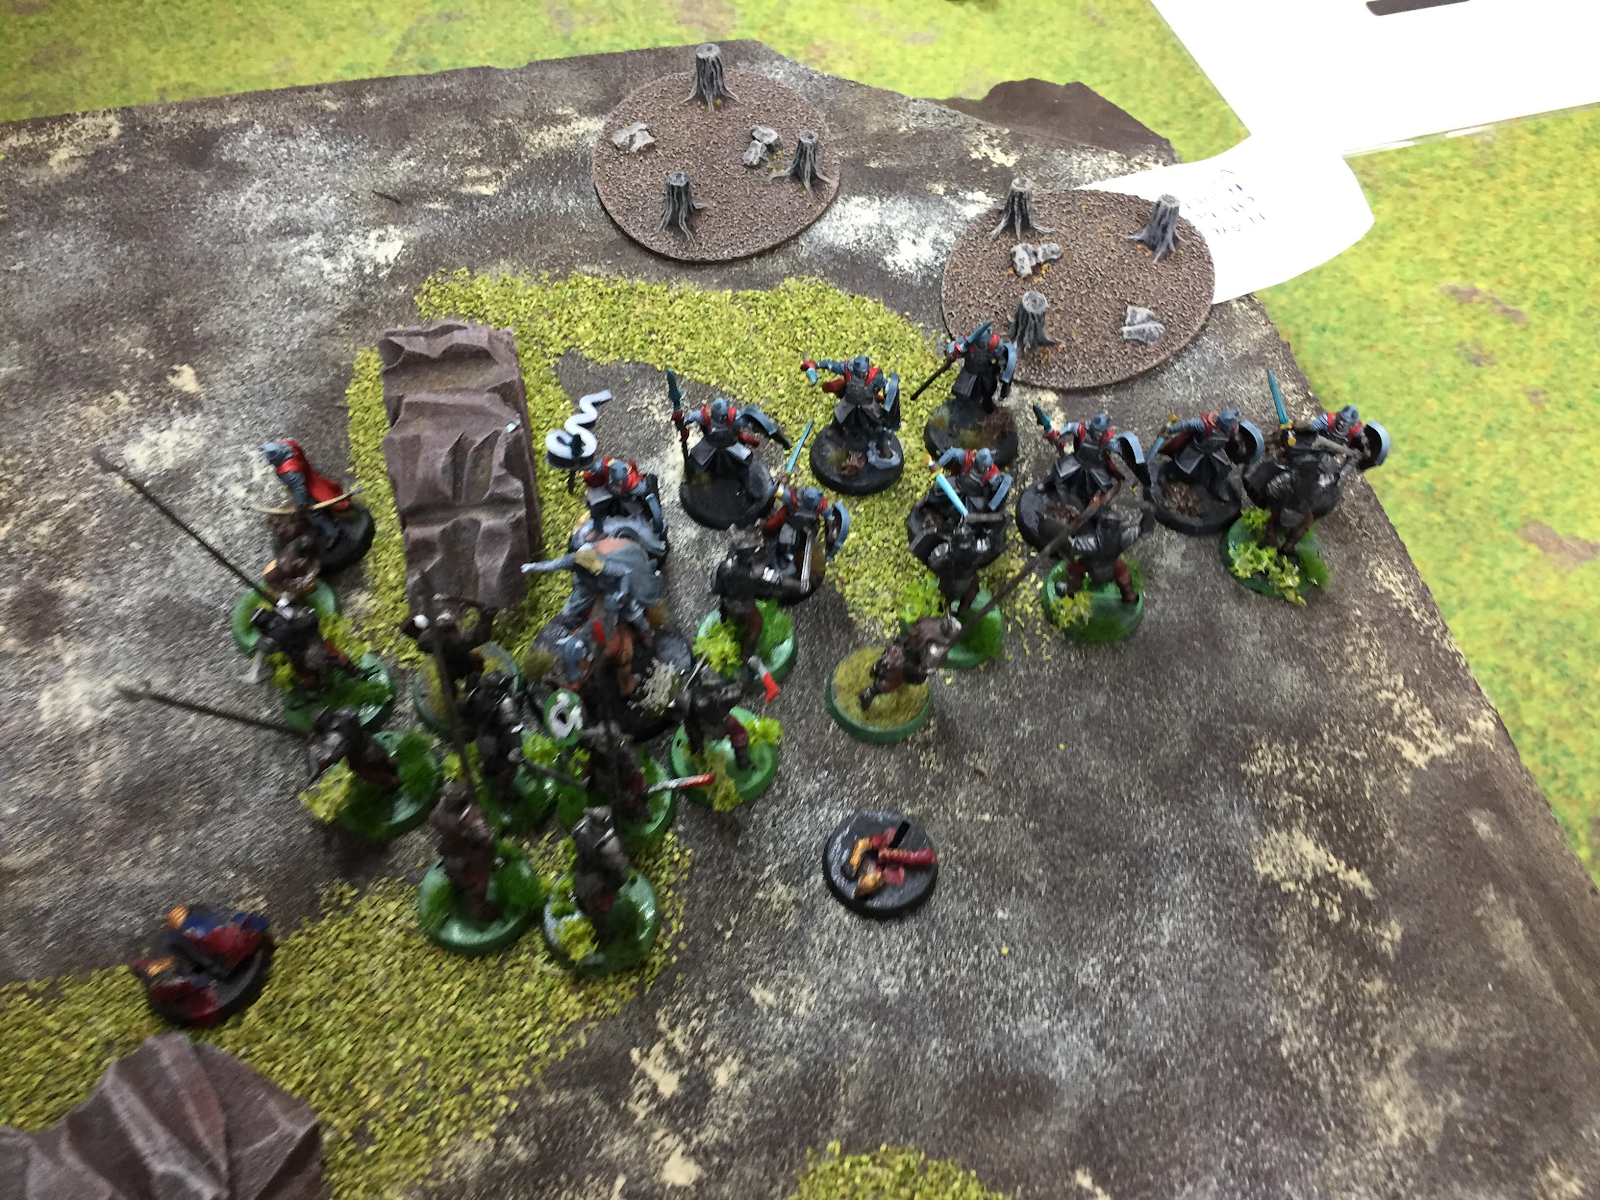
Deployment was basically a straight-up Thunderdome: both
armies were positioned for an epic duel between the two leaders, while my
Dwarves tried to guard the Champion’s flanks and Tom’s Uruks looked to
overwhelm them. Winning Priority, I windmill-slammed the Champion into the
Captain, while tying up Tom’s Berserker with a banner and otherwise forming a
solid defensive line with my Dwarves. Tom responded by attempting to turn my
flanks with his superior numbers, while two pikes went to support the Captain. The
cowardly Uruk opted to call a Heroic Defence, but managed to win the combat
anyway! Thankfully I’d positioned the Heralds so my Champion was D9, and
nothing came of the Uruk-hai attacks. That held true across the line, with
either my Dwarves winning combats thanks to their banner rerolls, or the Uruks
rolling one less than what they needed to wound. This trend continued across
the game, and saw my outnumbered Dwarves slowly whittle down the Uruks for
minimal losses in return.
The real excitement was in the centre, however, as the
King’s Champion managed to win his second fight and strip the Captain’s Fate.
On Turn 3 Tom won Priority and managed to get 5 Uruks in to support his leader,
but the Champion managed to score the critical 6 with his banner reroll. I then
struck at the Captain, rolling two 6s and a 1. I rerolled the one thanks to my
Army Bonus, and Tom picked up his leader.

It was all over from there, as the Champion went on a
rampage and hacked down one Uruk after the next (starting with the annoying
Berserker that had been raining blows down on one of my Heralds since Turn 1). Tom’s
dice still refused to roll the numbers they needed, and my deluge of sixes
eventually ground him off the board.
This game was probably my favourite across the day, just
because the imagery of it was so perfect for our armies. The epic duel between
the Uruk-hai Captain (who, at this point, was F6/S5/A3/D7/W3!) and my King’s
Champion was just so cinematic, and the thin green line of Dwarves holding his
flank was awesome. Tom was also a great opponent who took the outrageous swings
of the dice in his stride, and I’m definitely keen for a rematch!
To cap it off, both my heroes were now S6. I was kind of hoping to get a boost to my Defence instead, just so I could have a D10 King’s Champion doing his best Sauron imitation, but S6 seems pretty good too.
Round 5 v Chris’ Mirkwood in Hold Ground, 8:2
This game was to be fought on the already-famous Table 10, a
really interesting map totally covered with narrow passageways, broken up by
sharp turns, thick walls and so many doorways. You probably know that there are
bonuses for defending a doorway, but do you know exactly when those apply? I
certainly didn’t before this game!
Chris had a warband of Mirkwood Rangers, and an absolutely
terrifying Goblintown horde with 34 models. I had the choice of armies, and I
was briefly tempted by the sheer cinematics of my Dwarves holding back the tide
at the tight chokepoints. However, I just couldn’t go past the strategic
benefit of forcing the fragile Elven skirmishers to fight my Uruk-hai on the
worst possible map for them. Chris got to choose between Domination or Hold
Ground, and ended up going for the latter on the basis that he’d have a really
difficult time ever getting to any objectives I placed. Still, this matchup was
immediately heavily slanted in my favour by the board and armies.
We both arrived on opposite sides of the board, and moved
carefully towards the middle down the winding passages. I did my best to block
LoS wherever possible, but some chance arrows did get through to wound my
Captain and kill a couple of Uruks.
Once we hit combat the battle devolved into a wide-ranging
melee, with small groups of Elves and Uruk-hai clashing across a broad sweep of
the board. I initially expected to have a clear edge, given that I’m wounding
on 4’s and being wounded on 6’s, but Chris’ Elves fought like wild things. I
genuinely think they rolled the 6 they needed in around 3/4 of the fights they
won, and my Uruks were dropping like flies. That’s not taking anything away
from Chris either, who kept manoeuvring to line up shots on my pikemen with his
rear rank while using his Sentinel to disrupt my movement in lots of annoying
ways.


Eventually I did manage to whittle the Elves down, however,
and Chris was left with a lone Ranger on the left and his Captain and a friend
in the back. On the final move the Mirkwood Captain called a Heroic Move and
Heroic Combat to try and break through to the centre, but my stubborn leader
refused to budge. On the other flank, the last Elf was facing a Berserker and
another Uruk, won the fight and killed them both! That managed to Break me, but
I’d worked hard to keep Chris’ troops too far from the centre, and I scored the
7 points I needed from it. It was an absolute bloodbath, and a super tactical
game (first time in awhile I’ve had to actually pay attention to whether I had
LoS before charging!), but ultimately the matchup was just too slanted in the
Uruk-hai’s favour. Chris made the best of a bad lot, but this was definitely my
game to lose from the moment I got to pick the armies.
And with that, I’d gone 5:0! With around 20 players at the
tournament, that made me the only undefeated one. Alas, remember what I said
earlier about not submitting my list on time? Turns out the ten bonus points
for on-time submission were decisive, and let Sean Rossato sneak a nose in
front to take first place! Still, I was just glad I’d been able to make it, and
I got to take home some nice new Eagles that will soon be allied into my Good
forces.
Army Review
It should go without saying that I was pretty happy with my
two armies: they did get me five major wins, after all. I knew going into the
tournament that the Assault on Helm’s Deep is lethally strong at 200 points,
and the three games I played with it certainly reinforced that view. 14 models
is a lot at those points levels, Uruk-hai are capable of beating almost
anything 1:1, and the super-Captain is a true monster. However, I don’t think
it’s the optimum 200-point list. That crown definitely has to go to Goblintown,
which seem absolutely heinous at these points levels. I believe they went 3:0
in Chris’ hands, and I can’t think of an army that I’d say matched up well into
them. Still, I’d say the Assault on Helm’s Deep was at least a strong second
place for the points limit.
Surprisingly, the Dwarves actually win this matchup!
The bigger surprise for me was how well my Dwarves did. Having finished painting and basing them the night before the tournament, I hadn’t been able to even contemplate a practice game. So when their first outing involved taking a charge of Morgul Knights to the chin, I was worried my low numbers might have doomed me. But in news that should be a shock to no one, Dwarves are really tough to kill and banners are great. Especially at low points where there are lots of 1:1 fights, a banner makes an absolutely huge difference. The King’s Champion was also ludicrously scary, and very well-suited to the format. When everyone has around 10 models, it’s pretty common to end up with the two leaders duelling for several turns. And in a format with no named heroes, a Dwarf with F6/S5/A3 and some crazy defensive stats means I was always winning those duels. There were only two forces there that could seriously threaten him (a Barrow Wight and Wild Warg Chieftain combo and a Black Gate Opens super-Troll Chieftain), and I was still confident that my D9 and 5 Fate would let me survive long enough for the rest of the Dwarves to do their job. Overall, I think I might have to actually make that larger Khazad-dûm force I’ve been thinking about!
Conclusion
This tournament was an absolute blast. I got to play five
excellent games against lovely opponents, all of which took the swings of
fortune with good grace. I genuinely don’t think there was a single point of
real tension all day, which says a lot about the good attitude everyone brought
to the games. The tournament format was really interesting and felt awesome,
with the slow improvement of your leaders throughout the day making every game
feel exciting and new. By the end of the tournament, I’d have fancied my
Captain against Aragorn himself! Jack and Lawrence did a great job running the event,
and I’m super keen for their next one.
Overall, after a few months of mostly playing 40k, this
tournament really sparked my interest in MESBG again. Sorry 40k readers, but
MESBG is just a better game.
I hope you enjoyed this tournament report, with its brief
glimpse into the meta of a very different format. Stay tuned for my hot takes
on the Defence of the North supplement, coming soon to a blog near you. Specifically,
this blog. It’s on your screen right now.
Until next time, may you always win your Heroic Move-offs!
I'd like to run something similar here, can you send the tournament pack by any chance?
ReplyDeleteDefinitely! Let me know if this link doesn't work: file:///C:/Users/Sam/Downloads/ATFH%20Player%20Pack%20-%20final%20edits%20(2).pdf
DeleteHi Sharbie! That link is a local link on your own computer, it's not going to work. Could you upload it to a google drive somewhere and share the link with me?
DeleteHaha, so true. Sorry, that was dumb of me, didn't even really think about that. Here we go! https://drive.google.com/file/d/1miuGS8d-ixJ9hjSP8P2MLt-JNPd8lS0J/view?usp=sharing
DeleteThat worked a dream!!! Thank you very much!!!
DeleteGlad you're back to writing about mesbg! Definitely the superior gaming system. Did you consider the troll chieftain in black Gate opens at all as a pick for the evil side?
ReplyDeleteI can't promise I won't relapse to 40k, but I'm going to aim for a bit more balance for the next while.
DeleteI absolutely did, and at least two people brought it! The challenge for me was numbers. At most I could have supported it with 10 Mordor Orcs, and I was worried that if the Troll failed to perform the army would just crumble. I gather that was basically the experience of the people who did bring the Troll: it was unstoppable, but didn't necessarily get things done fast enough. The King's Champion was the same price, but he brought an extra two models, both of whom were very tanky and had banners, so it felt worthwhile for me.
Also, as it turned out, that final board I played on would have meant I almost certainly lost if I had the Chieftain. He couldn't fit through any of the doorways!
Fair enough. I probably would have called the TO if my opponent won the roll-off and chose to go against the troll because it doesn't fit, to either have the table swapped or lists swapped. Because scenery really shouldn't cause such a drastic auto-lose situation.
DeleteIt's a fantastic table, don't get me wrong, but it does kinda only suit 25mm bases.
Honestly, same, but I think at least one person played a monster on that board. There were a few all-cav lists that played on it as well, which sounded rough. Definitely a fun and interesting board, but only really balanced with two very similar armies. Even if both sides had only infantry, if one has shooting or an advantage in numbers then they're pretty weakened as well. Super cool, but had a pretty big effect on the outcomes of some games
DeleteTried some games of this last night, played moria with a troll and shaman into minas tirith with a Knight of the White Tower. Knight of the White Tower was great as the only(?) unnamed hero who can call Heroic Strike and the might blow made short work of the troll when backed up by a few men of minas tirith. Shamans seem good as you can quite effectively shut down an enemy hero for a couple of turns... We are considering banning Legendary Legions as we think they make some very powerful unnamed heroes or they have very abusable rules. Any thoughts on this?
ReplyDelete*not only, the king's Champion of course can also call Heroic Strike...
DeleteInteresting to hear! There's actually a surprising number of generic heroes with Strike: Troll Chieftains and Dragon Knights, to name two more. Plus, in this format, half of all heroes after round one! The Knight does still seem pretty strong, although I wonder whether a simple King of Minas Tirith on horse with all the gear would be more of a threat. The Knight definitely relies on having friends in the duel with him, which isn't always possible at 200 points.
DeleteInteresting to hear the Shaman went so well! Was it a Goblin or Blackshield Shaman? I normally find magic decreasingly useful at lower points, but I could see a Blackshield backing up a Cave Troll to be a pretty brutal combo. The Goblin Shaman only casts his Transfix on a 5+, which feels too unreliable to me.
Re Legendary Legions, that's not a bad idea. You're effectively banning the Black Gate and Assault on Helm's Deep Legions, as no others can be run without a named hero. That's potentially a good idea, as both are very strong. I would note that neither is really any stronger than what you can do with generic armies though: I've done some maths that convinced me that King's Champions are likely better than the Troll Chieftain build, and I'm not sure anything has a good matchup against Goblintown at 200 points.
So by banning LLs you're definitely getting rid of some abusive stuff, but there's still plenty of stuff at the same or higher power level that's untouched. Up to you whether that's worthwhile, I don't think it's a bad idea but I'm not sure it's necessary either.
Interesting to hear your thoughts!