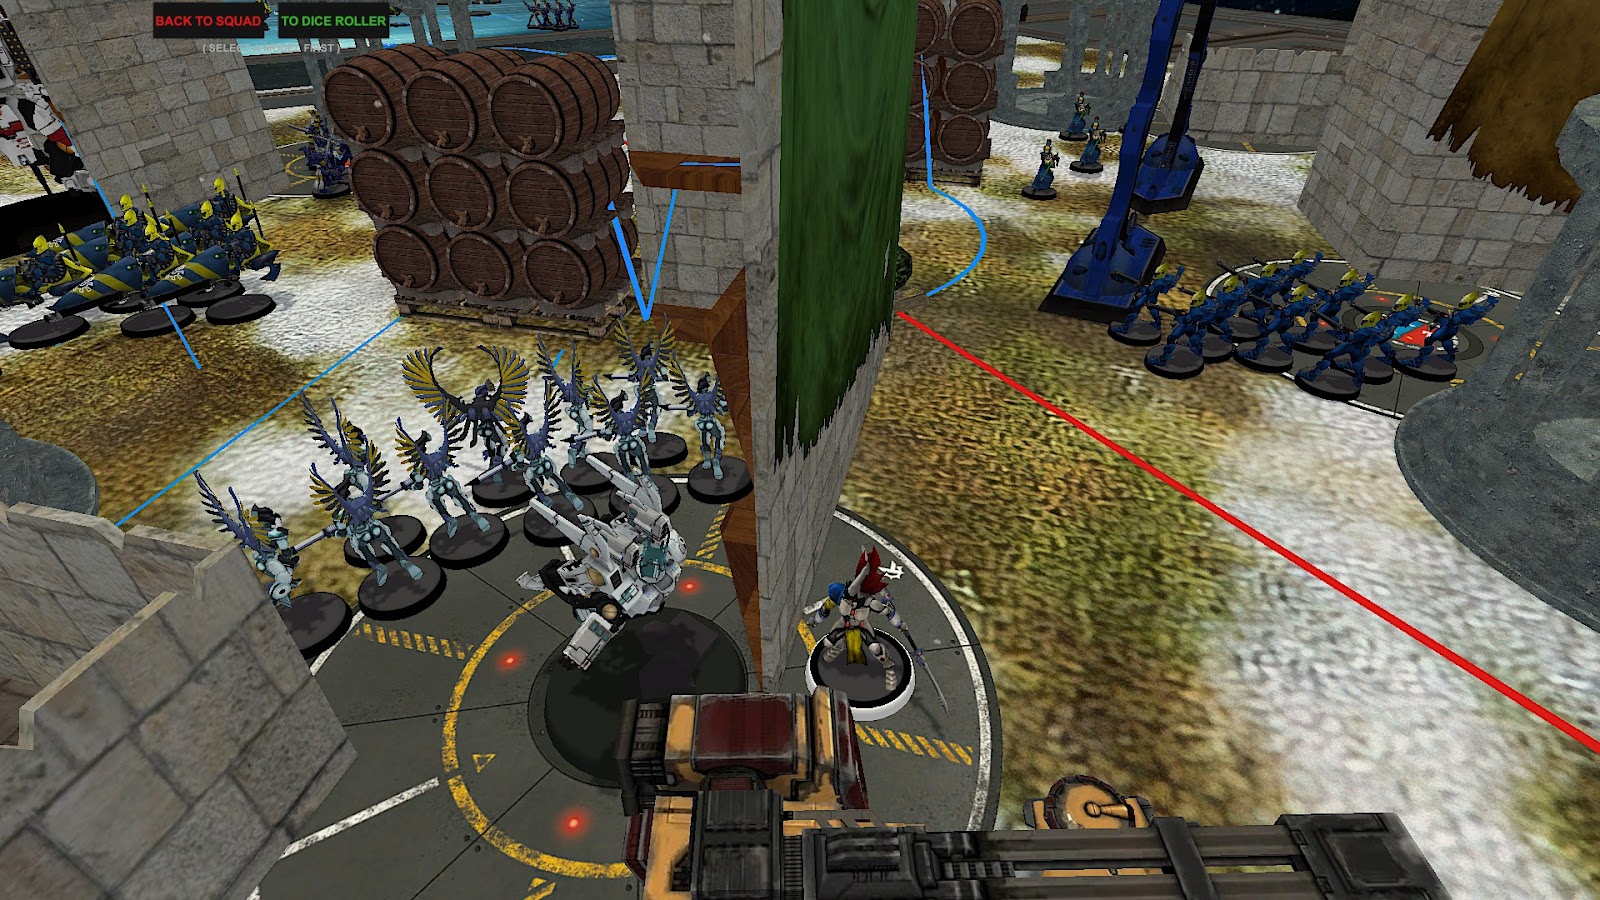
I’ve played with a number of Asuryani lists recently, and decided that Hail of Doom is the pick of the bunch. It just hits so hard, and does so with so many units and so much mobility. However, most of those units are pretty fragile, so how would it do against another army with heavy shooting? To that end, Owen was trying out Andrew Gonye’s recent Dallas build. Can the mighty Stormsurge do what the Chaos Knights could not?
Asuryani Custom Craftworld (Hail of
Doom/Masterful Shots)

Patrol
Farseer with Guide, Convergence of Fate (Seer Council) 90
Farseer Skyrunner with Sunstorm, Fortune, Will of Asuryan 120
2 Warlocks with Quicken/Restrain, Seer Council 40
10 Guardian Defenders 90
2 x 1 Vyper with scatter lasers 80
2 x 9 Dire Avengers, Exarchs with extra catapult 216
Outrider Detachment
Farseer Skyrunner with Doom, Executioner, Kurnous’ Bow and
Mark of the Incomparable Hunter 120
Baharroth 140
2 Warlocks with Jinx 40
2 x 3 Windriders with shuriken catapults 120
9 Windriders with shuriken cannons 270
3 Shining Spears, Exarch with paragon sabre, Heartstrike,
mirrorshield and shuriken cannon 125
10 Swooping Hawks, Exarch with The Phoenix Plume 180
6 Swooping Hawks 108
6 Dire Avengers, Exarch with extra catapult 72
5 Howling Banshees, Exarch with Piercing Strikes,
mirrorswords and Cronescream 105
Webway Gate 80
Total: 1996 points
This list is bonkers. It’s got a couple of key shooting
units that can pop out of cover, fire, then return to safety in the Windriders
and Swooping Hawks. It also has heaps of cheap chaff it can yeet forward to
pick up points so you don’t fall behind on scoring. That all forces opponents
to play aggressively into it, and as we saw last game it has the firepower to
brutally punish any attempts to do that. It’s a very, very good list, and I’m slowly
figuring out how best to use it.
T'au Sept

Patrol
Crisis Commander in Crisis Battlesuit with Precision of the
Hunter, Cyclic Ion Blaster, Missile Pod, Plasma Rifle, The Be’gel Hunter’s
Plate, and Thermoneutronic Projector, plus 2 Marker Drones 165
Ethereal with Sense of Stone, Exemplar of the Kauyon, Wisdom
of the Guides, Hover Drone, The Humble Stave and 2 Marker Drones 85
10 Kroot 60
5 Crisis with missile pods and twin plasma rifles, 4 with
target locks and one with iridium/early warning override/ stimm injectors, plus
4 Marker Drones 330
5 Crisis with plasma and twin airbursts, 4 with target locks
and one with iridium and early warning override, plus a Gun Drone and 2 Shield
Drones 287
2 x 4 Kroot Hounds 48
2 x Hammerhead Gunship with railgun and gun drones 290
Patrol
Longstrike with railgun and gun drones 160
10 Kroot 60
4 Kroot Hounds 24
Hammerhead Gunship with railgun and gun drones 145
Super-heavy Auxiliary Detachment
Stormsurge with Early Warning Override, Pulse Blastcannon,
Twin Airbursting Frag, Velocity Tracker 345
Total: 1999 points
Speaking of overwhelming firepower, this list has guns. 4
Hammerheads and a Stormsurge is wild levels of firepower, and the presence of
two big Crisis teams and lots of chaff means it’s hard to play around as well. There’s
still a decent weight of indirect fire to trouble me, especially with Longstrike
to buff the Crisis team, but hopefully the Dataslate changes will make it more
survivable. I definitely can’t survive a shootout, but if I’m able to play
defensively I might be able to eak out a win on points.
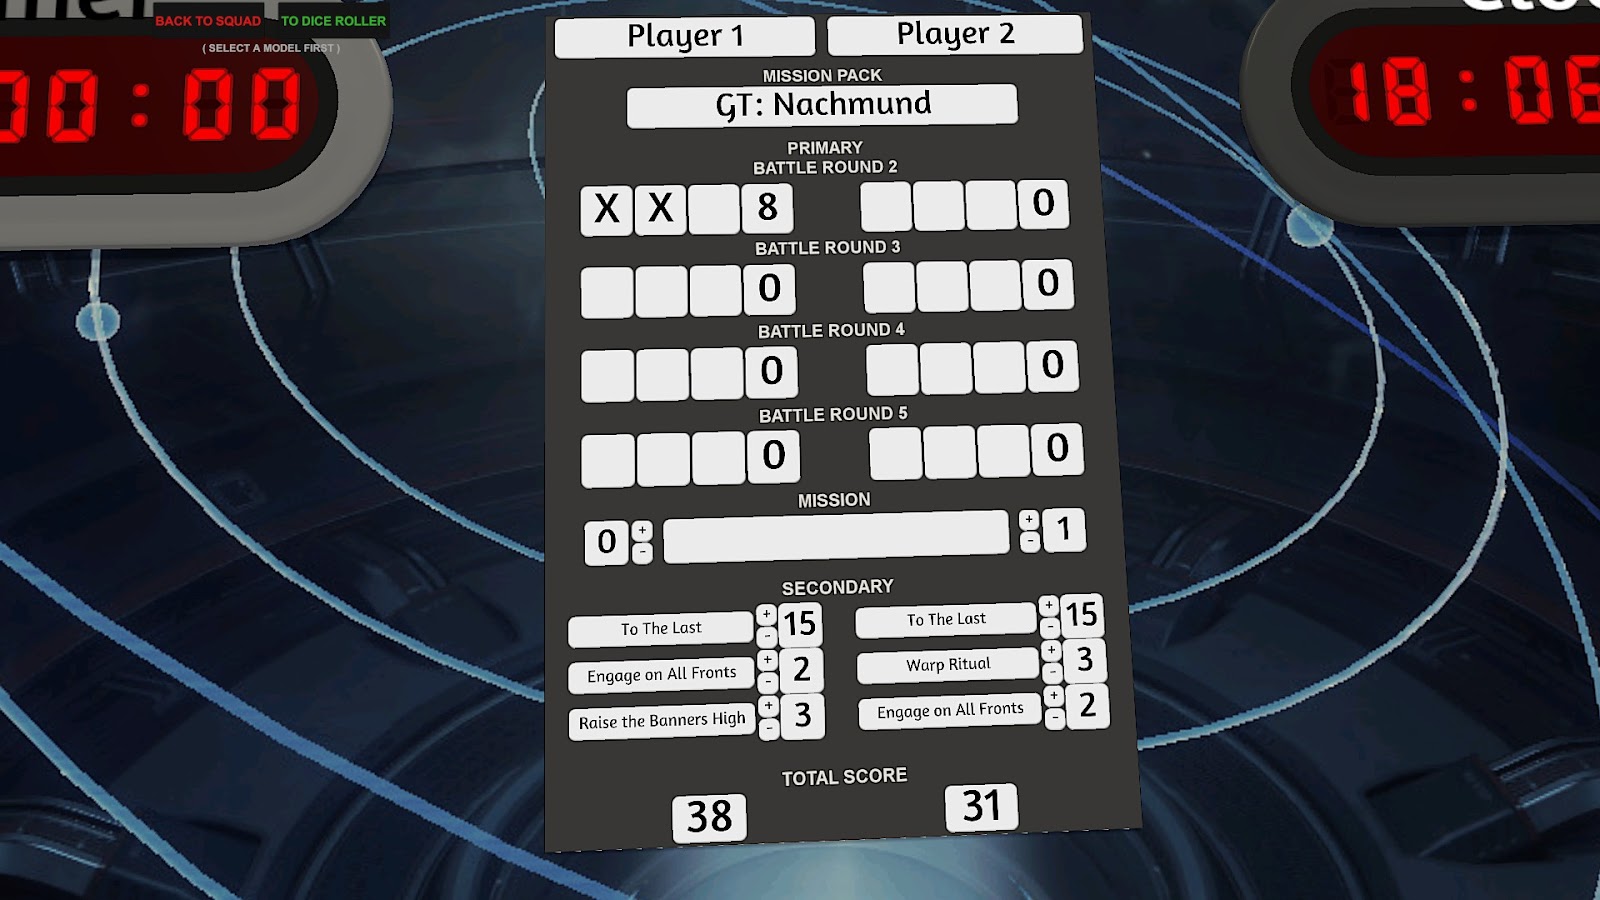
Secondaries and Deployment

On Recover the Relics, both of us are on effectively the
same Secondary plan, starting with Engage and To the Last. Engage is a lock on
a 6-objective mission, because neither of us feel confident in getting
Stranglehold with any reliability and we each have chaff we’re happy to trade
for points. To the Last is a little riskier, as both of us have tools to take
out the opponent’s big stuff. However, the terrain on this map should allow all
of our TtL targets to operate with relative impunity, with only the Stormsurge (the
toughest model on the board) unable to jump-shoot-jump somehow. For me, I’m
also quite interested in luring Owen into wasting his indirect fire on the
Windriders instead of wiping out my smaller squads. The final slot for me came
down to whether I’d rather do psychic actions with a Farseer or RND with my
infantry, with the eventual decision being made on the basis that Owen has no
denies and I can Warp Ritual from safely behind a wall. For Owen, he doesn’t
really have the infantry to make RND happen reliably, and my army doesn’t give
up killing Secondaries unless it’s tabled, so Banners was the best of a bad
lot.

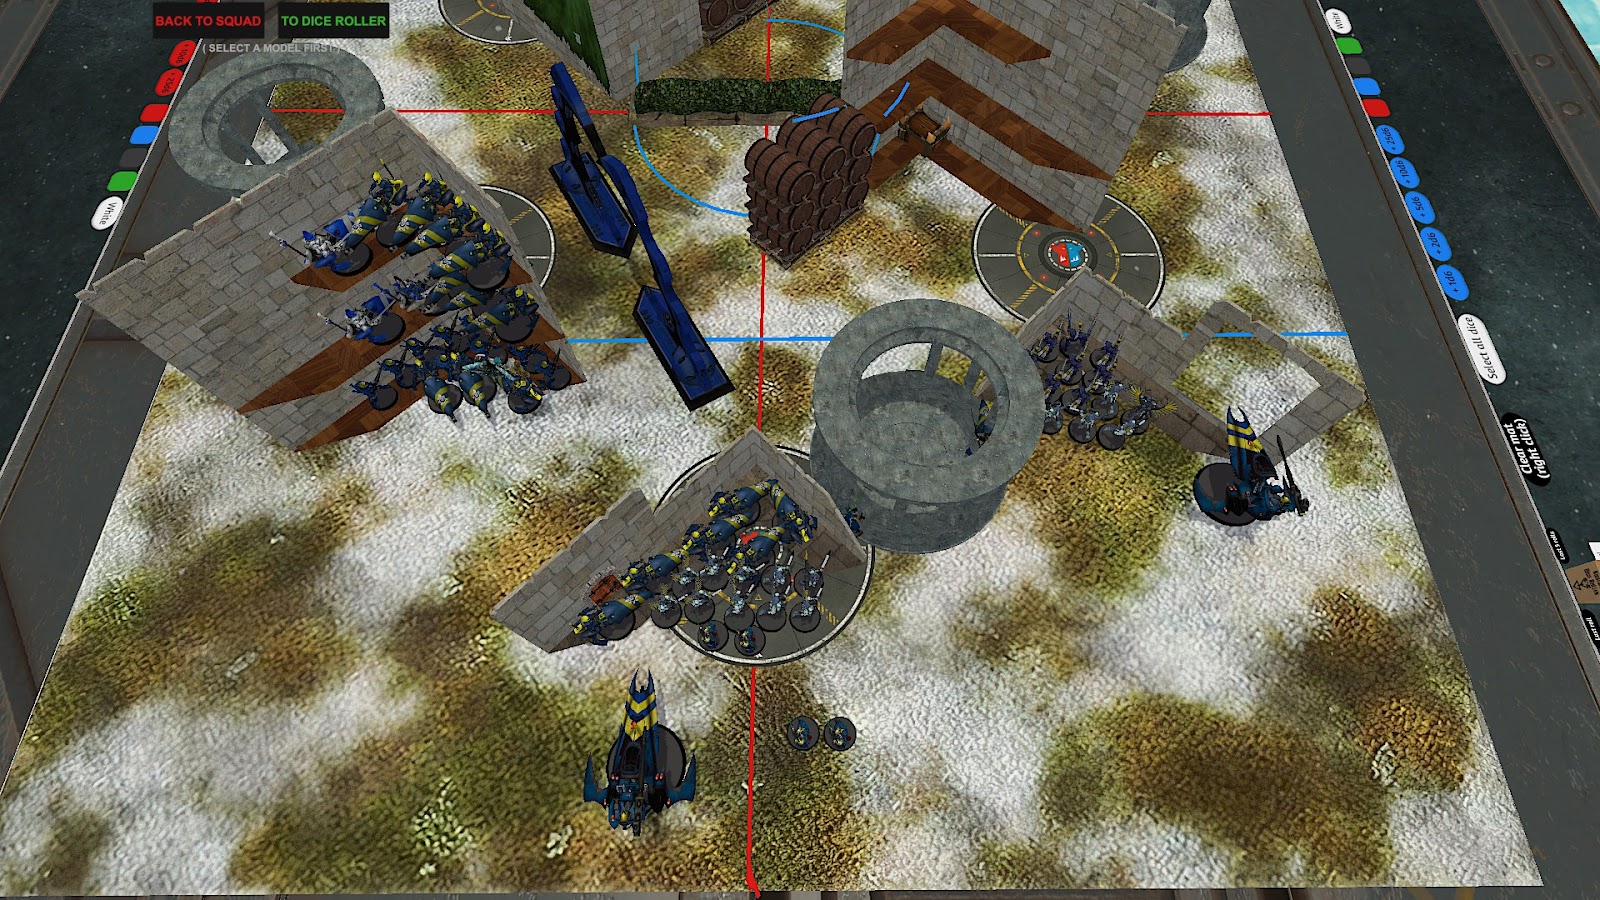
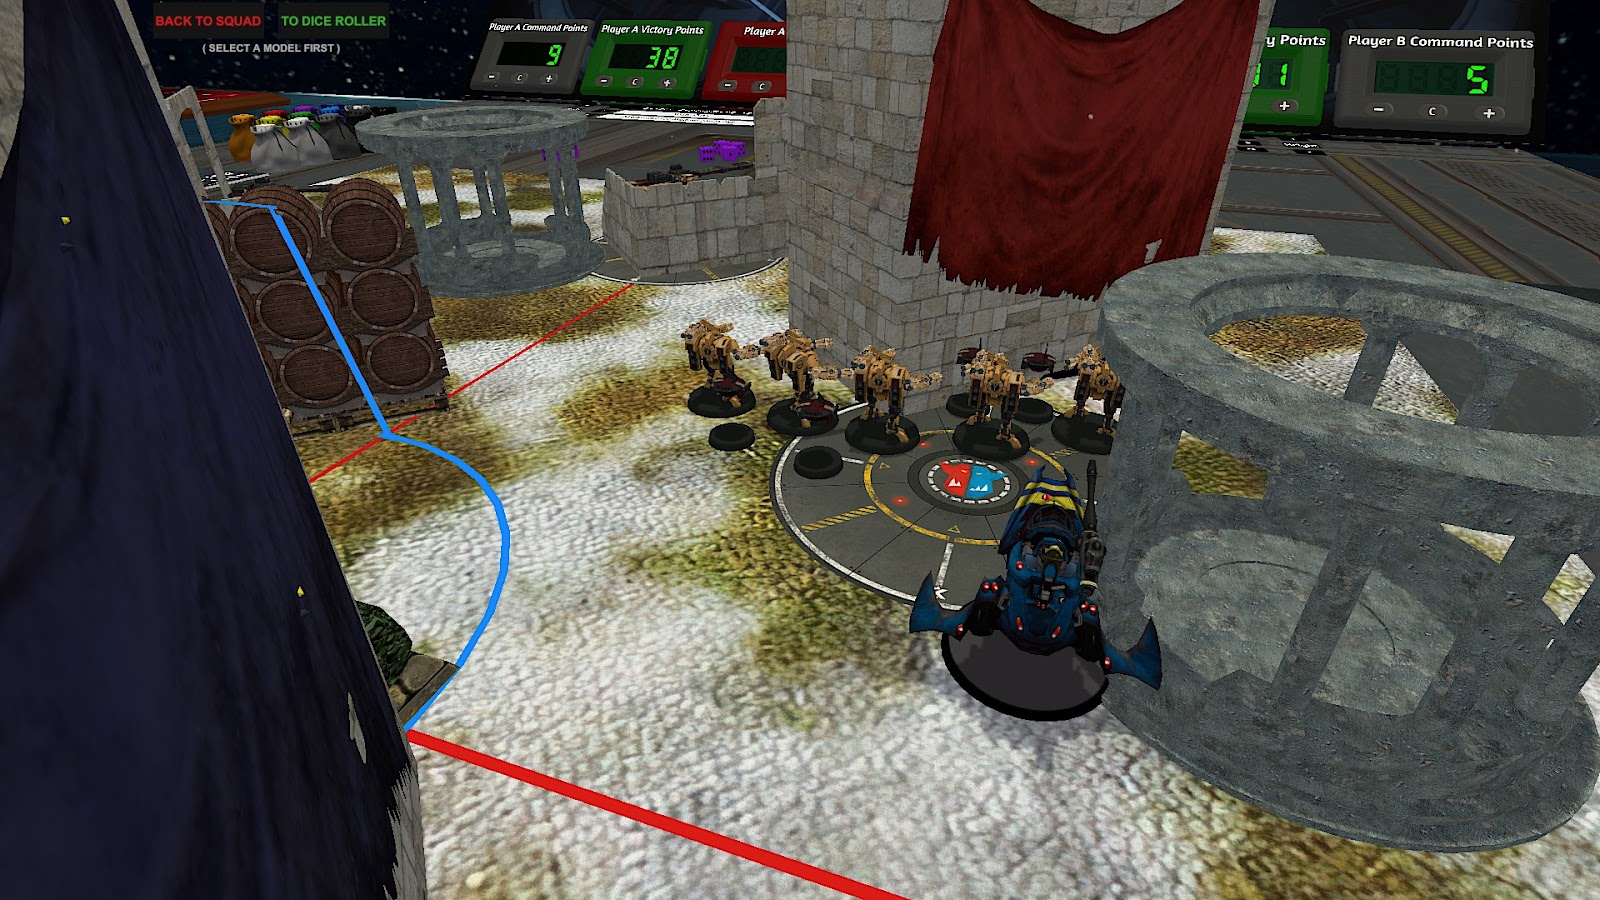
Deployment was very defensive for both of us, with nothing
exposed but Kroot, which were all ready to use their pre-game move to get into
cover anyway. Otherwise we’re clearly both committing to turtling up and
letting the other player come to us. I have two squads of Avengers and the
Banshees in the Webway, ready to take advantage of whatever openings Owen gives
me.
T’au Turn 1, 27:25
In this context, I’m pretty happy to be going second. Owen
picks Kau’yon, reasoning that if neither of us are likely to commit much early
he may as well boost his output in the lategame. Plus, fall back and shoot
could be critical against my tricksy Elves. On his turn, Owen pushes up lots of
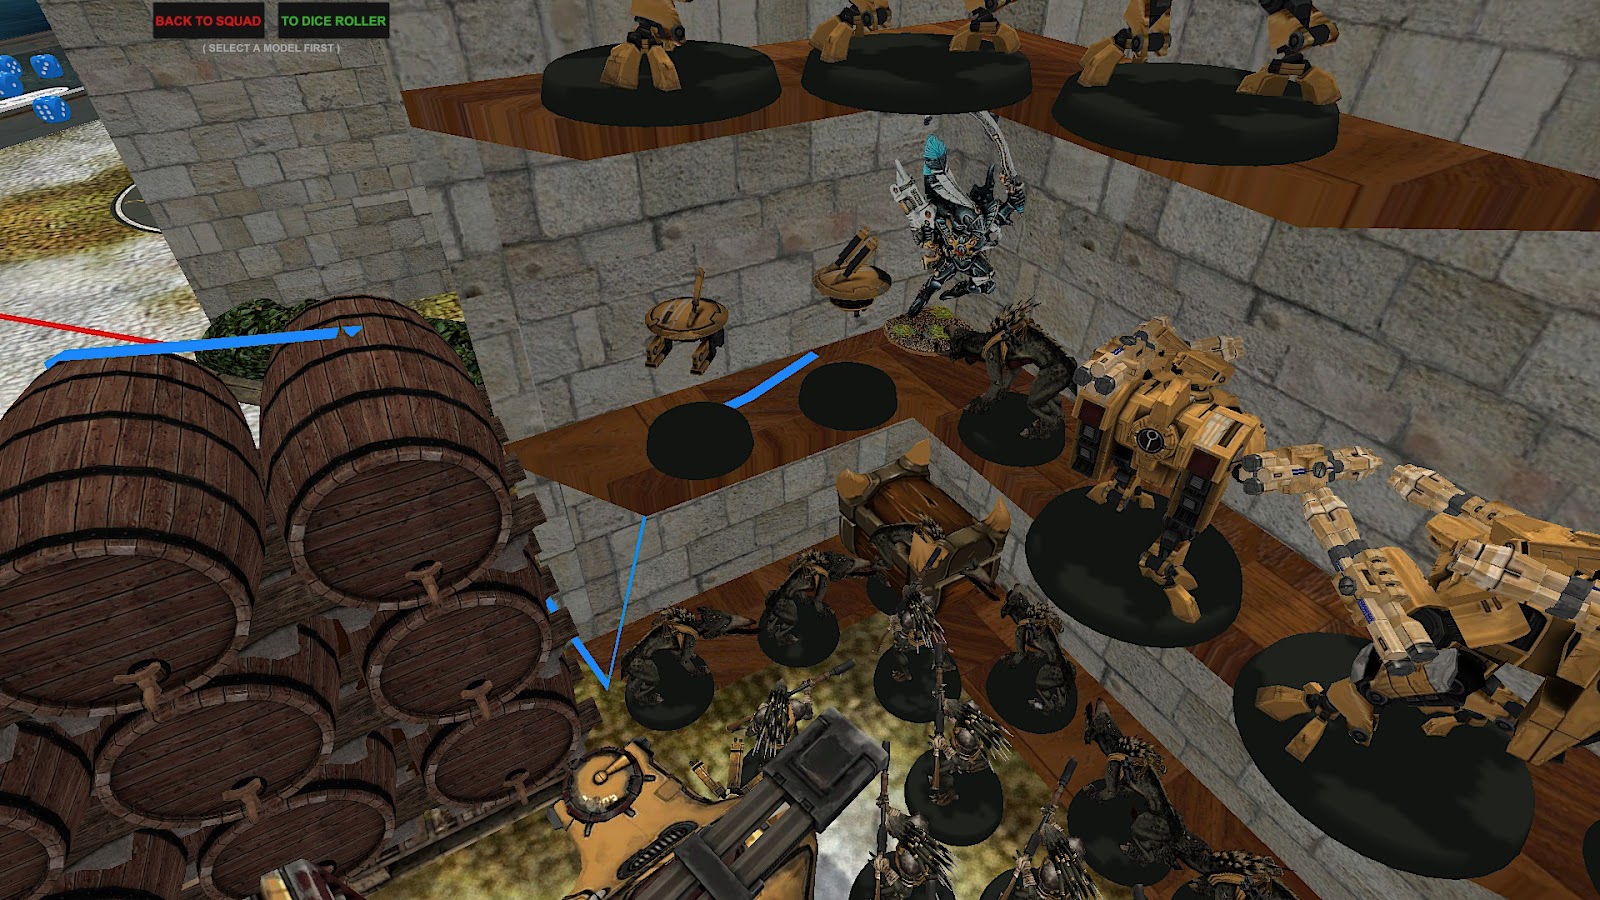
Kroot and the airburst Crisis into the right-hand building, ready to pummel me
with indirect fire, while the rest of the army Raises Banners and hides. A lone
squad of Kroot Hounds is sent speeding over the centre line to rack up some
Engage points, and that’s movement.


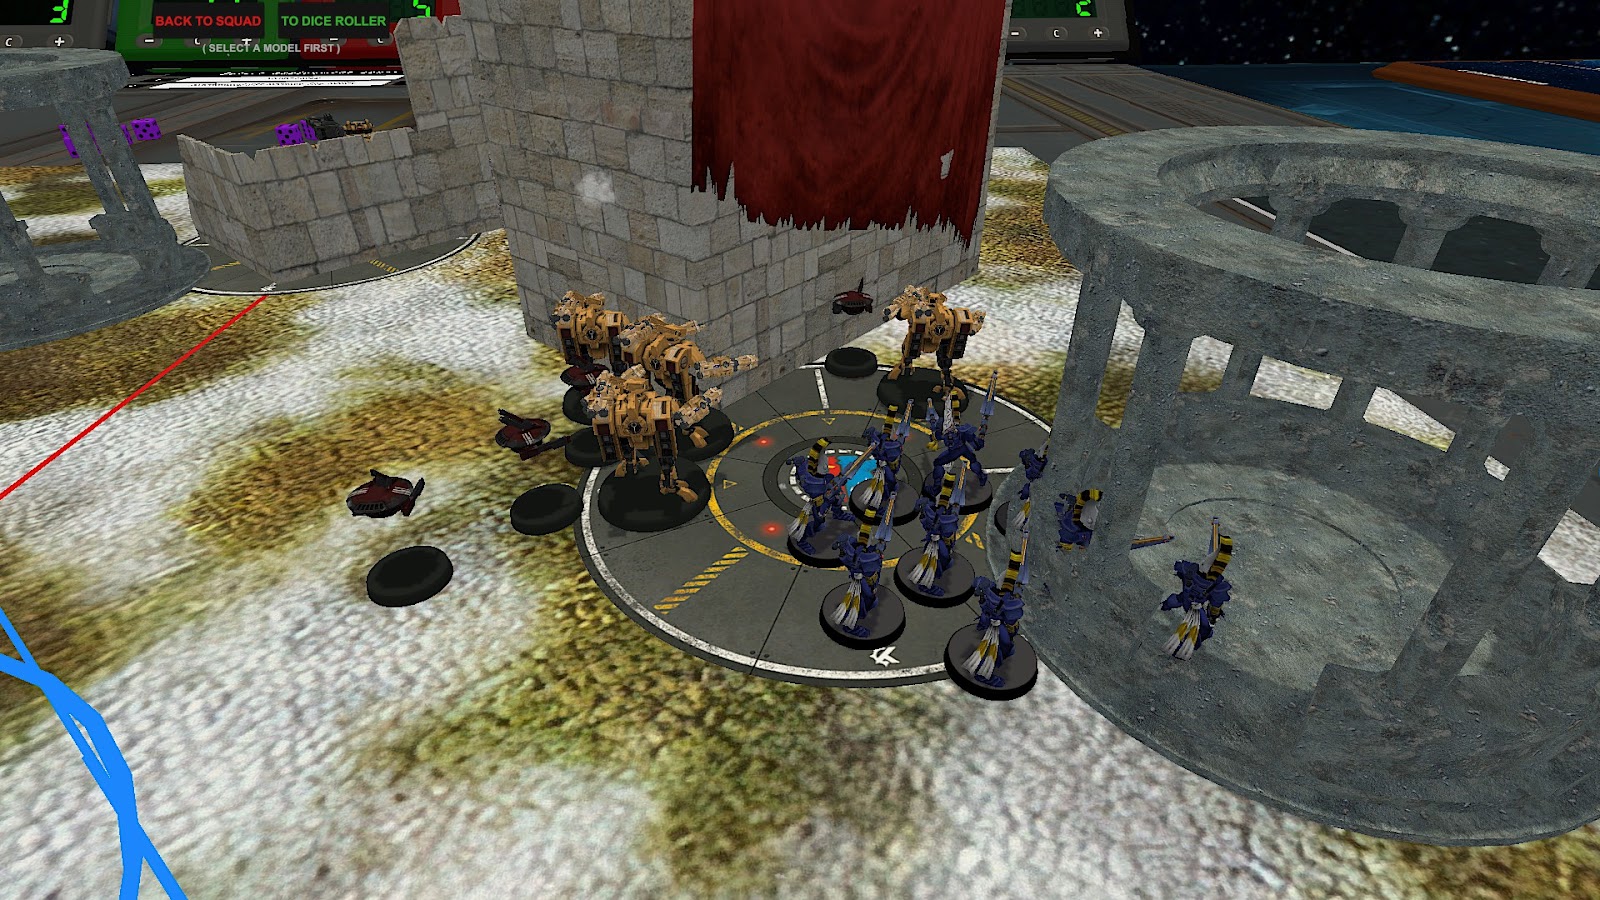
Critically, a heap of careful measuring and placement of
models sees us decide that Owen can’t fully screen out either of his
buildings. He just doesn’t have enough Kroot in the right building to stop me
either getting within 1” or slipping models into the building itself, and
Crisis bases are too big and clunky to close those gaps without getting too
close to the wall. So Owen can force my Shining Spears to take the long route,
but not Baharroth or (eventually) the Banshees.
In Shooting, Owen opens up with his airburst unit on my
large Windrider squad. Thanks to the Crisis Commander and Longstrike, he’s
hitting on 4’s rerolling 1’s, and is able to destroy a bike. The Stormsurge
also chips away with his SMS and airburst, but is unable to get any damage
through. Hitting on 5’s with reduced AP is a big deal!
Asuryani Turn 1, 27: 31
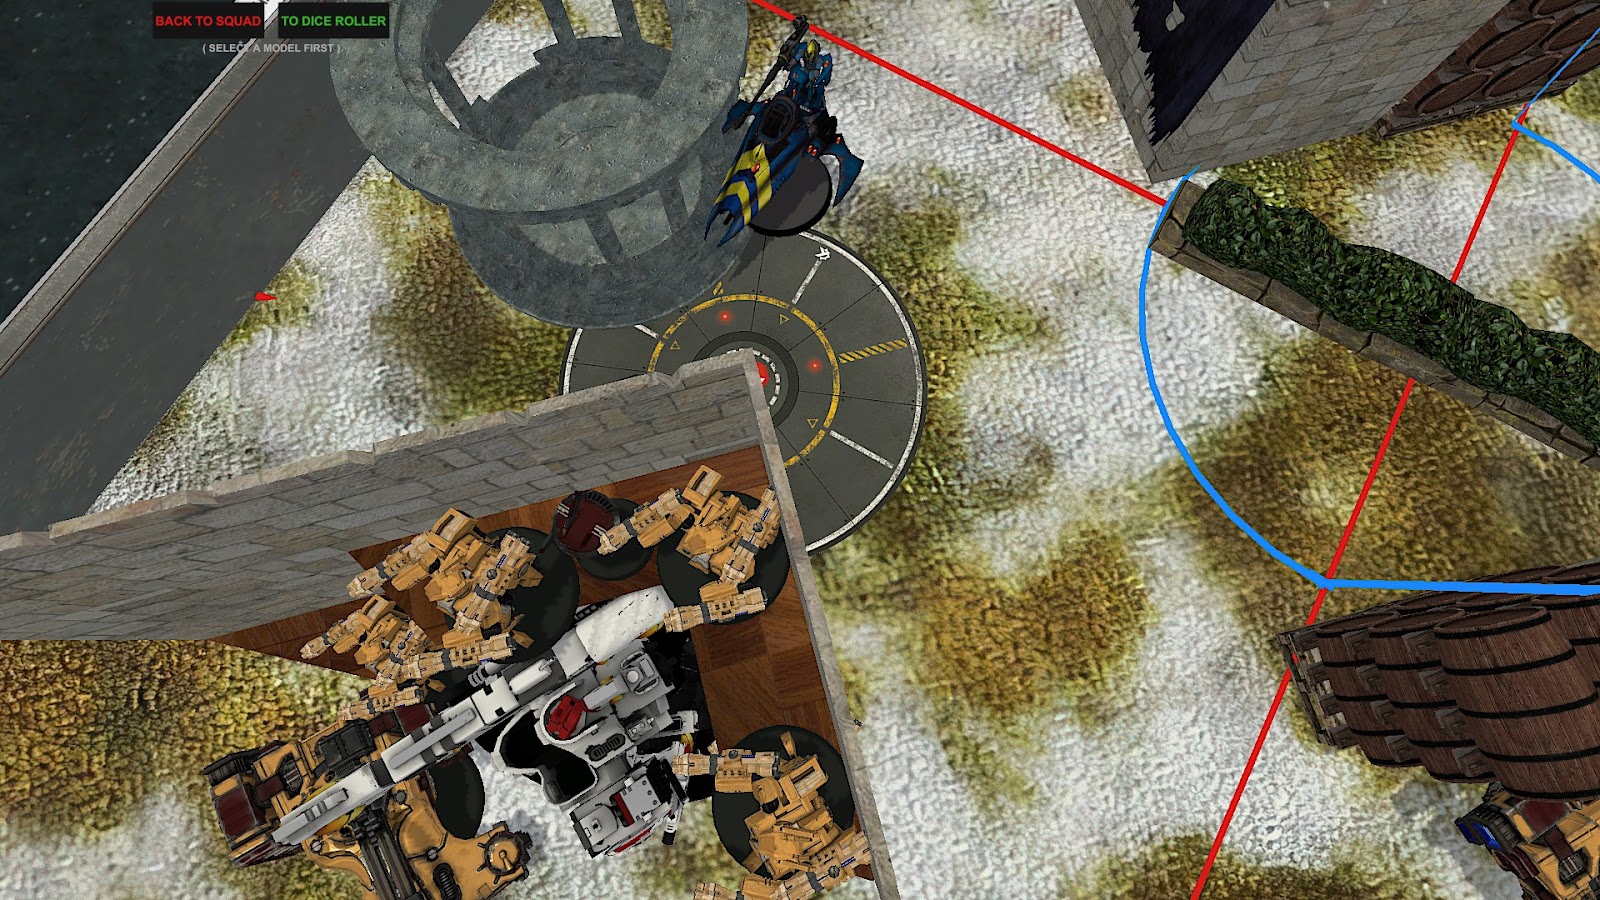
My turn largely mirrors Owen’s, with not too much excitement. Baharroth speeds forward to annoy the airburst Crisis, the small Hawks squad flits out to kill the Kroot Hounds then Skyleap to safety, and a Vyper is Quickened onto Owen’s left objective to tick off Engage.

Cunning use of Will of
Asuryan also means I take down Owen’s banner, which is fun. Otherwise,
everything just repositions into better staging positions, while remaining nice
and safe behind cover.

Warp Ritual goes off, starting my Secondaries ticking along, and the Kroot Hounds obviously evaporate as soon as they are looked at. Finally, Baharroth goes speeding into the airburst Crisis team, kills all their Drones then disappears. If Flyrants with Encircle the Prey didn’t exist, I’d say Baharroth was the most busted unit in the game.
Edit: This article was written before the recent Tyranid FAQ. I can now conclusively say that Baharroth is the most busted unit in the game.
T’au Turn 2, 40:31
Owen’s turn is about as exciting as mine. He advances his central Kroot over to his left building, getting them onto the objective with a clutch advance roll. No more easy takedowns of that banner for me.
He also makes the mistake of leaping the double-plasma Crisis squad out to blast the Vyper.
They do so with impressive overkill, but it’s only once they’ve Fired and Faded
back that Owen realises he now has no one on that objective to put the banner
back up. The Vyper’s legacy lives on!
Elsewhere, another squad of Kroot Hounds moves forward to
score some Engage points, and the Hammerheads screen a little to prevent my
Reserves coming in anywhere wild. The indirect fire contingent opens up on the
Windriders again, but thanks to Fortune they survive with seven models
remaining. Thank you Balance Dataslate!
Asuryani Turn 2, 40:48

In my turn, I’ve got a few more opportunities to do sneaky
things. First, the large Hawk unit moves up and evaporates the Kroot Hounds,
then returns to safety in the rightmost ruin. It’s simple work, but someone has
to do it. I also Warp Ritual, because points are good.

More excitingly, the other Hawks and Baharroth both leap over some containers to draw LoS into Owen’s right ruin. Combined with the small Avengers squad that pops up by the board edge, I’m able to wipe out all of the remaining Kroot Hounds and the Carnivores on this flank.

I do make one
dumb call, however, by opting to charge Baharroth into the Crisis team once
again. Because I’d positioned to shoot at them, they have LoS back to me, and
they promptly Overwatch for free and chip three wounds off me. Bah!
Finally, the large Windrider squad are able to draw some
narrow LoS on one of Owen’s Hammerheads. Those railguns stick out a long way! I
pop Bladestorm, but my failure to cast Guide or roll even one six to hit means the
vehicle survives on 8 wounds. Unperturbed, the Windriders use Matchless Agility
to return to the relative safety of their building.

Baharroth, annoyed by being shot up in Overwatch, then proceeds to roll all the sixes the Windriders didn’t to slaughter two Crisis Suits (before flapping back home to his building, of course).

Combined with the deaths of the Kroot on this flank, it leaves Owen feeling dangerously exposed.

T’au Turn 3, 51:48
To that end, he makes the somewhat risky call to move his
right-hand castle backwards one ruin, with just the damaged Hammerhead left
holding the right objective. This probably means I’ll take down his Banner next
turn, but it’s better than the Banshee/Shining Spear/Baharroth multi-charge
he’d likely get to enjoy otherwise. So the damaged Crisis squad and the characters
all flit backwards, where they combine with the Stormsurge to utterly
annihilate the small squad of Avengers I’d brought in last turn.

Thankfully, the net result of all that is that Owen’s indirect shooting into my Windriders is much reduced, with only the Stormsurge getting to chip away and deal a wound.

Owen puts his banner back up on the
left objective, but doesn’t have the expendable chaff remaining to push forward
for Engage. However, he has done an excellent job of screening out my reserves,
including using Designated Tasking to detach a couple of Drones from a
Hammerhead to screen out one board edge.
Asuryani Turn 3, 51:67
This is the last turn in which I can bring in my reserves,
and there flatly isn’t anywhere good to put them. The Banshees could go for a
long bomb assault into the Hammerhead, but even with a Fate Die I don’t trust
9” charges. The Avengers could pop up somewhere and shoot at… the damaged
Hammerhead, or maybe some Drones. Hmm.
In the end, I decide that I’m better off keeping assets
alive for the lategame than throwing them away for no gain. So the Avengers pop
up all the way back in my deployment zone, while the Banshees do the same in my
left-most building. Their time will come.
Thankfully, I do have some more exciting moves to make this turn. The two small Windrider squadrons zoom forward onto Owen’s two forward objectives, while the big one sticks its nose out to target Longstrike.

The
banner on Owen’s right objective comes down, as the three Windriders are enough
to control it. That’s true despite the damaged Hammerhead managing to survive
40 shots from my Hawks and 6 shuriken cannon shots from the Windriders!

I have more success into Longstrike, where my Windriders
apparently remember how to roll sixes (thanks to Guide) and use Bladestorm to
utterly eviscerate the tank ace. Then they Matchless Agility to pop back into
cover, of course.

Finally, on my right flank Owen’s banner is still flying
defiantly. I have 3 ObSec models on the point, thanks to Will of Asuryan going
off on the Windriders. But because of the Kroot, Owen now also has ObSec, and
outnumbers me to boot. So a Farseer uses Multifacted Mind to cast Executioner
after completing my Warp Ritual, killing 4 Kroot. Baharroth charges in and
kills 4 more (after blasting the two detached Drones first), then the
Windriders charge forward to finish off the last two! It’s a shockingly good
effort, and at the end of it I’m holding both of Owen’s forward objectives.
Baharroth disappears and the Windriders tag the Crisis Team to give themselves
a marginally better chance of survival next turn.

This turn put me thoroughly in the lead, and I have enough
materiel left to punish Owen if he tries to push back against me.
T’au Turn 4, 61:67

Owen starts his turn with a 4 on Primary and a 1 on Banners, which is pretty grim. He does put his right banner back up, holding the objective with the Crisis Team and the Drones he detached from the crippled Hammerhead. That Hammerhead manages to roll high on its advance roll to drift over the halfway mark, so at least Engage won’t be a bust this turn. The double-plasma Crisis team falls back from the Windriders and obliterates them in shooting, before using Strike and Fade to return to cover.

On the other
flank the Crisis Commander effortlessly evaporates the Windriders holding that
objective, while the airburst Crisis pummel my Banshees and kill 3. I then fail
the resulting Morale check on a 6, leaving just the Exarch alone. Oh well, she’s
what I take that squad for anyway.

That’s all Owen can really do on his turn. He just doesn’t
have enough units left to push, and anything that gets exposed will die on my
turn. Time to tighten the screws even further.
Asuryani Turn 4, 61:80
I do this by sending yet another wave of expendable chaff onto each of Owen’s objectives. The Shining Spears surge forward on my left flank, gunning down the nearby Drones before using a Fate Die to easily make a charge onto the airburst Crisis, even through Repulsor Impact Field.


They do
substantial damage, but the 5+++ litany from the nearby Ethereal sees a lone
Suit survive on 2 wounds. On the other flank, Baharroth goes after the double-plasma
Crisis team. I make the mistake of swinging with the Spears first, giving Owen
the chance to interrupt and potentially kill my TtL character. Thankfully
Lightning-Fast Reactions is on hand to make the T’au hit on sixes, and I save
the two wounds they get through on Fate Dice. Baharroth then kills the Iridium
suit and several Marker Drones, before Skyleaping once again.
His fellow Hawks are less exciting, with the small squad chipping some wounds onto a Hammerhead and the big one finishing off the damaged tank in my half.

Finally, a squad of Dire Avengers uses a Fate Die on an advance to sprint onto Owen’s left objective, meaning Owen will once again be starting his turn on a 4 and with one Banner.

T’au Turn 5, 68:80

That last turn was probably the death knell for the T’au, but Owen keeps fighting. His plasma Crisis leap forward and unleash hell on the Dire Avengers, reducing them to a lone model who wisely flees the field.
Firepower from the Stormsurge and Crisis Commander sees the Shining Spears
evaporate, as Owen Raises his Banner once more and tries desperately to prevent
me taking it down.

Edit: I’ve subsequently realised in writing up this report
that Banners doesn’t let you start the action when an enemy model is on the
objective, so Owen would have been unable to Raise his Banners after they’d
been taken down on this or previous turns. Thankfully, I don’t think he scored
a point for Banners on either of his forward objectives after Turn 2, so it
didn’t affect the game, but it’s a little unfortunate to know that that
Secondary pick was actually even worse than we thought.
That aside, the lone Crisis Suit falls back into Owen’s
backfield to try and hide as best as he can, and the Stormsurge lines up a lone
Vyper. It had stuck its head out to help bring down the damaged Hammerhead last
turn, and a pair of Destroyer Missiles promptly reminds it why that was a bad
idea.

Asuryani Turn 5, 58:95

The T’au guns are done firing, and now it’s go time for
everyone. My whole army surges forward out of cover, with everything from
Guardians to Windriders to the Farseers zooming into the open. My goal is to
score a 12 on Primary, take down the last Banner (or last two Banners, as we
were playing it) and wipe the TtL Crisis Suits.


That last goal starts well, with the Kurnous’ Bow/Incomparable Hunter Farseer effortlessly gunning down the last airburst Crisis.
A hail of psychically-boosted shuriken from the Windriders sees the
other squad reduced to a lone Suit, and Baharroth charges in to finish it off
in combat. I can only chip a couple of wounds onto the Stormsurge, but that was
probably never going to happen.

That gives me control of Owen’s left objective, and the
Sunstorm Farseer easily takes down the Banner on the back objective as well. The
only challenge is Owen’s right, where the Crisis Commander is ready to
heroically intervene into my Hawks as they attempt to take the objective from
under him. I pour firepower in, but the Plate of Bagel Hunting does its job and
he survives on three wounds. It’s up to the Banshee Exarch, who makes her
charge, forgets to use Cronescream and promptly butchers the Commander anyway
with 10 D2 attacks. She’s wild.
With that, the Asuryani are solidly in control of the field
and the surviving T’au retreat. They have been defeated 95:58, but someday they
will return.

Post-Game Analysis
This game was extremely cagey and technical, and I felt like
the tension was constantly high. The scoreline was relatively solid, but it
seemed like one mistake would be enough for it all to fall away.
Thankfully, the combination of this army’s raw power and the
nerfs to indirect fire in the last Dataslate made it a very winnable game. Ultimately,
the capacity of my Swooping Hawks, Windriders and Baharroth to keep chipping
away at the enemy without exposing themselves was critical. They were able to
take out a lot of Owen’s chaff, while squad after squad of
jetbikes/Vypers/Avengers flung themselves heroically forward to die on Owen’s
points. Without the mobility to threaten me in return, or the ObSec to stop me
flipping his objectives, it was a death by a thousand cuts for Owen’s points
tally.

What could he have done differently? We talked it out after
the game, and honestly, it’s hard to say. He probably had to play more
aggressively early on, to try and do some critical damage and stop me
overwhelming his scoring in the lategame. But there weren’t that many great
angles for doing so, and his best offensive tools in the matchup (the Crisis
and the Stormsurge) were also those he needed to keep safe. Probably the
Hammerheads needed to be making pushes, but I’m not really sure those have the
damage output to do much to an army like mine, which lacks any critical big
targets. They’d probably have just died sooner to massed shuriken, and left Owen
with even less screening tools.
If I could have started doing this from Turn 1, it would have been pretty painful for those T'au
One change that we agreed definitely would have made a
difference would have been to take Decisive Action instead of Engage on All
Fronts. We didn’t realise this till after the game, but Decisive Action is
worded as ‘control half or more of the objectives’, making it far more
achievable on a six-objective game. Owen would have scored it fairly easily on
all three turns, making it a safe 12 points I’d have struggled to do much
about. That’s much better than the 6 he got on Engage, which also required him
to throw away potential screening units for it. Otherwise, none of Owen’s
Secondaries really went well, but it’s hard to see what else he could have
picked. Killing Secondaries were a recipe for disaster, and something like RND
would have likely ended up on a 4.
The T’au list probably needs a few more infantry in this
matchup, and definitely an Enforcer Commander. My ObSec edge was massive in
this game, and Owen just didn’t have the model-count to screen me out of his
buildings. Swapping two Hammerheads for another squad of Kroot and an Enforcer
would make it way harder for lists like mine to play the objective game and
whittle away its Primary scoring without needing to commit. It’d weaken the
Tyranids matchup though, which is a pretty big deal. Hopefully having only two
Hammerheads and a Stormsurge would be enough there.

As far as my list and strategy, I’m not sure I’d change
much. Every unit is performing an important role, and I don’t think there’s
anything I’d trade away. This is a game where I would have preferred character
Warlocks instead of pairs, but most lists don’t have as much indirect fire as
this T’au one. And character Warlocks are just asking for Perils, after all. I’m
loving the tweaks I’ve made from Nanavati’s version: it’s a shame to lose the
extra shuriken cannons he fitted in, but the Hawks and Spears have been
consistently excellent. The Hawks give me that extra bit of uninteractive
firepower, while the Spears are an excellent trade unit that remains a massive
threat until the last model is dead.
This list is incredibly strong, and I really feel like I’m not even close to figuring out all its tricks. Sorry Ulthwé, but Hail of Doom is just too good. Now I just need to come up with an actual name for my Craftworld…
I hope you enjoyed this somewhat cagey battle report, I really
got a lot out of the tactical aspect of it. Less of an out-and-out brawl than Chaos
Knights v Tyranids, that’s for sure! What Asuryani lists have you been enjoying
recently? And how have the T’au players in your meta adapted to the Dataslate? Are there any cool Craftworlds I should look into to represent my Custom Craftworld? As ever, I’d love to hear from you.
Until next time, may you always win the chaff-war!
Comments
Post a Comment